
Getting Started HP Notebook - Windows Vista and Windows 7
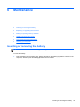

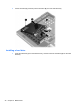
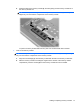
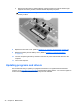

2. Pull the hard drive tab (3) to the right until the hard drive is seated. Tighten the 3 screws (4) to
secure the hard drive.
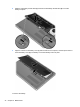
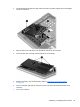
3. Align the tabs on the hard drive cover (1) with the notches on the computer.
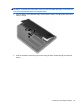
4. Close the hard drive cover (2), and then tighten the 3 screws (3).
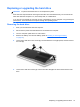
5. Replace the battery cover and the battery. (Refer to Inserting or removing the battery
on page 33.)
6. Turn the computer right-side up, and then reconnect AC power and external devices to the
computer.
7. Turn on the computer.
Replacing or upgrading the hard drive 39