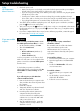
PHOTOSMART PREMIUM FAX e-ALL-IN-ONE C410 series Start setup here... 3 4 6 8 8 9 10 Verify box contents English 1 Inside... Setup troubleshooting Get to know your HP Photosmart Features and tips Get more info Specs Networked printer setup and use Fixing connectivity issues * * * * Not included with all models 2 Unpack printer. Remove all tape, protective film, and packing material. Remove the cardboard that secures the two-sided printing accessory (if present) Install the document feeder tray 1.
3 Install faceplate, if included English Install the faceplate If you need to install a faceplate on the control panel: 1. Remove the existing faceplate by pulling up on the right edge. 2. Position the new faceplate over the buttons on the control panel. 3. Press down firmly on all edges of the faceplate until it snaps into place. 4 Connect and power on Do not connect the USB cable unless prompted by the software! (Windows® only) Connect the power cord and adapter.
Setup troubleshooting If you are unable to print... 1. Check the power cord. •• Make sure the power cord is firmly connected to both the printer and the power adaptor. A light on the power supply will be on if the power cord is working. •• If you are using a power strip, check that the power strip is turned on. Or, plug the printer directly into a power outlet. •• Test the power outlet to make sure that is working. Plug in another appliance that you know works, and see if it has power.
Get to know your HP Photosmart OK 1 2 abc 3 def 4 ghi 5 jkl 6 mno 7 pqrs 8 tuv 9 wxyz * 0 # English Wireless button and light: Opens the Network menu where you can access the Wireless Setup Wizard and Wi-Fi Protected Setup. The wireless light indicates the status of the connection: •• Off: The wireless radio is off. •• On (not flashing): The wireless radio is on and the printer is connected to a network.
Start Fax: Sends or receives a black-and-white or color fax. Cancel: Stops the current operation. Start Copy: Starts a black-and-white or color copy. Help: Provides help about the current display. Start Scan: Opens the Scan Menu where you can select a destination for your scan. Setup: Opens the Setup menu where you can change product settings and perform maintenance functions. Print Photos: Prints the photos selected on your memory card.
Features and tips Print documents and photos Print English •• Use the Print menu on the printer display to print documents and photos from software applications on a connected computer. •• Print photos directly from a memory card in various sizes and papers. •• Use the Photo menu on the printer display to browse photos, apply automatic fixes, and make selections. •• Print on both sides of the page (two-sided printing). •• Photo Black cartridges and Photo cartridges are interchangeable.
Features and tips ePrint Note: A USB connection by itself won’t enable ePrint. To use ePrint, the printer must be connected to the Internet through a router, either wirelessly or via an Ethernet cable. This type of connection is different than a USB connection between the printer and a computer. HP’s free ePrint service provides an easy way to print from email, anywhere and anytime.
Get more info Find more information Get more info English Additional product information can be found in the onscreen Help and Readme file that are installed with the HP Photosmart software. •• Onscreen Help includes instructions on product features and troubleshooting. It also provides product specifications, legal notices, environmental, regulatory, and support information, plus links to more information online on the web.
Networked printer setup and use Changing the type of computer connection Changing your connection from USB to wireless Windows Mac To change from USB to wireless connection: 1. Click Start, click All Programs, click HP, click Photosmart Prem C410 series, then click USB to Wireless. Keep your USB cable connected until prompted to disconnect it. 2. Follow the instructions on the displayed screens. •• Click Next to move from one screen to the next.
Fixing connectivity issues Run a Wireless Network Test to check diagnostic and configuration information. To do this: 1. On the HP Photosmart front panel, press the Wireless button to display the Wireless menu on the printer display. 2. Select Run Wireless Network Test on the display. 3. The Wireless Network Test Report is automatically printed. English You may have picked the wrong network or typed in your network name (SSID) incorrectly •• Check these settings to ensure that they are correct.
HP product Duration of limited warranty Software Media 90 days Printer 1 year Print or Ink cartridges Until the HP ink is depleted or the “end of warranty” date printed on the cartridge has been reached, whichever occurs first. This warranty does not cover HP ink products that have been refilled, remanufactured, refurbished, misused, or tampered with. Printheads (only applies to products with customer replaceable printheads) 1 year Accessories 1 year unless otherwise stated A.
English 12
PHOTOSMART PREMIUM FAX e-ALL-IN-ONE série C410 Commencez la configuration ici... 15 16 18 20 20 21 22 Vérifiez le contenu de l’emballage * * * * Sur certains modèles uniquement 2 Déballez l’imprimante. Retirez tous les adhésifs, films protecteurs et matériaux d’emballage. Ôtez le carton qui protège l’accessoire d’impression recto verso (s’il y en a un). Installez le bac d’alimentation de documents. 1. Retirez la butée en carton par le haut de l’imprimante. 2.
3 Installez le cache, s’il est inclus Installez le cache. Si vous devez installer un cache sur le panneau de commande : 1. Retirez le cache existant en soulevant le bord droit. 2. Positionnez le nouveau cache sur les boutons du panneau de commande. 3. Appuyez fortement sur tous les bords du cache jusqu’à ce qu’il soit en place. 4 Effectuez la connexion et la mise sous tension Français Ne connectez pas le câble USB tant que vous n’y êtes pas invité par le logiciel d’installation.
Dépannage concernant l’installation Si vous ne parvenez pas à imprimer... 1. Vérifiez le cordon d’alimentation. •• Assurez-vous que le cordon d’alimentation est correctement branché à l’imprimante et à l’adaptateur d’alimentation. La présence d’un voyant allumé sur le bloc d’alimentation indique que le cordon d’alimentation est opérationnel. •• Si vous utilisez une prise multiple, assurez-vous que l’interrupteur dont elle est équipée est en position de marche.
Apprenez à connaître votre appareil HP Photosmart OK Écran graphique couleur (également appelé écran) : affiche les menus, les photos et les messages. Vous pouvez rehausser l’écran et l’orienter pour optimiser l’affichage. 1 2 abc 3 def 4 ghi 5 jkl 6 mno 7 pqrs 8 tuv 9 wxyz * 0 # Français Bouton et voyant sans fil : ouvre le menu Réseau, à partir duquel vous pouvez accéder à l’assistant de configuration sans fil et à la configuration WPS (Wi-Fi Protected Setup).
Démarrer la télécopie : permet d’envoyer ou recevoir une télécopie couleur ou en noir et blanc. Annuler : interrompt l’opération en cours. Démarrer la copie : permet de démarrer une copie couleur ou en noir et blanc. Aide : fournit l’aide relative à l’écran en cours. Numériser : ouvre le menu Numériser, dans lequel vous pouvez sélectionner une destination pour votre numérisation.
Fonctionnalités et conseils Impression de documents et de photos Imprimer Français •• Utilisez le menu Imprimer sur l’écran de l’imprimante pour imprimer des documents et des photos à partir d’applications logicielles sur un ordinateur connecté. •• Imprimez des photos directement à partir d’une carte mémoire sous différents formats et sur différents papiers. •• Utilisez le menu Photo sur l’écran de l’imprimante pour parcourir les photos, appliquer automatiquement des corrections et effectuer des choix.
Fonctionnalités et conseils Imprimez depuis n’importe où ePrint Remarque : Une connexion USB n’active pas ePrint. Pour utiliser ePrint, l’imprimante doit être connectée à Internet via un routeur, soit sans fil, soit par un câble Ethernet. Ce type de connexion est différent d’une connexion USB entre l’imprimante et un ordinateur. Le service gratuit ePrint de HP simplifie l’impression depuis la messagerie électronique, partout et à tout moment.
Obtenir des informations complémentaires Sources d’informations supplémentaires Obtenir des informations complémentaires Vous trouverez des informations complémentaires sur le produit dans l’aide en ligne affichée à l’écran, ainsi que dans le fichier Lisez-moi, qui sont installés avec le logiciel HP Photosmart. •• L’aide en ligne contient des instructions relatives aux fonctionnalités et au dépannage du produit.
Configuration et utilisation d’une imprimante en réseau Changement du type de connexion à l’ordinateur De la connexion USB à la connexion sans fil Windows Mac Pour passer d’une connexion USB à une connexion sans fil : 1. Cliquez sur Démarrer, sur Tous les programmes, puis sur HP, choisissez Photosmart Prem série C410, puis USB à sans fil. Le câble USB doit rester connecté jusqu’à ce que vous soyez invité à le déconnecter. 2. Suivez les instructions des écrans qui s’affichent.
Résolution des problèmes de connectivité Effectuez un Test réseau sans fil pour vérifier les informations portant sur le diagnostic et la configuration. Pour ce faire : 1. Sur le panneau avant de l’imprimante HP Photosmart, appuyez sur le bouton Sans fil pour afficher le menu Sans fil sur l’écran de l’imprimante. 2. Sélectionnez Exécutez test réseau sans fil sur l’écran. 3. Le rapport de Test réseau sans fil s’imprime automatiquement.
Déclaration de garantie limitée de l’imprimante HP Produit HP Supports logiciels Imprimante Cartouches d'encre Durée de la garantie limitée 90 jours 1 an Jusqu'à épuisement de l'encre HP ou jusqu'à expiration de la date de garantie imprimée sur la cartouche (selon le cas qui se produira en premier). Cette garantie ne couvre pas les produits utilisant de l'encre HP qui ont été reconditionnés, mal utilisés ou altérés. 1 an A. Extension de garantie limitée 1.
Français 24