
HP CM8060/CM8050 Color MFP with Edgeline Technology - System Administrator Guide


Advanced e-mail setup
You can begin using the e-mail feature after you have performed the initial e-mail setup. However, you
can maximize control of this feature by using the embedded Web server to perform advanced setup.
1. Open the embedded Web server. See
Open the embedded Web server on page 40.
2. Select the Digital Sending tab.
3. Select E-mail Setup from the menu on the left side of the screen.
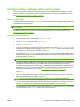
4. To enable the E-mail feature on the device control panel, select Enable Send to E-mail. If this box
is not selected, the feature is unavailable.
5. In the area for SMTP Gateways Settings, select which SMTP servers to use for sending e-mail
attachments.
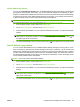
The device attempts to use the servers in the order in which they are listed. To prioritize the order
in which the device uses the servers, select a server and then click either Move Up or Move
Down to move the server to a higher or lower priority.
You can add a server to the list if the one you want to use is not listed. You can also edit the settings
for an SMTP server, and you can delete servers from the list. See
Add or edit SMTP servers
on page 42.
Click Test Server to verify that the selected SMTP server is functioning correctly.
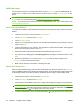
6. In the area for Default Message Settings, provide the information. The Default E-mail
Address is required, but the other settings are optional. The following table provides information
about those settings.
Table 4-3 Default Message Settings
Feature Description
Address Field Control If you want the Default E-mail Address and Default Display Name to be used for all e-mails
sent from this device (unless a user is signed in), select Restrict users from changing the
'From:' address fields.
If you want users to be able to send e-mails to their own e-mail address only, select Restrict
users from editing all address fields.
Default E-mail Address and
Default Display Name
Provide an e-mail address and name to use for the “From” address for the e-mail message.
TIP: Create an e-mail account for the device and use this address for the default e-mail
address.
TIP: Configure the E-mail feature so users must sign in before using it. This prevents users
from sending an e-mail from an address that is not their own. See
Control access to the device
on page 63.
If a user is signed in to the device, that user's e-mail address appears in the “From” field instead
of the default e-mail address.
Default Subject Provide a default subject line for the e-mail messages.
Default Message Create a custom message. If you want this message to be used for all e-mail sent from this
device, select Restrict users at the device from editing the 'Message:' field.
ENWW Configure device settings remotely 41