Appendix B B Control panel menus Control panel menus Overview The control panel menu layout represents an attempt to show the menus used by all end users while protecting the menus used by administrators. End users will typically use the first three menus of the list. Administrators and service technicians will use the other items, which can be protected by a personal identification number (PIN).
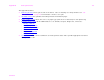
Appendix B Control panel menus This appendix includes: z Retrieve job menu shows jobs stored on the device. Jobs are listed by user and job name. See “Job retention features” on page 59 for information of how to store jobs. z Information menu lists printable menu map and other information pages. z Paper handling menu allows the user to set paper type (and size if not detected) for each printer tray. z Configure device menu allows administrators to set defaults, I/O ports, diagnostics, and resets.
Appendix B Control panel menus 174 Retrieve job menu Note If there are no private, stored, quick copy, or proof-and-hold jobs on the printer hard disk or RAM memory, the message NO STORED JOB is displayed when the menu is selected. 1 The user is presented a list of user names. 2 The user selects a user name, and is then shown a list of jobs stored for that user. 3 The user selects a job name, and can print or delete. If a job requires a PIN to print, the PRINT command and a PIN must be provided.
Appendix B Control panel menus 175 Information menu To print an information page, scroll to the desired page and press . . Item Explanation PRINT MENU MAP Generates a menu map that shows layout and current settings of the control menu items. The printer will back up one screen to SET FRONT TO BACK when the page is completed. PRINT CONFIGURATION Generates a page detailing the current configuration of the printer. The printer will return to the online READY state when the page is completed.
Appendix B Control panel menus 176 Paper handling menu When paper handling settings are correctly configured through the control panel, you can print by choosing the type and size of paper from the printer driver or software application. For more information, see “Printing by type and size of paper” on page 57. Some items in this menu (such as duplex and manual feed) are accessible from a software application, or from the printer driver (if the appropriate driver is installed).
Appendix B Control panel menus 177 Item Values Explanation FUSER MODES AUTO NORMAL LOW HIGH1 HIGH2 SPECIAL Configure the fuser mode associated with each paper type. The fuser mode can only be changed from this menu option in the control panel. AUTO: Utilizes the optimum mode for that media type. NORMAL: Normal temperature, prints at 50 pages per minute (ppm). LOW: Low temperature, prints at 50 ppm. HIGH1: Raises the temperature, prints at 50 ppm. HIGH2: Raises the temperature, prints at 32 ppm.
Appendix B Control panel menus 178 Configure device menu This menu contains all administrative functions. Printing submenu Some items in this menu are available from a software application, or from the printer driver (if the appropriate driver is installed). Printer driver and program settings override control panel settings. For more information, see “Using features in the printer driver” on page 51.
Appendix B Control panel menus 179 Item Values Explanation DEFAULT CUSTOM PAPER SIZE UNIT OF MEASURE X DIMENSION Y DIMENSION Allows the user to set a custom paper size for any of the installed trays. Substitute the tray number for . This menu only appears when the selected tray custom switch is in the custom size position. The user selects the X and Y dimensions of the custom paper size using the ruler labels in the trays.
Appendix B Control panel menus 180 Item Values Explanation MANUAL FEED=OFF OFF ON Feed the paper manually from optional Tray 1, rather than automatically from a tray. When MANUAL FEED=ON and optional Tray 1 is empty, the printer goes offline when it receives a print job. It then displays MANUALLY FEED [PAPER SIZE]. For more information, see “Manually feeding paper from optional Tray 1” on page 56. EDGE TO EDGE OVERRIDE=OFF OFF ON Turns the edge-to-edge mode on or off for all print jobs.
Appendix B Control panel menus 181 Item Values Explanation FORM LENGTH 60 Sets vertical spacing from 5 to 128 lines for default paper size. Enter the value using the numeric keypad. ORIENTATION PORTRAIT Allows the user to select default page orientation. Note It is best to set the page orientation from the printer driver or software application. (Driver and software settings override control panel settings.) FONT SOURCE INTERNAL INTERNAL: Internal fonts. SOFT: Permanent soft fonts.
Appendix B Control panel menus 182 Item Values Explanation APPEND CR TO LF=NO YES NO Select YES to append a carriage return to each line feed encountered in backward-compatible PCL jobs (pure text, no job control). Some environments, such as UNIX, indicate a new line using only the line feed control code. This option allows the user to append the required carriage return to each line feed.
Appendix B Control panel menus 183 Item Values Explanation STAPLES=NONE Values vary depending on the output device attached If stapling is requested, indicates where the staple is placed and how many staples are placed. If a stacker is attached to the printer, stapling is not an option.
Appendix B Control panel menus 184 Print quality submenu Some items in this menu are accessible from a software application, or from the printer driver (if the appropriate driver is installed). Printer driver and software application settings override control panel settings. For more information, see “Using features in the printer driver” on page 51. Item Values Shift the margin alignment to center the image on the page from top to bottom, and left to right.
Appendix B Control panel menus 185 Item Values Explanation ECONOMODE=OFF OFF ON Turn EconoMode on (to save toner) or off (for high quality). EconoMode is designed to give print output at a very low cost. EconoMode will work only with genuine HP print cartridges. Note It is best to turn EconoMode on or off from the control panel (Control panel settings override driver and software settings). TONER DENSITY=3 1 to 5 Lighten or darken the print on the page by changing the toner density setting.
Appendix B Control panel menus 186 System setup submenu Items in this menu affect the printer function. Configure the printer according to your printing needs. Item Values Explanation JOB STORAGE LIMIT=32 1 to 100 Specifies the number of jobs that can be stored on the printer hard disk accessory. JOB HELD TIMEOUT= OFF OFF 1 HOUR 4 HOURS 1 DAY 1 WEEK Sets the amount of time that quick copy, proof and hold, private, and stored jobs are kept before being automatically deleted from the queue.
Appendix B Control panel menus 187 Item Values Explanation CLEARABLE WARNINGS= JOB ON JOB Set the amount of time that a clearable warning is displayed on the printer control panel. ON: Warning messages display on the control panel until is pressed. JOB: Warning messages display on the control panel until the end of the job from which they were generated. AUTO CONTINUE=ON ON OFF Determine how the printer reacts to errors.
Appendix B Control panel menus 188 Item Values Explanation JAM RECOVERY= AUTO AUTO ON OFF Determine how the printer functions when a jam occurs. AUTO: The printer automatically selects the best mode for printer jam recovery (usually ON). This is the default setting. ON: The printer automatically reprints pages after a paper jam is cleared. OFF: The printer does not reprint pages following a paper jam. Printing performance might be increased with this setting.
Appendix B Control panel menus 189 I/O submenu Items in the I/O (input/output) menu affect the communication between the printer and the computer. I/O timeout submenu Item Values Explanation I/O TIMEOUT=15 5 to 300 Select the I/O timeout period in seconds. (I/O timeout refers to the time, measured in seconds, that the printer waits before ending a print job.) This setting allows you to adjust timeout for best performance.
Appendix B Control panel menus EIO submenu The EIO (enhanced input/output) submenu appears only when an EIO device is installed in an EIO slot on the printer (such as an HP Jetdirect print server). The items in the menu depend on the particular accessory product installed. If the printer contains an HP Jetdirect print server EIO card, you can configure basic networking parameters using the EIO menu.
Appendix B Control panel menus 191 Item Options Values Explanation TCP/IP ENABLE ON OFF Selects whether the TCP/IP protocol is enabled (ON) or disabled (OFF). CONFIG METHOD BOOTP DHCP MANUAL Selects whether the TCP/IP configuration parameters are set automatically from a network server either using BootP (Bootstrap Protocol), DHCP (Dynamic Host Configuration Protocol), or manually from the EIO submenu. Provides access to parameters that can manually configured from the printer control panel.
Appendix B Control panel menus 192 Item Options Values Explanation IPX/SPX ENABLE ON OFF Selects whether the IPX/SPX protocol stack is enabled (ON) or disabled (OFF). FRAME TYPE AUTO EN_8023 EN_II EN_8022 EN_SNAP TR_8022 TR_SNAP Selects the frame type setting for your network SOURCE ROUTING AUTO OFF ALL ROUTES SINGLE ROUTE AUTO (default) automatically sets and limits the frame type to the first one detected.
Appendix B Control panel menus Item LINK SPEED Configure device menu Options 193 Values Explanation AUTO 10T HALF 10T FULL 100TX HALF 100TX FULL For an Ethernet network only, sets the network link speed and communication mode of the HP Jetdirect 10/100TX print server. The default setting is AUTO, where the printer automatically configures itself to match the network link speed (10 or 100 Mbps) and communication mode (half or full duplex).
Appendix B Control panel menus 194 Diagnostics submenu Administrators can use this submenu to isolate parts, and to troubleshoot jam and print quality issues. Item Values Explanation PRINT EVENT LOG Generates a localized LIFO (last in, first out) list of the 50 most recent entries in the error log. The printed event log shows error number, page count, error code, and description or personality.
Appendix B Control panel menus The items in the Resets submenu will clear all memory in the printer, while C ANCEL J OB clears only the current job. Item Explanation RESTORE FACTORY SETTINGS This item performs a simple reset and restores most of the factory (default) settings. This item also clears the input buffer for the active I/O. Resetting memory during a print job can result in data loss. This item does not affect network settings stored on the HP Jetdirect print server (if installed).
Appendix B Control panel menus Service menu The Service menu is locked and requires a PIN to enter. A service professional may use this, but a user should have no need for access. Item Explanation CLEAR EVENT LOG This item allows the service representative to clear the printer internal error log.