
HP Color LaserJet CP3505 Printer - Software Technical Reference


Use the Location: text field to type a description of the physical location of the printer. The field is large,
but is limited as to the number of characters that it can accommodate.
To change the physical location of the printer, click Browse…, navigate to the folder that you want, and
click OK to return to the Custom Installer Location dialog box.
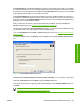
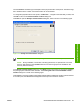
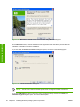
Click Next to open the Ready to Create Installer dialog box, which is shown in the following figure.
Figure 3-13 Ready to Create Installer dialog box
NOTE: The location for the installer package defaults to c:\<name of printer>.
NOTE: During installation, several files, including system files, are placed at the root of the
directory that appears in the Location field. Be sure that enough space is available on the
directory before continuing.
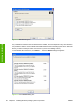
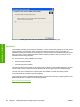
In the Ready to Create Installer dialog box, click Next to begin the process of copying and installing
the printing-system software folders and files. The Creating HP Color LaserJet CP3505 Custom
Installer dialog box is shown in the following figure.
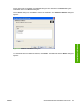
Click Cancel to close the Installer Customization Wizard without installing the printing-system software.
At a certain point, the Cancel button disappears and the process cannot be revoked.
ENWW General MS Windows installation instructions 87
Installation in Windows