
HP LaserJet P2010 Series - Software Technical Reference


3. If you are installing the printer using a USB or parallel connection, verify that the printer appears
on the printer list. The Kind column in the printer list should display HP LaserJet P2010 Series.
If this is the case, the setup is complete.
If the printer does not appear, or if the correct information does not appear in the Kind column,
see
Troubleshooting the printer setup on page 117.
If you are installing the printer using a network connection, continue with the following steps.
4. Click Add (or the + button in the Print & Fax utility) to open the Printer Browser screen.
5. Use Bonjour for the network connection. Carry out the following steps:
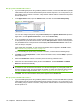
a. Click the Default Browser tab.
Figure 5-11 Default Browser tab
b. Select the HP LaserJet P2010 Series printer from the list. The software verifies that the printer
is connected to the network and the Print Using field is automatically populated with the
correct driver for the printer.
NOTE: If the HP LaserJet P2010 Series printer does not appear in the list, verify that the
printer is on and connected to the network, then try turning the printer off and then on again.
If the HP LaserJet P2010 Series driver does not appear in the Print Using pull-down list,
turn the computer off and then on again, then restart the setup process. For more
troubleshooting information, see
Troubleshooting the printer setup on page 117.
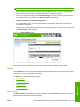
6. Click Add. The device name appears in the Printer List and the setup is complete.
Figure 5-12 Printer List screen
ENWW Macintosh install and uninstall instructions 115
Macintosh