
HP LaserJet P4010 and P4510 Series - Software Technical Reference
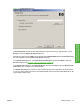
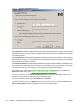
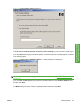
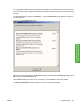
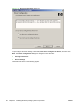
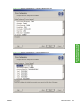
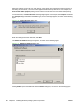
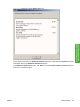
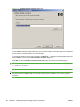

Figure 3-6 Printer Port dialog box
Click Network Path to make the text field available for a queue-name entry. Type the path, or click
Browse to open the Browse for Printer dialog box.
Navigate to a device and click OK to record the path in the Network Path field in the Printer Port dialog
box. Click Cancel to close the Browse for Printer dialog box.
In the Printer Port dialog box, click Local (direct connect) port, and then click Next to open the
Drivers dialog box (see
Figure 3-11 Drivers dialog box on page 82).
In the Printer Port dialog box, click New TCP/IP Port, and then click Next to open the Specify TCP/
IP Port dialog box, as shown in the following figure.
The Printer Port dialog box includes all custom network ports that are available on the local system.
To use any custom network port for the customized installer, the port must be created identically on the
system where it will be used.
ENWW Install Overview 79
Install Windows printing-
system components