
User Guide

Solution 2: Check the layout of the document
Solution: Make sure the layout of the document you are trying to print fits on a paper
size supported by the product.
To preview the print layout
1. Load the correct paper size into the input tray.
2. Preview your print job before sending it to the product.
In most software applications, click the File menu, and then click Print Preview.
3. Check the graphics in the document to make sure that the current size fits within
the printable area of the product.
4. Cancel the print job if the graphics do not fit in the printable area of the page.
TIP: Some software applications allow you to scale the document to fit the paper
size currently selected. Additionally, you can scale the size of a document from
the print Properties dialog box.
Cause: The size of the document you are printing is larger than the paper loaded
in the input tray.
If this did not solve the issue, try the next solution.
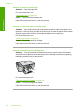
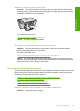
Solution 3: Remove and reload the paper in the input tray
Solution: If the paper is misfeeding, it could cause parts of the document to cut off.
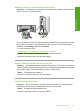
Remove the stack of paper from the input tray, and then reload the paper. Make sure
that you slide the paper-width guide inward until it stops at the edge of the paper.
For more information, see:
“
Load full-size paper” on page 24
Cause: The paper is loaded incorrectly.
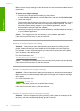
Solution 4: Try printing with borders
Solution: Try printing with borders by turning off the borderless option.
For more information, see:
“
Print a borderless image” on page 38
Cause: Borderless printing was enabled. By selecting the Borderless option, your
printed photo was enlarged and centered to fit the printable area of the page.
Depending on the relative sizes of the digital photo and the paper on which you are
printing, this could result in some parts of the image being cropped.
Chapter 12
126 Troubleshooting
Troubleshooting