
User Guide


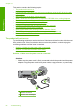

If you installed the software, uninstall it and then reinstall it, connecting the USB cable
only when prompted.
For more information on installing the software and connecting the USB cable, see
the Start Here guide that came with the product.
Cause: The USB cable was connected before the software was installed.
Connecting the USB cable before prompted can cause errors.
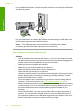
After setting up the product, it does not print
Solution:
• Look at the On button located on the product. If it is not lit, the product is turned
off. Make sure the power cord is firmly connected to the product and plugged into
a power outlet. Press the On button to turn on the product.
• Make sure the print cartridges are installed.
• Make sure you have paper loaded in the input tray.
• Make sure that the product does not have a paper jam.
• Check that the print carriage is not jammed.
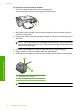
Open the front access door to access the print carriage area. Remove any objects
that are blocking the print carriage, including any packing materials. Turn the
product off and then turn it on again.
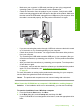
• Print a test page to see if the product can print and is communicating with the
computer. For more information, see “
Print a self-test report” on page 67.
• Make sure that the print queue is not paused. If it is, choose the appropriate setting
to resume printing. For more information about accessing the print queue, see
the documentation that came with the operating system installed on your
computer.
• Check the USB cable. If you are using an older cable, it might not be working
properly. Try connecting it to another product to see if the USB cable works. If
you experience problems, the USB cable might need to be replaced. Also verify
that the cable does not exceed 3 meters (9.8 feet) in length.
Chapter 12
86 Troubleshooting
Troubleshooting