HP Photosmart Premium Fax C309 series Basics Guide
Hewlett-Packard Company notices The information contained in this document is subject to change without notice. All rights reserved. Reproduction, adaptation, or translation of this material is prohibited without prior written permission of Hewlett-Packard, except as allowed under copyright laws. The only warranties for HP products and services are set forth in the express warranty statements accompanying such products and services. Nothing herein should be construed as constituting an additional warranty.
HP Photosmart Premium Fax C309 series English Basics Guide
English
1 Network setup Add the HP Photosmart to a network.........................................................................................2 Install the software for a network connection.............................................................................9 Connect to additional computers on a network..........................................................................9 Change the HP Photosmart from a USB connection to a network connection.........................
1 Network setup This section describes how to connect the HP Photosmart to a network and how to view and manage network settings. English If you want to: See this section: Connect to a wired (Ethernet) network. Wired (Ethernet) network Connect to a wireless network with a wireless router (infrastructure). Wireless with a router (infrastructure network) Connect directly to a wireless-capable computer without a wireless router (ad hoc).
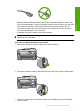
NOTE: The HP Photosmart supports networks with automatic speed negotiation capable of 10 or 100 Mbps. To connect the HP Photosmart to the network 1. Remove the yellow plug from the back of the HP Photosmart. 2. Connect the Ethernet cable to the Ethernet port on the back of the HP Photosmart. 3. Connect the other end of the Ethernet cable to an available port on your Ethernet router or switch.
Chapter 1 4. Once you have connected the HP Photosmart to the network, install the software. English Wireless with a router (infrastructure network) To connect the HP Photosmart to an integrated wireless WLAN 802.11 network, you will need the following: A wireless 802.11 network that includes a wireless router or access point. A desktop computer or laptop with either wireless networking support, or a network interface card (NIC).
5. Press the down arrow button to highlight the name of the network you wrote down in step 1, and then press OK. NOTE: You must enter the exact uppercase (capital) and lowercase (small) letters. Otherwise, the wireless connection will fail. c. When you are finished entering the new SSID, use the arrow buttons to highlight Done on the visual keyboard, and then press OK. d. Press the down arrow button until Infrastructure is highlighted, and then press OK. e.
Chapter 1 3. Connect to wireless network. Highlight Yes, set up printer on network using wireless settings on memory device and press OK. Press OK to print a network configuration page. 4. Install software. Wireless without a router (ad hoc connection) Use this section if you want to connect the HP Photosmart to a wireless-capable computer without using a wireless router or access point.
To create a network profile for a Windows XP computer 1. In the Control Panel, double-click Network Connections. 2. On the Network Connections window, right-click the Wireless Network Connection. If you see Enable on the pop-up menu, select it. Otherwise, if you see Disable on the menu, the wireless connection is already enabled. 3. Right-click the Wireless Network Connection icon, and then click Properties. 4. Click the Wireless Networks tab. 5.
Chapter 1 configuration program for your wireless LAN card, access your computer's list of programs. Using the LAN card configuration program, create a network profile that has the following values: To create a network profile for other operating sysytems • Network name (SSID): Mynetwork (example only) English NOTE: You should create a network name that is unique and easy for you to remember. Just remember that the network name is case-sensitive.
Install the software for a network connection NOTE: If your computer is configured to connect to a series of network drives, make sure that your computer is currently connected to these drives before installing the software. Otherwise, the HP Photosmart software installer might try to use one of the reserved drive letters and you will not be able to access that network drive on your computer.
Chapter 1 Change the HP Photosmart from a USB connection to a network connection If you first install the HP Photosmart with a USB connection, you can later change to either a wireless or Ethernet network connection. If you already understand how to connect to a network, you can use the general directions below. English NOTE: For optimal performance and security in your wireless network, use an access point (such as a wireless router) to connect the HP Photosmart.
1. In the firewall configuration utility, look for an option to trust computers on the local subnet (sometimes called the “scope” or “zone”). By trusting all computers on the local subnet, computers and devices in your home can communicate with each other while still being protected from the internet. This is the easiest approach to use. 2. If you do not have the option to trust computers on the local subnet, add incoming UDP port 427 to your firewall's list of allowed ports.
Chapter 1 Manage your network settings The HP Photosmart control panel enables you to perform a variety of network management tasks. This includes printing the network settings, restoring the network defaults, turning the wireless radio on and off, and printing a wireless network test. Print network settings English You can display a summary of the network settings on the HP Photosmart control panel, or you can print a more detailed configuration page.
Print the wireless network test 1. Press Setup. 2. Press the down arrow button until Network is highlighted, and then press OK. 3. Press the down arrow button until Wireless Network Test is highlighted, and then press OK. The Wireless Network Test prints. Manage your network settings 13 English The wireless network test performs a series of diagnostic tests to determine whether network setup is successful.
2 Fax setup After completing all the steps in the Setup Guide, use the instructions in this section to complete your fax setup. Please keep your Setup Guide for later use. In this section, you will learn how to set up the HP Photosmart so that faxing works successfully with equipment and services you might already have on the same phone line as the HP Photosmart.
www.hp.com/at/faxconfig Germany www.hp.com/de/faxconfig Switzerland (French) www.hp.com/ch/fr/faxconfig Switzerland (German) www.hp.com/ch/de/faxconfig United Kingdom www.hp.com/uk/faxconfig Spain www.hp.es/faxconfig The Netherlands www.hp.nl/faxconfig Belgium (French) www.hp.be/fr/faxconfig Belgium (Dutch) www.hp.be/nl/faxconfig Portugal www.hp.pt/faxconfig Sweden www.hp.se/faxconfig Finland www.hp.fi/faxconfig Denmark www.hp.dk/faxconfig Norway www.hp.no/faxconfig Ireland www.
Chapter 2 To set up the product with a separate fax line 1. Using the phone cord supplied in the box with the product, connect one end to your telephone wall jack, then connect the other end to the port labeled 1-LINE on the back of the product. NOTE: If you do not use the supplied cord to connect from the telephone wall jack to the product, you might not be able to fax successfully. This special phone cord is different from the phone cords you might already have in your home or office. English 2.
To set up the product with DSL 1. Obtain a DSL filter from your DSL provider. 2. Connect the DSL filter cord to the telephone wall jack. 3. Using the phone cord supplied in the box with the product, connect one end to the DSL filter in your telephone wall jack, then connect the other end to the port labeled 1-LINE on the back of the product.
Chapter 2 Case D: Fax with a distinctive ring service on the same line If you subscribe to a distinctive ring service (through your telephone company) that allows you to have multiple phone numbers on one phone line, each with a different ring pattern, set up the HP Photosmart as described in this section.
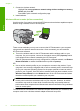
Case E: Shared voice/fax line If you receive both voice calls and fax calls at the same phone number, and you have no other office equipment (or voice mail) on this phone line, set up the HP Photosmart as described in this section. English Figure 2-4 Back view of the HP Photosmart 1 Telephone wall jack 2 Use the phone cord supplied in the box with the HP Photosmart to connect to the "1-LINE" port To set up the product with a shared voice/fax line 1.
Chapter 2 Case F: Shared voice/fax line with voice mail If you receive both voice calls and fax calls at the same phone number, and you also subscribe to a voice mail service through your telephone company, set up the HP Photosmart as described in this section. NOTE: You cannot receive faxes automatically if you have a voice mail service at the same phone number you use for fax calls. You must receive faxes manually; this means you must be available to respond in person to incoming fax calls.
Choose the recommended answer setting for your setup To set the answer mode ▲ Press Auto Answer to turn the light on or off, as appropriate for your setup. When the Auto Answer light is on, the HP Photosmart answers calls automatically. When the light is off, the HP Photosmart does not answer calls. Change the answer ring pattern for distinctive ringing Many phone companies offer a distinctive ringing feature that allows you to have several phone numbers on one phone line.
Chapter 2 To set a default fax header from the control panel 1. Press Setup. English 2. Press the down arrow button to highlight Basic Fax Setup and press OK. 3. Press the down arrow button to highlight Fax Header, and then press OK. The visual keyboard appears on the display. 4. Use the visual keyboard to enter your personal or company name. When you are finished, highlight Done on the visual keyboard, and then press OK. 5. Enter your fax number by using the numeric keypad, and then press OK.
3 HP Photosmart overview NOTE: This guide introduces basic operations and troubleshooting, as well as provides information for contacting HP support and ordering supplies. The Electronic Help details the full range of features and functions, including use of the HP Photosmart Software that came with the HP Photosmart.
Chapter 3 (continued) English Label Description 12 Photo light 13 Memory card slot for CompactFlash cards 14 Front USB/PictBridge port for your camera or other storage device 15 Lid backing 16 Lid 17 Glass 18 Cartridge door access handle 19 Paper-width guide for the main input tray 20 Main input tray (also referred to as the input tray) Figure 3-2 Top and rear views of the printer Label Description 21 Printhead assembly 22 Cartridge access area 23 Model number location 24 Rea
1 OK 2 abc 3 def 4 ghi 5 jkl 6 mno 7 pqrs 8 tuv 9 wxyz * 0 # English CD/DVD Label Name and Description 1 Color graphics display (also referred to as the display): Displays menus, photos, and messages. The display can be pulled up and angled for better viewing. 2 Back: Returns to the previous screen. 3 Menu: Presents a set of options related to the current display. 4 Attention light: Indicates a problem occurred. See the display for more information.
Chapter 3 (continued) English Label Name and Description 20 Start Fax: Sends or receives a black-and-white or color fax. 21 CD/DVD access door handle: Lowers the CD/DVD tray. 22 Start Copy: Starts a black-and-white or color copy. 23 Start Scan: Opens the Scan Menu where you can select a destination for your scan. 24 Print Photos: Prints the photos selected on your memory card. If no photos are currently selected, the product prints the photo currently showing on the display.
HP Web site If you have Internet access, you can get help and support from the HP Web site at www.hp.com/support. This Web site offers technical support, drivers, supplies, and ordering information. You can load different types and sizes of paper in the HP Photosmart, including letter or A4 paper, photo paper, transparencies, and envelopes. For more information, see the Electronic Help. To load full-size paper 1. Raise the output tray. TIP: Tap a stack of paper on a flat surface to align the edges.
Chapter 3 CAUTION: Make sure that the product is idle and silent when you load paper into the main input tray. If the product is servicing the ink cartridges or otherwise engaged in a task, the paper stop inside the product might not be in place. You could push the paper too far forward, causing the product to eject blank pages. TIP: If you are using letterhead, insert the top of the page first with the print side down. English 4.
3. Insert the stack of photo paper into the photo tray with the short edge forward and the print side down. Slide the stack of photo paper forward until it stops. If the photo paper you are using has perforated tabs, load the photo paper so that the tabs are closest to you. 4. Slide the paper-width guide inward until it stops at the edge of the paper. Do not overload the photo tray; make sure the stack of photo paper fits within the photo tray and is no higher than the top of the paper-width guide. 5.
Chapter 3 English Avoid paper jams To help avoid paper jams, follow these guidelines. • • • • • • • • Remove printed papers from the output tray frequently. Prevent curled or wrinkled photo paper by storing all unused photo paper flat in a resealable bag. Ensure that paper loaded in the input tray lays flat and the edges are not bent or torn. If you are printing labels, ensure that the label sheets are no more than two years old.
English 1 Memory Stick, Memory Stick Pro, Memory Stick Select, Memory Stick Magic Gate, Memory Stick Duo or Duo Pro (adapter optional), or Memory Stick Micro (adapter required) 2 MultiMedia Card (MMC), MMC Plus, Secure MultiMedia Card, MMC Mobile (RS-MMC; adapter required), Secure Digital (SD), Secure Digital Mini (adapter required), Secure Digital High Capacity (SDHC), TransFlash MicroSD Card (adapter required), or xD-Picture card 3 CompactFlash (CF) types I and II 4 Front USB port/Pictbridge: For d
Chapter 3 Scan an image You can start a scan from your computer or from the control panel of the HP Photosmart. This section explains how to scan from the control panel of the HP Photosmart only. NOTE: You can also use the software you installed with the HP Photosmart to scan images. Using this software, you can edit a scanned image and create special projects using a scanned image. English To scan to a computer 1.
TIP: You can also send a fax manually by dialing from a phone or by using the monitor dialing feature from the control panel. These features allow you to control the pace of your dialing. They are also useful when you want to use a calling card to charge the call and you need to respond to tone prompts while dialing. To send a basic fax from the control panel 1. Load your originals print side up into the document feeder tray.
Chapter 3 English The print carriage moves to the center of the product. NOTE: Wait until the print carriage stops moving before proceeding. 4. Press the tab on the front of the cartridge to release it, and then remove it from the slot. CAUTION: Do not lift the latch handle on the print carriage to remove the cartridges. 5. Remove the new cartridge from its packaging by pulling the orange pull-tab straight back to remove the plastic wrap from the cartridge.
English 6. Twist the orange cap to snap it off. 7. Using the colored shaped icons for help, slide the cartridge into the empty slot until it clicks into place and is seated firmly in the slot. CAUTION: Do not lift the latch handle on the print carriage to install the cartridges. Doing so can result in incorrectly seated cartridges and printing problems. The latch must remain down in order to correctly install the cartridges.
4 Troubleshooting and support English This chapter contains troubleshooting information for the HP Photosmart. Specific information is provided for installation and configuration issues, and some operational topics. For more troubleshooting information, see the Electronic Help that came with your software. Many issues are caused when the HP Photosmart is connected to the computer using a USB cable before the HP Photosmart software is installed on the computer.
To verify that the software is properly installed, double-click the HP Solution Center icon on the desktop. If the HP Solution Center shows the essential icons (Scan Picture and Scan Document), the software has been properly installed. Setup troubleshooting Use this section to solve any problems you might encounter while setting up the HP Photosmart hardware. Try the following solutions if there are no light indications, no noise, and no movement from the product when you turn it on.
Chapter 4 Solution 5: Contact HP support for service Solution: If you have completed all of the steps provided in the previous solutions and are still having a problem, contact HP support for service. Go to: www.hp.com/support. If prompted, choose your country/region, and then click Contact HP for technical support. Cause: You might need assistance to enable the product or software to function properly.
If this did not solve the issue, try the next solution. Solution 4: Check the connection between the product and computer Solution: Check the connection between the product and computer. Cause: The product and computer were not communicating with each other. If this did not solve the issue, try the next solution. Solution 5: Check that the ink cartridges are installed properly and have ink English Solution: Check that the ink cartridges are installed properly and have ink.
Chapter 4 Step 1: Make sure that the computer is connected to your network To check a wired (Ethernet) connection ▲ Where the Ethernet cable from the router connects to your computer, check to see if the indicator lights are on. Usually there are two indicator lights, one that is on and another that blinks. If you do not see any lights, try reconnecting the Ethernet cable to the computer and the router. If you still do not see lights, there might be a problem with the router or your computer.
Press the down arrow button until View Network Settings is highlighted, and then press OK. d. Press the down arrow button until Print Network Configuration Page is highlighted, and then press OK. This prints the Network Configuration Page. Network Status • • URL If the Network Status is Ready, the product is actively connected to a network. If the Network Status is Offline, the product is not connected to a network.
Chapter 4 English To check the printer status 1. Do one of the following, depending on your operating system: • Windows XP: Click Start, point to Printers and Faxes, and then select View/Details. • Windows Vista: Click Start, point to Control Panel, and then select Printers and Faxes. 2. Do one of the following, depending on the printer status: • If the product says Offline, right-click the product and select Use Printer Online.
• • • Solution 8: Make sure extension phones or other equipment on the phone line are not in use Solution 9: Make sure the product is connected to an analog phone line Solution 10: If you use a DSL service, make sure you have a DSL filter installed Solution 11: If you use a DSL service, make sure the DSL modem is properly grounded Solution 12: If you use a PBX or ISDN converter, make sure you are using a port designated for fax and phone use Solution 13: Check for and resolve any error messages Solution 14
Chapter 4 Solution 3: Make sure you are using the correct type of phone cord Solution NOTE: This possible solution applies only in the countries/regions that receive a 2-wire phone cord in the box with the product, including: Argentina, Australia, Brazil, Canada, Chile, China, Colombia, Greece, India, Indonesia, Ireland, Japan, Korea, Latin America, Malaysia, Mexico, Philippines, Poland, Portugal, Russia, Saudi Arabia, Singapore, Spain, Taiwan, Thailand, USA, Venezuela, and Vietnam.
Cause: The wrong phone cord was used to connect the product or the phone cord was plugged into the wrong port. If this did not solve the issue, try the next solution.
Chapter 4 Solution 6: Make sure the telephone wall jack works properly Solution: Try connecting a working telephone and phone cord to the telephone wall jack you are using for the product and check for a dial tone. If you do not hear a dial tone, call your local telephone company for service. Cause: The telephone wall jack was not working properly. If this did not solve the issue, try the next solution.
If this did not solve the issue, try the next solution. Solution: If you use a DSL service, make sure that you have a DSL filter connected or you will not be able to fax successfully. The DSL service sends out a digital signal on the phone line that can interfere with the product, preventing the product from sending and receiving faxes. The DSL filter removes the digital signal and allows the product to communicate properly with the phone line.
Chapter 4 If this did not solve the issue, try the next solution. Solution 13: Check for and resolve any error messages Solution: Check the display or your computer for an error message providing information about the problem and how to solve it. If there is an error, the product will not send or receive a fax until the error condition is resolved. You can also check the status of the product by clicking Status in the HP Solution Center. Cause: Another process caused an error in the product.
• • • Solution 2: Check the fax number Solution 3: Dial the fax number more slowly Solution 4: Check the receiving fax machine for problems Solution 1: Make sure the product is set up for faxing correctly Solution: Make sure you set up the product properly for faxing, based on the equipment and services you have on the same phone line as the product. For more information, see Set up the HP Photosmart for faxing.
Chapter 4 Cause: The product might have been dialing too fast or too soon. If this did not solve the issue, try the next solution. Solution 4: Check the receiving fax machine for problems Solution: Try calling the fax number from a telephone and listen for fax tones. If you cannot hear fax tones, the receiving fax might not be turned on or connected, or a voice mail service could be interfering with the recipient's phone line.
English 1 Telephone wall jack 2 Use the phone cord supplied in the box with the product 3 Telephone For more information on setting up the product with your telephone, see the printed documentation that came with the product. Cause: The telephone used to initiate the fax call was not connected directly to the product or was not connected properly. If this did not solve the issue, try the next solution.
Chapter 4 Fax speed setting Fax speed Fast (33600) v.34 (33600 baud) Medium (14400) v.17 (14400 baud) Slow (9600) v.29 (9600 baud) Cause: The Fax Speed setting might have been set too fast. Fax tones are recorded on my answering machine English Try the following solutions to resolve the issue. Solutions are listed in order, with the most likely solution first. If the first solution does not solve the problem, continue trying the remaining solutions until the issue is resolved.
English 1 Telephone wall jack 2 Connect to the IN port on the answering machine 3 Connect to the OUT port on the answering machine 4 Telephone (optional) 5 Answering machine 6 Use the phone cord supplied in the box with the product Make sure the product is set to receive faxes automatically and that the number of rings to wait setting is correct. The number of rings to wait for the product should be greater than the number of rings to answer for the answering machine.
Chapter 4 The product cannot receive faxes, but can send faxes English Try the following solutions to resolve the issue. Solutions are listed in order, with the most likely solution first. If the first solution does not solve the problem, continue trying the remaining solutions until the issue is resolved.
Solution 2: Check the Auto Answer setting Solution 3: Set the product to answer faxes manually Solution: Set the product to answer faxes manually. You cannot receive faxes automatically if you have a voice mail service at the same phone number you use for fax calls. You must receive faxes manually; this means you must be available to respond in person to incoming fax calls.
Chapter 4 Solution 6: If you have an answering machine on the same phone line as the product, make sure it is connected to the correct port Solution NOTE: This possible solution applies only in the countries/regions that receive a 2-wire phone cord in the box with the product, including: Argentina, Australia, Brazil, Canada, Chile, China, Colombia, Greece, India, Indonesia, Ireland, Japan, Korea, Latin America, Malaysia, Mexico, Philippines, Poland, Portugal, Russia, Saudi Arabia, Singapore, Spain, Taiwan,
Solution 7: If you use a distintive ring service, make sure the Distinctive Ring setting matches the ring pattern for your fax number Solution: If you have a special ring pattern for your fax phone number (using a distinctive ring service through your telephone company), make sure that the Distinctive Ring setting on the product is set to match. For example, if the phone company has assigned your number a double ring pattern, make sure Double Rings is selected as the Distinctive Ring setting.
Chapter 4 • The cartridge access door is closed. If not, remove all the originals you might have loaded in the HP Photosmart and close the cartridge access door, as shown below: English • The print carriage is not stalled or blocked. Turn off the product, remove any objects that are blocking the print cartridge carriage (including any packing materials), and then turn on the product again. Resolve any problems found. The product automatically begins printing all the unprinted faxes from memory.
NOTE: If the product has an alignment message, you might be able to press the button next to OK to clear the message and resume faxing. After you resolve any problems found, the product can begin answering incoming fax calls. Cause: An error condition was preventing the product from receiving faxes and Backup Fax Reception was set to Off. The fax test failed What to check • The product is set up properly, connected to a power supply, and is connected to your computer.
Chapter 4 The "Fax Connected to Active Telephone Wall Jack" test failed English Solution • Check the connection between the telephone wall jack and the product to make sure the phone cord is secure. • Make sure you use the phone cord that came with the product. If you do not use the supplied phone cord to connect from the telephone wall jack to the product, you might not be able to send or receive faxes. After you plug in the phone cord that came with the product, run the fax test again.
English 2. 3. 1 Telephone wall jack 2 Use the phone cord supplied in the box with the product After you have connected the phone cord to the port labeled 1-LINE, run the fax test again to make sure it passes and the product is ready for faxing. Try to send or receive a test fax. The "Using Correct Type of Phone Cord with Fax" test failed Solution • Make sure you used the phone cord supplied in the box with the product to connect to the telephone wall jack.
Chapter 4 The "Fax Line Condition" test failed English Solution • Make sure you connect the product to an analog phone line or you will not be able to send or receive faxes. To check if your phone line is digital, connect a regular analog phone to the line and listen for a dial tone. If you do not hear a normal sounding dial tone, it might be a phone line set up for digital phones. Connect the product to an analog phone line and try sending or receiving a fax.
English • • • • 1 Telephone wall jack 2 Use the phone cord supplied in the box with the product If you are using a phone splitter, this can cause faxing problems. (A splitter is a two-cord connector that plugs into a telephone wall jack.) Try removing the splitter and connecting the product directly to the telephone wall jack. If your telephone system is not using a standard dial tone, such as some PBX systems, this might cause the test to fail.
Chapter 4 CAUTION: Trying to clear a paper jam from the front of the HP Photosmart can damage the print mechanism. Always access and clear paper jams from the Two-sided printing accessory of the HP Photosmart. English 3. Gently pull the paper out of the rollers. CAUTION: If the paper tears when you are removing it from the rollers, check the rollers and wheels for torn pieces of paper that might be remaining inside the device.
• • • • • • Keep all ink cartridges in the original sealed packages until they are needed. Turn off the product by pressing the On button. Do not turn off the product by turning off a power strip or unplugging the power cord. If you improperly turn off the product, the printhead assembly might not return to the correct position. Store ink cartridges at room temperature (15.6°-26.6° C or 60°-78° F).
5 Technical information The technical specifications and international regulatory information for the HP Photosmart are provided in this section. For additional regulatory and environmental information, including the Declaration of Conformity statement, see the Electronic Help. System requirements English Software system requirements are located in the Readme file. Product specifications For product specifications, go to the HP Web site at www.hp.com/support.
English Warranty Warranty 67
HP Photosmart Premium Fax C309 series دﻟﻴﻞ اﻷﺳﺎﺳﻴﺎت ﻋﺮﺑﻲ
ﻋﺮﺑﻲ
١ إﻋﺪاد اﻟﺸﺒﻜﺔ إﺿﺎﻓﺔ HP Photosmartإﻟﻰ اﻟﺸﺒﻜﺔ٢....................................................................................................... ﺗﺜﺒﻴﺖ اﻟﺒﺮﻧﺎﻣﺞ ﻣﻦ أﺟﻞ اﻟﺘﻮﺻﻴﻞ ﺏﺎﻟﺸﺒﻜﺔ٨...................................................................................................... ﺗﻮﺻﻴﻞ أﺟﻬﺰة آﻤﺒﻴﻮﺗﺮ إﺿﺎﻓﻴﺔ ﻋﻠﻰ اﻟﺸﺒﻜﺔ٨................................................................................................... ﺗﻐﻴﻴﺮ ﺟﻬﺎز HP Photosmartﻣﻦ ﺗﻮﺻﻴﻞ USBإﻟﻰ ﺗﻮﺻﻴﻞ اﻟﺸﺒﻜﺔ٨.
١ إﻋﺪاد اﻟﺸﺒﻜﺔ یﺼﻒ هﺬا اﻟﻘﺴﻢ آﻴﻔﻴﺔ ﺗﻮﺻﻴﻞ HP Photosmartﺏﺎﻟﺸﺒﻜﺔ وآﻴﻔﻴﺔ ﻋﺮض إﻋﺪادات اﻟﺸﺒﻜﺔ وإدارﺗﻬﺎ. ﻋﺮﺑﻲ إذا رﻏﺒﺖ ﻓﻲ: راﺟﻊ هﺬا اﻟﻘﺴﻢ: اﻟﺘﻮﺻﻴﻞ ﺏﺸﺒﻜﺔ ) (Ethernetﺳﻠﻜﻴﺔ. ﺵﺒﻜﺔ ﺳﻠﻜﻴﺔ )(Ethernet اﻟﺘﻮﺻﻴﻞ ﺏﺸﺒﻜﺔ ﻻﺳﻠﻜﻴﺔ ﺏﺎﺳﺘﺨﺪام ﻣﻮﺟﻪ ﻻﺳﻠﻜﻲ )ﺏﻨﻴﺔ ﺗﺤﺘﻴﺔ(. ﻣﻮﺟﻪ )ﺵﺒﻜﺔ ﺏﻨﻴﺔ ﺗﺤﺘﻴﺔ( ﻻﺳﻠﻜﻴﺔ ﻣﻊ ّ اﻟﺘﻮﺻﻴﻞ ﻣﺒﺎﺵﺮ ًة ﺏﺠﻬﺎز آﻮﻣﺒﻴﻮﺗﺮ ذي إﻣﻜﺎﻧﻴﺔ ﺳﻠﻜﻴﺔ ﺏﺪون ﻣﻮﺟﻪ ﻻﺳﻠﻜﻲ ).(ad hoc ﻣﻮﺟﻪ )اﺗﺼﺎل (ad hoc ﻻﺳﻠﻜﻴﺔ دون ّ ﺗﺜﺒﻴﺖ ﺏﺮﻧﺎﻣﺞ HP Photosmartﻟﻼﺳﺘﺨﺪام ﻓﻲ ﺏﻴﺌﺔ ﺵﺒﻜﺔ.
اﻟﻔﺼﻞ ١ رﻏﻢ ﺗﺸﺎﺏﻪ آﺒﻼت Ethernetاﻟﻘﻴﺎﺳﻴﺔ ﻣﻊ آﺒﻼت اﻟﻬﺎﺗﻒ اﻟﻘﻴﺎﺳﻴﺔ إﻻ أﻧﻪ ﻻ یﻤﻜﻦ أن یﺤﻞ أﺡﺪهﻤﺎ ﻣﻜﺎن اﻵﺥﺮ .یﻮﺟﺪ أیﻀﺎ ﻣﻮﺻﻞ ﻋﺪد ﻣﺨﺘﻠﻒ ﻣﻦ اﻷﺳﻼك ﻓﻲ آﻞ واﺡﺪ ،وﻟﻜﻞ واﺡﺪ ﻣﻮﺻﻞ ﻣﺨﺘﻠﻒ .إن ﻣﻮﺻﻞ آﺒﻞ ) Ethernetیﺴﻤّﻰ ً َ (RJ-45أﻋﺮض وأﺳﻤﻚ وﺏﻪ داﺋﻤًﺎ 8 ،ﻧﻘﺎط ﺗﻼﻣﺲ ﻓﻲ ﻃﺮﻓﻪ .ﻣﻮﺻﻞ اﻟﻬﺎﺗﻒ ﻟﻪ ﻣﺎ ﺏﻴﻦ ﻧﻘﻄﺘﻲ ﺗﻼﻣﺲ إﻟﻰ 6ﻧﻘﺎط. آﻤﺒﻴﻮﺗﺮ ﺳﻄﺢ اﻟﻤﻜﺘﺐ أو آﻤﺒﻴﻮﺗﺮ ﻣﺤﻤﻮل ﻋﻠﻰ ﻧﻔﺲ اﻟﺸﺒﻜﺔ. ﻡﻼﺡﻈﺔ :یﺪﻋﻢ HP Photosmartﺵﺒﻜﺎت ذات ﺗﻔﺎوض ﺗﻠﻘﺎﺋﻲ ﻣﻦ ﻧﺎﺡﻴﺔ اﻟﺴﺮﻋﺔ ﺏﺴﻌﺔ 10أو 100ﻣﻴﻐﺎﺏﺎیﺖ ﻓﻲ اﻟﺜﺎﻧﻴﺔ.
ﻡﻮﺟﻪ )ﺵﺒﻜﺔ ﺑﻨﻴﺔ ﺕﺤﺘﻴﺔ( ﻻﺱﻠﻜﻴﺔ ﻡﻊ ّ ﻟﺘﻮﺻﻴﻞ HP Photosmartﺏﺸﺒﻜﺔ WLAN 802.11ﻻﺳﻠﻜﻴﺔ ﻣﻀﻤﻨﺔ ،ﺳﺘﺤﺘﺎج إﻟﻰ اﻟﺘﺎﻟﻲ: ﺵﺒﻜﺔ ﻻﺳﻠﻜﻴﺔ 802.11ﺗﺘﻀﻤﻦ ﻣﻮﺟﻪ ﻻﺳﻠﻜﻲ أو ﻧﻘﻄﺔ وﺻﻮل. آﻤﺒﻴﻮﺗﺮ ﻣﻜﺘﺒﻲ أو آﻤﺒﻴﻮﺗﺮ ﻣﺤﻤﻮل یﺪﻋﻢ اﻟﺸﺒﻜﺎت اﻟﻼﺳﻠﻜﻴﺔ أو ﺏﻄﺎﻗﺔ واﺟﻬﺔ اﺗﺼﺎل اﻟﺸﺒﻜﺔ ) .(NICیﺠﺐ ﺗﻮﺻﻴﻞ اﻟﻜﻤﺒﻴﻮﺗﺮ ﺏﺎﻟﺸﺒﻜﺔ اﻟﻼﺳﻠﻜﻴﺔ اﻟﺘﻲ ﺳﻴﺘﻢ ﺗﺜﺒﻴﺖ HP Photosmartﻋﻠﻴﻬﺎ. وﺻﻮل إﻧﺘﺮﻧﺖ ﻋﺮیﺾ اﻟﻨﻄﺎق )یﻮﺻﻰ ﺏﻪ( ﻣﺜﻞ آﺎﺏﻞ أو .
اﻟﻔﺼﻞ ١ .٦إذا ُﻃﻠﺐ ﻣﻨﻚ ذﻟﻚ ﻗﻢ ﺏﺈدﺥﺎل ﻣﻔﺘﺎح WPAأو WEPﺏﺎﻟﻄﺮیﻘﺔ اﻟﺘﺎﻟﻴﺔ: أ .اﺳﺘﺨﺪم أزرار اﻷﺳﻬﻢ ﻟﺘﻤﻴﻴﺰ ﺡﺮف أو رﻗﻢ ﻋﻠﻰ ﻟﻮﺡﺔ اﻟﻤﻔﺎﺗﻴﺢ اﻟﻤﺮﺋﻴﺔ ،ﺙﻢ اﺿﻐﻂ ﻋﻠﻰ OKﻟﺘﺤﺪیﺪﻩ. ﻡﻼﺡﻈﺔ :یﺠﺐ ﻋﻠﻴﻚ إدﺥﺎل اﻟﺤﺮوف اﻟﻜﺒﻴﺮة )اﻟﺤﺮوف اﻹﺳﺘﻬﻼﻟﻴﺔ( واﻟﺤﺮوف اﻟﺼﻐﻴﺮة ﺑﺎﻟﺘﺤﺪﻳﺪ .ﺏﺨﻼف ذﻟﻚ ،ﺳﻴﻔﺸﻞ اﻻﺗﺼﺎل اﻟﻼﺳﻠﻜﻲ. ﻋﺮﺑﻲ ب .ﻋﻨﺪ اﻻﻧﺘﻬﺎء ﻣﻦ إدﺥﺎل ﻣﻔﺘﺎح WPAأو ،WEPاﺳﺘﺨﺪم أزرار اﻷﺳﻬﻢ ﻟﺘﻤﻴﻴﺰ ﺕﻢ ﻋﻠﻰ ﻟﻮﺡﺔ اﻟﻤﻔﺎﺗﻴﺢ اﻟﻤﺮﺋﻴﺔ. ج .اﺿﻐﻂ ﻋﻠﻰ OKﻟﻠﺘﺄآﻴﺪ. ﺳﻴﺤﺎول اﻟﻤﻨﺘﺞ اﻟﺘﻮﺻﻴﻞ ﺏﺎﻟﺸﺒﻜﺔ .
ﻣﻜﻮﻧًﺎ ﺡﺎﻟﻴًﺎ ﻣﻊ وﺿﻊ ﺵﺒﻜﺔ ▲ اﺳﺘﺨﺪم وﺿﻊ ﺵﺒﻜﺔ ad hocﻓﻲ اﻟﻜﻤﺒﻴﻮﺗﺮ ﻹﻧﺸﺎء اﻟﺘﻮﺻﻴﻞ ﺏﺎﻟﻤﻨﺘﺞ .إذا ﻟﻢ یﻜﻦ اﻟﻜﻤﺒﻴﻮﺗﺮ ّ ,ad hocﻓﺮاﺟﻊ ﻣﻠﻒ اﻟﺘﻌﻠﻴﻤﺎت اﻟﺨﺎص ﺏﻨﻈﺎم اﻟﺘﺸﻐﻴﻞ ﻟﻠﻜﻤﺒﻴﻮﺗﺮ ﻟﺪیﻚ ﻟﻠﺤﺼﻮل ﻋﻠﻰ اﻟﻄﺮیﻘﺔ اﻟﺴﻠﻴﻤﺔ ﻹﻧﺸﺎء وﺿﻊ ad hocﻓﻲ اﻟﻜﻤﺒﻴﻮﺗﺮ .ﺏﻌﺪ إﻧﺸﺎء ﻣﻠﻒ ﺗﻌﺮیﻒ ,ad hocﻗﻢ ﺏﺘﺸﻐﻴﻞ ﻡﻌﺎﻟﺞ إﻋﺪاد اﻟﻼﺱﻠﻜﻴﺔ ﻣﻦ ﻗﺎﺋﻤﺔ ﺵﺒﻜﺔ ﻓﻲ HP Photosmartوﺡﺪد ﻣﻠﻒ ﺗﻌﺮیﻒ ad hocاﻟﺬي أﻧﺸﺄﺗﻪ ﻓﻲ اﻟﻜﻤﺒﻴﻮﺗﺮ.
اﻟﻔﺼﻞ ١ ح .ﻗﻢ ﺏﺘﺤﺪیﺪ ﻣﺮﺏﻊ اﻻﺥﺘﻴﺎر ﻟـThis is a computer-to-computer (ad hoc) network; wireless ) access points are not usedهﺬﻩ هﻲ ﺵﺒﻜﺔ آﻤﺒﻴﻮﺕﺮ -إﻟﻰ آﻤﺒﻴﻮﺕﺮ ) ,(ad hocﻟﻢ ﻳﺘﻢ اﺱﺘﺨﺪام ﻧﻘﺎط اﻟﻮﺻﻮل اﻟﻼﺱﻠﻜﻴﺔ(. ط .اﻧﻘﺮ ﻓﻮق ) OKﻡﻮاﻓﻖ( ﻣﻦ أﺟﻞ إﻏﻼق إﻃﺎر ) Wireless network propertiesﺧﺼﺎﺋﺺ اﻟﺸﺒﻜﺔ اﻟﻼﺱﻠﻜﻴﺔ( ،ﺙﻢ اﻧﻘﺮ ﻓﻮق ) OKﻡﻮاﻓﻖ( ﺙﺎﻧﻴ ًﺔ. ي .أﻧﻘﺮ ﻓﻮق ) OKﻡﻮاﻓﻖ( ﺙﺎﻧﻴ ًﺔ ﻣﻦ أﺟﻞ إﻏﻼق ﻧﺎﻓﺬة Wireless Network Properties ) Connectionاﺕﺼﺎل ﺧﺼﺎﺋﺺ اﻟﺸﺒﻜﺔ اﻟﻼﺱﻠﻜﻴﺔ(.
ﺕﺜﺒﻴﺖ اﻟﺒﺮﻧﺎﻡﺞ ﻡﻦ أﺟﻞ اﻟﺘﻮﺻﻴﻞ ﺑﺎﻟﺸﺒﻜﺔ ﻗﻢ ﺏﺎﺳﺘﺨﺪام هﺬا اﻟﻘﺴﻢ ﻟﺘﺜﺒﻴﺖ ﺏﺮﻧﺎﻣﺞ HP Photosmartﻋﻠﻰ آﻤﺒﻴﻮﺗﺮ ﻣﺘﺼﻞ ﺏﺸﻜﺒﺔ .ﻗﺒﻞ ﺗﺜﺒﻴﺖ اﻟﺒﺮﻧﺎﻣﺞ ,ﺗﺄآﺪ ﻣﻦ ﺗﻮﺻﻴﻞ ﺟﻬﺎز HP Photosmartﺏﺎﻟﺸﺒﻜﺔ. ﻡﻼﺡﻈﺔ :إذا ﺗﻢ ﺗﻜﻮیﻦ اﻟﻜﻤﺒﻴﻮﺗﺮ ﻟﻠﺘﻮﺻﻴﻞ ﺏﺴﻠﺴﻠﺔ ﻣﻦ ﻣﺸﻐﻼت اﻟﺸﺒﻜﺔ ،ﺗﺄآﺪ ﻣﻦ ﺗﻮﺻﻴﻞ اﻟﻜﻤﺒﻴﻮﺗﺮ ﺡﺎﻟﻴًﺎ ﺏﻬﺬﻩ اﻟﻤﺸﻐﻼت ﻗﺒﻞ ﺗﺜﺒﻴﺖ اﻟﺒﺮﻧﺎﻣﺞ .إﻻ ،ﻗﺪ یﺤﺎول ﻣﺜﺒّﺖ ﺏﺮﻧﺎﻣﺞ HP Photosmartأﺥﺬ أﺡﺪ ﺡﺮوف ﻣﺤﺮك اﻷﻗﺮاص اﻟﻤﺤﺠﻮزة ﻓﻼ ﺗﺘﻤﻜﻦ ﻣﻦ اﻟﻮﺻﻮل إﻟﻰ ﻣﺤﺮك أﻗﺮاص ﺵﺒﻜﺔ اﻻﺗﺼﺎل اﻟﻤﻮﺟﻮد ﻋﻠﻰ اﻟﻜﻤﺒﻴﻮﺗﺮ.
اﻟﻔﺼﻞ ١ ﻟﺘﻐﻴﻴﺮ ﺕﻮﺻﻴﻞ USBإﻟﻰ ﺕﻮﺻﻴﻞ ) (Ethernetﺱﻠﻜﻲ .١اﻓﺼﻞ اﺗﺼﺎل USBﻣﻦ اﻟﺠﺰء اﻟﺨﻠﻔﻲ ﻟﻠﻤﻨﺘﺞ. .٢ﻗﻢ ﺏﺘﻮﺻﻴﻞ آﺒﻞ Ethernetﻣﻦ ﻣﻨﻔﺬ Ethernetاﻟﻤﻮﺟﻮد ﻓﻲ اﻟﺠﻬﺔ اﻟﺨﻠﻔﻴﺔ ﻟﻠﻤﻨﺘﺞ ﺏﻤﻨﻔﺬ Ethernetاﻟﻤﺘﻮﻓﺮ ﻓﻲ اﻟﻤﻮﺟﻪ أو وﺡﺪة اﻟﺘﻘﺴﻴﻢ. .٣ﻗﻢ ﺏﺘﺜﺒﻴﺖ ﺏﺮﻧﺎﻣﺞ ﻣﻦ أﺟﻞ اﺗﺼﺎل اﻟﺸﺒﻜﺔ ،واﺥﺘﺮ ) Add a deviceإﺿﺎﻓﺔ ﺟﻬﺎز( ،ﺙﻢ اﺥﺘﺮ Through the ) networkﻡﻦ ﺧﻼل اﻟﺸﺒﻜﺔ(. .
ﻡﻼﺡﻈﺔ :راﺟﻊ وﺙﺎﺋﻖ ﺟﺪار اﻟﺤﻤﺎیﺔ اﻟﺨﺎﺻﺔ ﺏﻄﺮیﻘﺔ ﺗﻜﻮیﻦ إﻋﺪادات ﻣﻨﺎﻓﺬ ﺟﺪار اﻟﺤﻤﺎیﺔ وﻃﺮیﻘﺔ إﺿﺎﻓﺔ ﻣﻠﻔﺎت HP ﻟﻘﺎﺋﻤﺔ اﻟﺒﺮاﻣﺞ "اﻟﻤﻮﺙﻮق ﺏﻬﺎ". ﻡﻼﺡﻈﺔ یﺴﺘﻤﺮ ﺏﻌﺾ ﺟﺪر اﻟﺤﻤﺎیﺔ ﻓﻲ إﺡﺪاث اﻟﺘﻘﺎﻃﻊ ﺡﺘﻰ ﺏﻌﺪ ﺗﻌﻄﻴﻠﻬﺎ .إذا ﻟﻢ ﺗﺰل ﺗﻮاﺟﻪ ﻣﺸﺎآﻞ ﺏﻌﺪ ﺗﻜﻮیﻦ ﺟﺪار اﻟﺤﻤﺎیﺔ آﻤﺎ ﺳﺒﻖ ذآﺮﻩ ,ﻓﻘﺪ ﺗﺤﺘﺎج إﻟﻰ إﻟﻐﺎء ﺗﺜﺒﻴﺖ ﺏﺮﻧﺎﻣﺞ ﺟﺪار اﻟﺤﻤﺎیﺔ ﻟﻜﻲ ﺗﺴﺘﺨﺪم اﻟﻤﻨﺘﺞ ﻓﻲ اﻟﺸﺒﻜﺔ. ﻡﻌﻠﻮﻡﺎت ﻡﺘﻘﺪﻡﺔ ﻋﻦ ﺟﺪار اﻟﺤﻤﺎﻳﺔ أیﻀﺎ ﻣﻦ ﻗﺒﻞ ﻣﻨﺘﺞ HPﻓﻘﺪ ﺗﺤﺘﺎج إﻟﻰ ﻓﺘﺤﻬﺎ ﻣﻦ ﺥﻼل ﺗﻜﻮیﻦ ﺟﺪار اﻟﺤﻤﺎیﺔ .
اﻟﻔﺼﻞ ١ .١ .٢ .٣ .٤ اﺿﻐﻂ ﻋﻠﻰ إﻋﺪاد. اﺿﻐﻂ ﻋﻠﻰ زر اﻟﺴﻬﻢ ﻟﻸﺳﻔﻞ ﺡﺘﻰ یﺘﻢ ﺗﻤﻴﻴﺰ ﺵﺒﻜﺔ ,ﺙﻢ اﺿﻐﻂ ﻋﻠﻰ .OK اﺿﻐﻂ ﻋﻠﻰ زر اﻟﺴﻬﻢ ﻷﺳﻔﻞ ﺡﺘﻰ أن یﺘﻢ یﻤﻴﻴﺰ اﺱﺘﻌﺎدة اﻓﺘﺮاﺿﻴﺎت اﻟﺸﺒﻜﺔ ,ﺙﻢ اﺿﻐﻂ ﻋﻠﻰ .OK اﺿﻐﻂ ﻋﻠﻰ OKﻟﺘﺄآﻴﺪ رﻏﺒﺘﻚ ﻓﻲ اﺳﺘﻌﺎدة اﻹﻋﺪادات اﻻﻓﺘﺮاﺿﻴﺔ ﻟﻠﺸﺒﻜﺔ. ﺕﺸﻐﻴﻞ اﻹرﺱﺎل اﻟﻼﺱﻠﻜﻲ ﺙﻢ إﻳﻘﺎف ﺕﺸﻐﻴﻠﻪ ﺗﻢ إیﻘﺎف اﻹرﺳﺎل اﻟﻼﺳﻠﻜﻲ ﺏﺸﻜﻞ اﻓﺘﺮاﺿﻲ ،وﻟﻜﻦ ﻋﻨﺪ ﺗﺜﺒﻴﺖ اﻟﺒﺮﻧﺎﻣﺞ وﺗﻮﺻﻴﻞ ﺟﻬﺎز HP Photosmartﺏﺎﻟﺸﺒﻜﺔ ،یﺘﻢ ﺗﺸﻐﻴﻞ اﻹرﺳﺎل اﻟﻼﺳﻠﻜﻲ ﺗﻠﻘﺎﺋﻴًﺎ .
٢ إﻋﺪاد اﻟﻔﺎآﺲ ﺏﻌﺪ اﻻﻧﺘﻬﺎء ﻣﻦ آﺎﻓﺔ اﻟﺨﻄﻮات اﻟﻮاردة ﻓﻲ دﻟﻴﻞ اﻹﻋﺪاد ,اﺳﺘﺨﺪم اﻹرﺵﺎدات اﻟﻤﻮﺟﻮدة ﻓﻲ هﺬا اﻟﻘﺴﻢ ﻻﺳﺘﻜﻤﺎل إﻋﺪاد اﻟﻔﺎآﺲ. یﺮﺟﻰ اﻻﺡﺘﻔﺎظ ﺏﺪﻟﻴﻞ اﻹﻋﺪاد ﻟﻴﺘﻢ اﺳﺘﺨﺪاﻣﻪ ﻓﻲ وﻗﺖ ﻻﺡﻖ. ﻓﻲ هﺬا اﻟﻘﺴﻢ ,ﺳﺘﺘﻌﻠﻢ ﻃﺮیﻘﺔ إﻋﺪاد ﺟﻬﺎز HP Photosmartﺏﺤﻴﺚ ﺗﺘﻤﻜﻦ ﻣﻦ إرﺳﺎل اﻟﻔﺎآﺴﺎت واﺳﺘﻘﺒﺎﻟﻬﺎ ﺏﺎﻟﻨﺠﺎح ﺏﺎﺳﺘﺨﺪام أیﺔ ﺗﺠﻬﻴﺰات وﺥﺪﻣﺎت ﻗﺪ ﺗﻜﻮن ﻟﺪیﻚ ﻋﻠﻰ ﻧﻔﺲ ﺥﻂ اﻟﻬﺎﺗﻒ ﻣﺜﻞ ﺟﻬﺎز HP Photosmartاﻟﺨﺎص ﺏﻚ.
اﻟﻔﺼﻞ ٢ ﺏﻠﺪان/ﻣﻨﺎﻃﻖ یُﺴﺘﺨﺪم ﻓﻴﻬﺎ ﻧﻈﺎم اﻟﻬﺎﺗﻒ اﻟﻤﺘﻮازي )ﺗﺎﺏﻊ( ﺳﻨﻐﺎﻓﻮرة إﺳﺒﺎﻧﻴﺎ ﺗﺎیﻮان ﺗﺎیﻼﻧﺪ اﻟﻮﻻیﺎت اﻟﻤﺘﺤﺪة اﻷﻣﺮیﻜﻴﺔ ﻓﻨﺰویﻼ ﻓﻴﺘﻨﺎم إذا ﻟﻢ ﺗﻜﻦ ﻣﺘﺄآﺪًا ﻣﻦ ﻧﻮع ﻧﻈﺎم اﻟﻬﺎﺗﻒ اﻟﻤﻮﺟﻮد ﻟﺪیﻚ )ﻣﺘﺴﻠﺴﻞ أو ﻣﺘﻮازي( ,ﻓﺮاﺟﻊ ﺵﺮآﺔ اﻟﻬﻮاﺗﻒ. اﺧﺘﻴﺎر إﻋﺪاد اﻟﻔﺎآﺲ اﻟﺼﺤﻴﺢ ﻟﻤﻨﺰﻟﻚ أو ﻡﻜﺘﺒﻚ ودون ﻟﺘﺤﺪیﺪ أﻓﻀﻞ ﻃﺮیﻘﺔ ﻹﻋﺪاد HP Photosmartﻓﻲ ﻣﻨﺰﻟﻚ أو ﻣﻜﺘﺒﻚ ،اﺏﺪأ ﺏﻘﺮاءة آﺎﻓﺔ اﻷﺳﺌﻠﺔ اﻟﻮاردة ﻓﻲ هﺬا اﻟﻘﺴﻢ ّ إﺟﺎﺏﺎﺗﻚ .
ﻋﺮﺑﻲ هﻞ أﻧﺖ ﻏﻴﺮ ﻣﺘﺄآﺪ إذا اﺳﺘﺨﺪﻣﺖ ﻣﻮدم آﻤﺒﻴﻮﺗﺮ ﺏﺎﺗﺼﺎل هﺎﺗﻔﻲ؟ إذا آﺎﻧﺖ إﺟﺎﺏﺘﻚ ﻧﻌﻢ ﻋﻠﻰ أي ﻣﻦ اﻷﺳﺌﻠﺔ اﻟﺘﺎﻟﻴﺔ ,ﻓﺄﻧﺖ ﺗﺴﺘﺨﺪم ﻣﻮدم آﻤﺒﻴﻮﺗﺮ ﺏﺎﺗﺼﺎل هﺎﺗﻔﻲ: • هﻞ ﺗﻘﻮم ﺏﺈرﺳﺎل ﻓﺎآﺴﺎت واﺳﺘﻘﺒﺎﻟﻬﺎ ﻣﺒﺎﺵﺮ ًة إﻟﻰ وﻣﻦ ﺗﻄﺒﻴﻘﺎت ﺏﺮاﻣﺞ اﻟﻜﻤﺒﻴﻮﺗﺮ ﻋﻦ ﻃﺮیﻖ اﻟﺘﻮﺻﻴﻞ اﻟﻬﺎﺗﻔﻲ اﻟﺸﺒﻜﻲ؟ • هﻞ ﺗﺮﺳﻞ وﺗﺴﺘﻘﺒﻞ رﺳﺎﺋﻞ ﺏﺮیﺪ إﻟﻜﺘﺮوﻧﻲ ﻋﻠﻰ اﻟﻜﻤﺒﻴﻮﺗﺮ ﻣﻦ ﺥﻼل اﺗﺼﺎل هﺎﺗﻔﻲ؟ • هﻞ ﺗﺘﺼﻞ ﺏﺸﺒﻜﺔ اﻹﻧﺘﺮﻧﺖ ﻋﻠﻰ اﻟﻜﻤﺒﻴﻮﺗﺮ ﻣﻦ ﺥﻼل اﺗﺼﺎل هﺎﺗﻔﻲ؟ اﻟﺮﺟﺎء ﻣﻮاﺻﻠﺔ إﺟﺎﺏﺔ اﻷﺳﺌﻠﺔ. .
اﻟﻔﺼﻞ ٢ )ﺗﺎﺏﻊ( اﻷﺟﻬﺰة/اﻟﺨﺪﻡﺎت اﻷﺧﺮى اﻟﺘﻲ ﺕﺸﺘﺮك ﻓﻲ ﺧﻂ اﻟﻔﺎآﺲ اﻟﺨﺎص ﺑﻚ إﻋﺪاد اﻟﻔﺎآﺲ اﻟﻤﻮﺻﻰ ﺑﻪ ﻟﻸﻧﻈﻤﺔ اﻟﻬﺎﺕﻔﻴﺔ اﻟﻤﺘﻮازﻳﺔ إﻋﺪاد اﻟﻔﺎآﺲ اﻟﻤﻮﺻﻰ ﺑﻪ ﻟﻸﻧﻈﻤﺔ اﻟﻬﺎﺕﻔﻴﺔ اﻟﺘﺴﻠﺴﻠﻴﺔ )أﺟﺒﺖ ﺏﻨﻌﻢ ﻋﻠﻰ اﻟﺴﺆاﻟﻴﻦ 4و 7ﻓﻘﻂ(. اﻟﺤﺎﻟﺔ و :ﺥﻂ ﺻﻮت/ﻓﺎآﺲ ﻣﺸﺘﺮك ﻣﻊ ﺏﺮیﺪ ﺻﻮﺗﻲ اﻟﺤﺎﻟﺔ و :ﺥﻂ ﺻﻮت/ﻓﺎآﺲ ﻣﺸﺘﺮك ﻣﻊ ﺏﺮیﺪ ﺻﻮﺗﻲ )أﺟﺒﺖ ﺏﻨﻌﻢ ﻋﻠﻰ اﻟﺴﺆال 5ﻓﻘﻂ(. اﻟﺤﺎﻟﺔ ز :ﺥﻂ ﻓﺎآﺲ ﻣﺸﺘﺮك ﻣﻊ ﻣﻮدم آﻤﺒﻴﻮﺗﺮ ﺏﺎﺗﺼﺎل هﺎﺗﻔﻲ )ﻟﻢ یﺘﻢ اﺳﺘﻘﺒﺎل ﻣﻜﺎﻟﻤﺎت ﺻﻮﺗﻴﺔ( ﻏﻴﺮ ﻗﺎﺏﻞ ﻟﻠﺘﻄﺒﻴﻖ.
اﻟﺤﺎﻟﺔ أ :ﺧﻂ ﻓﺎآﺲ ﻡﺴﺘﻘﻞ )ﻟﻢ ﻳﺘﻢ اﺱﺘﻼم ﻡﻜﺎﻟﻤﺎت ﺻﻮﺕﻴﺔ( إذا آﺎن ﻟﺪیﻚ ﺥﻂ هﺎﺗﻒ ﻣﺴﺘﻘﻞ ﻻ ﺗﺴﺘﻠﻢ ﻋﻠﻴﻪ ﻣﻜﺎﻟﻤﺎت ﺻﻮﺗﻴﺔ ،وﻟﻢ یﻜﻦ ﻟﺪیﻚ أیﺔ أﺟﻬﺰة أﺥﺮى ﻣﺘﺼﻠﺔ ﺏﺨﻂ اﻟﻬﺎﺗﻒ هﺬا ،ﻓﻘﻢ ﺏﺈﻋﺪاد HP Photosmartآﻤﺎ هﻮ ﻣﻮﺿﺢ ﻓﻲ هﺬا اﻟﻘﺴﻢ. ﺵﻜﻞ ١-٢ﻡﻨﻈﺮ ﺧﻠﻔﻲ ﻟﺠﻬﺎز HP Photosmart ﻋﺮﺑﻲ ١ ﻗﺎﺏﺲ اﻟﺤﺎﺋﻂ اﻟﺨﺎص ﺏﺎﻟﻬﺎﺗﻒ ٢ اﺳﺘﺨﺪم ﺳﻠﻚ اﻟﻬﺎﺗﻒ اﻟﻤﺰود ﺏﺎﻟﻌﻠﺒﺔ ﻣﻊ HP Photosmartﻟﺘﻮﺻﻴﻠﻪ ﺏﻤﻨﻔﺬ LINE-1 ﻹﻋﺪاد اﻟﻤﻨﺘﺞ ﻡﻊ ﺧﻂ اﻟﻔﺎآﺲ اﻟﻤﺴﺘﻘﻞ .
اﻟﻔﺼﻞ ٢ ﺵﻜﻞ ٢-٢ﻡﻨﻈﺮ ﺧﻠﻔﻲ ﻟﺠﻬﺎز HP Photosmart ٢ ٣ اﺳﺘﺨﺪم ﺳﻠﻚ اﻟﻬﺎﺗﻒ اﻟﻤﺰود ﺏﺎﻟﻌﻠﺒﺔ ﻣﻊ HP Photosmartﻟﺘﻮﺻﻴﻠﻪ ﺏﻤﻨﻔﺬ ""1-LINE ﻋﺮﺑﻲ ١ ﻣﻘﺒﺲ اﻟﻬﺎﺗﻒ اﻟﻤﻮﺟﻮد ﺏﺎﻟﺤﺎﺋﻂ ﻣﺮﺵﺢ وآﺒﻞ DSLاﻟﻮاردان ﻣﻦ ﻣﻮﻓﺮ ﺥﺪﻣﺔ DSL ﻹﻋﺪاد اﻟﻤﻨﺘﺞ ﻡﻊ DSL .١اﺡﺼﻞ ﻋﻠﻰ ﻣﺮﺵﺢ DSLﻣﻦ ﻣﺰود ﺥﺪﻣﺔ اﻟـ .DSL .٢ﻗﻢ ﺏﺘﻮﺻﻴﻞ آﺒﻞ ﻣﺮﺵﺢ DSLﺏﻤﻘﺒﺲ اﻟﻬﺎﺗﻒ اﻟﻤﻮﺟﻮد ﺏﺎﻟﺤﺎﺋﻂ.
إذا آﻨﺖ ﺗﺴﺘﺨﺪم ﻣﺤﻮل /ISDNﻣﺤﻮل ﻃﺮﻓﻲ ،ﻓﻘﻢ ﺏﺎﻵﺗﻲ: ﻗﻢ ﺏﺘﻮﺻﻴﻞ اﻟﻤﻨﺘﺞ ﺏﺎﻟﻤﻨﻔﺬ اﻟﺬي ﺗﻢ ﺗﺼﻤﻴﻤﻪ ﻟﻼﺳﺘﺨﺪام ﻣﻊ اﻟﻔﺎآﺲ أو اﻟﻬﺎﺗﻒ. • ﻡﻼﺡﻈﺔ :ﺗﺴﻤﺢ ﻟﻚ ﺏﻌﺾ أﻧﻈﻤﺔ ISDNﺏﺘﻬﻴﺌﺔ اﻟﻤﻨﺎﻓﺬ ﻷﺟﻬﺰة هﻮاﺗﻒ ﻣﻌﻴﻨﺔ .ﻋﻠﻰ ﺳﺒﻴﻞ اﻟﻤﺜﺎل ،رﺏﻤﺎ ﺗﻜﻮن ﻗﺪ ﺡﺪدت ﻣﻨﻔﺬًا ﻟﻠﻬﺎﺗﻒ وﻓﺎآﺲ Group 3وﻣﻨﻔﺬًا ﺁﺥﺮًا ﻷﻏﺮاض ﻣﺘﻌﺪدة .إذا واﺟﻬﺘﻚ ﻣﺸﺎآﻞ ﻋﻨﺪ اﻟﺘﻮﺻﻴﻞ ﺏﻤﻨﻔﺬ اﻟﻔﺎآﺲ/اﻟﻬﺎﺗﻒ ﻓﻲ ﻣﺤﻮل ،ISDNﺟﺮب اﺳﺘﺨﺪام اﻟﻤﻨﻔﺬ اﻟﻤﺤﺪد ﻟﻸﻏﺮاض اﻟﻤﺘﻌﺪدة واﻟﺬي ﻗﺪ یﺤﻤﻞ اﺳﻢ "multi- "combiأو ﺵﻲء ﻣﻦ هﺬا اﻟﻘﺒﻴﻞ.
اﻟﻔﺼﻞ ٢ یﻘﻮم ﺟﻬﺎز HP Photosmartﺏﺎﻟﺮد اﻵﻟﻲ ﻋﻠﻰ اﻟﻤﻜﺎﻟﻤﺎت اﻟﻮاردة اﻟﺘﻲ ﺗﺤﺘﻮي ﻋﻠﻰ ﻧﻤﻮذج اﻟﺮﻧﻴﻦ اﻟﺬي ﻗﻤﺖ ﺏﺘﺤﺪیﺪﻩ )إﻋﺪاد ﻧﻤﻂ اﻟﺮﻧﻴﻦ ﻟﻠﺮد( ﺏﻌﺪ ﻋﺪد اﻟﺮﻧﺎت اﻟﺘﻲ ﺡﺪدﺗﻬﺎ )إﻋﺪاد اﻟﺮد اﻟﺘﻠﻘﺎﺋﻲ( .ﺏﻌﺪ ذﻟﻚ یﺒﺪأ اﻟﺠﻬﺎز ﻓﻲ إﺻﺪار ﻧﻐﻤﺎت اﺳﺘﻘﺒﺎل اﻟﻔﺎآﺲ إﻟﻰ ﺁﻟﺔ إرﺳﺎل اﻟﻔﺎآﺲ ویﻘﻮم اﻟﺠﻬﺎز ﺏﺎﺳﺘﻘﺒﺎل اﻟﻔﺎآﺲ.
إذا اﻟﺘﻘﻄﺖ ﺳﻤﺎﻋﺔ اﻟﻬﺎﺗﻒ ﻗﺒﻞ ﻗﻴﺎم اﻟﻤﻨﺘﺞ ﺏﺎﻟﺮد ﻋﻠﻰ اﻟﻤﻜﺎﻟﻤﺔ وﺳﻤﻌﺖ ﻧﻐﻤﺎت ﻓﺎآﺲ ﻣﻦ ﺟﻬﺎز اﻟﻔﺎآﺲ اﻟﺬي یﻘﻮم ﺏﺈرﺳﺎل اﻟﻔﺎآﺲ ,ﻓﻴﺠﺐ أن ﺗﻘﻮم ﺏﺎﻟﺮد ﻋﻠﻰ ﻣﻜﺎﻟﻤﺔ اﻟﻔﺎآﺲ یﺪویًﺎ. اﻟﺤﺎﻟﺔ و :ﺧﻂ ﺻﻮت/ﻓﺎآﺲ ﻡﺸﺘﺮك ﻡﻊ ﺑﺮﻳﺪ ﺻﻮﺕﻲ إذا آﻨﺖ ﺗﺴﺘﻘﺒﻞ آﻼ ﻣﻦ ﻣﻜﺎﻟﻤﺎت اﻟﺼﻮت وﻣﻜﺎﻟﻤﺎت اﻟﻔﺎآﺲ ﻋﻠﻰ ﻧﻔﺲ رﻗﻢ اﻟﻬﺎﺗﻒ وآﻨﺖ ﻣﺸﺘﺮآًﺎ آﺬﻟﻚ ﻓﻲ ﺥﺪﻣﺔ ﺏﺮیﺪ ﺻﻮﺗﻲ ﻣﻦ ﺥﻼل ﺵﺮآﺔ اﻟﻬﻮاﺗﻒ ,ﻓﻘﻢ ﺏﺈﻋﺪاد ﺟﻬﺎز HP Photosmartآﻤﺎ هﻮ ﻣﻮﺿﺢ ﻓﻲ هﺬا اﻟﻘﺴﻢ.
اﻟﻔﺼﻞ ٢ ﻧﻈﺮًا ﻻﺵﺘﺮاك ﻣﻮدم آﻤﺒﻴﻮﺗﺮ ﺏﺎﺗﺼﺎل هﺎﺗﻔﻲ ﺥﻂ اﻟﻬﺎﺗﻒ ﻣﻊ ﺟﻬﺎز ،HP Photosmartﻓﻼ ﺗﺘﻤﻜﻦ ﻣﻦ اﺳﺘﺨﺪام آﻼ ﻣﻦ اﻟﻤﻮدم وﺟﻬﺎز HP Photosmartﻓﻲ ﺁن واﺡﺪ .ﻋﻠﻰ ﺳﺒﻴﻞ اﻟﻤﺜﺎل ,ﻻ یﻤﻜﻦ اﺳﺘﺨﺪام ﺟﻬﺎز HP Photosmartﻹرﺳﺎل اﻟﻔﺎآﺴﺎت واﺳﺘﻘﺒﺎﻟﻬﺎ ﻋﻨﺪ اﺳﺘﺨﺪام ﻣﻮدم آﻤﺒﻴﻮﺗﺮ ﺏﺎﺗﺼﺎل هﺎﺗﻔﻲ ﻹرﺳﺎل اﻟﺒﺮیﺪ اﻹﻟﻜﺘﺮوﻧﻲ أو ﻟﻠﻮﺻﻮل إﻟﻰ اﻹﻧﺘﺮﻧﺖ.
ﻧﻈﺮا ﻻﺵﺘﺮاك ﻣﻮدم آﻤﺒﻴﻮﺗﺮ ﺏﺎﺗﺼﺎل هﺎﺗﻔﻲ ﺥﻂ اﻟﻬﺎﺗﻒ ﻣﻊ ﺟﻬﺎز ،HP Photosmartﻓﻼ ﺗﺘﻤﻜﻦ ﻣﻦ اﺳﺘﺨﺪام آﻼ ﻣﻦ ً اﻟﻤﻮدم وﺟﻬﺎز HP Photosmartﻓﻲ ﺁن واﺡﺪ .ﻋﻠﻰ ﺳﺒﻴﻞ اﻟﻤﺜﺎل ,ﻻ یﻤﻜﻦ اﺳﺘﺨﺪام ﺟﻬﺎز HP Photosmartﻹرﺳﺎل اﻟﻔﺎآﺴﺎت واﺳﺘﻘﺒﺎﻟﻬﺎ ﻋﻨﺪ اﺳﺘﺨﺪام ﻣﻮدم آﻤﺒﻴﻮﺗﺮ ﺏﺎﺗﺼﺎل هﺎﺗﻔﻲ ﻹرﺳﺎل اﻟﺒﺮیﺪ اﻹﻟﻜﺘﺮوﻧﻲ أو ﻟﻠﻮﺻﻮل إﻟﻰ اﻹﻧﺘﺮﻧﺖ. هﻨﺎك ﻃﺮیﻘﺘﺎن ﻣﺨﺘﻠﻔﺘﺎن ﻹﻋﺪاد ﺟﻬﺎز HP Photosmartﻣﻊ اﻟﻜﻤﺒﻴﻮﺗﺮ ,اﺳﺘﻨﺎدًا ﻟﻌﺪد ﻣﻨﺎﻓﺬ اﻟﻬﺎﺗﻒ اﻟﺘﻲ ﺗﻮﺟﺪ ﻓﻲ اﻟﻜﻤﺒﻴﻮﺗﺮ.
اﻟﻔﺼﻞ ٢ .٥إذا آﺎن ﺏﺮﻧﺎﻣﺞ اﻟﻤﻮدم اﻟﺨﺎص ﺏﻚ ﻣﻀﺒﻮﻃًﺎ إﻟﻰ اﺳﺘﻘﺒﺎل اﻟﻔﺎآﺴﺎت ﻋﻠﻰ اﻟﻜﻤﺒﻴﻮﺗﺮ ﺁﻟﻴًﺎ ،ﻓﻘﻢ ﺏﺈیﻘﺎف ﺗﺸﻐﻴﻞ هﺬا اﻹﻋﺪاد. .٦اﻵن ﺗﺤﺘﺎج إﻟﻰ ﺗﺤﺪیﺪ اﻟﻄﺮیﻘﺔ اﻟﺘﻲ یﺮد ﺏﻬﺎ اﻟﻤﻨﺘﺞ ﻋﻠﻰ ﻣﻜﺎﻟﻤﺎت ,إﻣﺎ ﺏﺸﻜﻞ ﺁﻟﻲ أو یﺪوي: • ﻋﻨﺪ إﻋﺪاد ﺟﻬﺎز اﻟﻤﻨﺘﺞ ﻟﻠﺮد ﻋﻠﻰ اﻟﻤﻜﺎﻟﻤﺎت ﺁﻟﻴًﺎ ،ﻓﻴﻘﻮم ﺏﺎﻟﺮد ﻋﻠﻰ آﺎﻓﺔ اﻟﻤﻜﺎﻟﻤﺎت اﻟﻮاردة وﺏﺎﺳﺘﻘﺒﺎل اﻟﻔﺎآﺴﺎت .
ﻹﻋﺪاد اﻟﻤﻨﺘﺞ ﻡﻊ ﺧﻂ ﻡﺸﺘﺮك ﻟﻠﻤﻜﺎﻟﻤﺎت اﻟﺼﻮﺕﻴﺔ/ﻡﻜﺎﻟﻤﺎت اﻟﻔﺎآﺲ ﻡﻊ ﺁﻟﺔ اﻟﺮد ﻋﻠﻰ ﻡﻜﺎﻟﻤﺎت .١ﻗﻢ ﺏﺈزاﻟﺔ اﻟﻘﺎﺏﺲ اﻷﺏﻴﺾ ﻣﻦ اﻟﻤﻨﻔﺬ اﻟﻤﺴﻤﻰ 2-EXTﻓﻲ اﻟﺠﺰء اﻟﺨﻠﻔﻲ ﻟﻠﻤﻨﺘﺞ. .٢ﻗﻢ ﺏﻔﺼﻞ ﺁﻟﺔ اﻟﺮد ﻋﻠﻰ اﻟﻤﻜﺎﻟﻤﺎت ﻣﻦ ﻣﻘﺒﺲ اﻟﻬﺎﺗﻒ اﻟﻤﻮﺟﻮد ﺏﺎﻟﺤﺎﺋﻂ وﺏﺘﻮﺻﻴﻠﻬﺎ ﺏﺎﻟﻤﻨﻔﺬ اﻟﻤﻜﺘﻮب ﻋﻠﻴﻪ 2-EXTﻓﻲ اﻟﺠﺰء اﻟﺨﻠﻔﻲ ﻟﻠﻤﻨﺘﺞ. ﻡﻼﺡﻈﺔ ﻋﻨﺪ ﻋﺪم ﺗﻮﺻﻴﻞ ﺁﻟﺔ اﻟﺮد ﻋﻠﻰ اﻟﻤﻜﺎﻟﻤﺎت ﻣﺒﺎﺵﺮ ًة ﺏﺎﻟﻤﻨﺘﺞ ,ﻓﻘﺪ یﺘﻢ ﺗﺴﺠﻴﻞ ﻧﻐﻤﺎت اﻟﻔﺎآﺲ ﻣﻦ ﺁﻟﺔ إرﺳﺎل اﻟﻔﺎآﺲ ﻓﻲ ﺁﻟﺔ اﻟﺮد ﻋﻠﻰ اﻟﻤﻜﺎﻟﻤﺎت ،وﻣﻦ اﻟﻤﺤﺘﻤﻞ أﻧﻚ ﻻ ﺗﺘﻤﻜﻦ ﻣﻦ اﺳﺘﻘﺒﺎل اﻟﻔﺎآﺴﺎت ﻣﻊ اﻟﻤﻨﺘﺞ. .
اﻟﻔﺼﻞ ٢ • • ﻓﻲ ﺡﺎﻟﺔ اﺡﺘﻮاء اﻟﻜﻤﺒﻴﻮﺗﺮ ﻋﻠﻰ ﻣﻨﻔﺬ هﺎﺗﻒ واﺡﺪ ,ﻓﺘﺤﺘﺎج إﻟﻰ ﺵﺮاء وﺡﺪة ﺗﻘﺴﻴﻢ ﻣﺘﻮازیﺔ )واﻟﺬي یﻄﻠﻖ ﻋﻠﻴﻬﺎ آﺬﻟﻚ وﺻﻠﺔ( .راﺟﻊ اﻟﺘﻌﻠﻴﻤﺎت اﻹﻟﻜﺘﺮوﻧﻴﺔ ﻟﻠﺤﺼﻮل ﻋﻠﻰ اﻹرﺵﺎدات اﻟﺨﺎﺻﺔ ﺏﺎﻹﻋﺪاد. ﻓﻲ ﺡﺎﻟﺔ اﺡﺘﻮاء اﻟﻜﻤﺒﻴﻮﺗﺮ ﻋﻠﻰ ﻣﻨﻔﺬي اﻟﻬﺎﺗﻒ ,ﻓﻘﻢ ﺏﺈﻋﺪاد ﺟﻬﺎز HP Photosmartآﻤﺎ هﻮ ﻣﻮﺿﺢ أدﻧﺎﻩ.
.٤ﺏﺎﺳﺘﺨﺪام ﺳﻠﻚ اﻟﻬﺎﺗﻒ اﻟﻤﺰود ﺏﺎﻟﻤﻨﺘﺞ ،ﻗﻢ ﺏﺘﻮﺻﻴﻞ أﺡﺪ اﻟﻄﺮﻓﻴﻦ ﺏﻤﻘﺒﺲ اﻟﻬﺎﺗﻒ اﻟﻤﻮﺟﻮد ﺏﺎﻟﺤﺎﺋﻂ ،ﺙﻢ ﻗﻢ ﺏﺘﻮﺻﻴﻞ اﻟﻄﺮف اﻵﺥﺮ ﺏﺎﻟﻤﻨﻔﺬ اﻟﻤﺴﻤﻰ 1-LINEﻓﻲ اﻟﺠﺰء اﻟﺨﻠﻔﻲ ﻟﻠﻤﻨﺘﺞ. ﻡﻼﺡﻈﺔ :إذا ﻟﻢ ﺗﺴﺘﺨﺪم اﻟﻜﺎﺏﻞ اﻟﻤﺰود ﻟﻠﺘﻮﺻﻴﻞ ﻣﻦ ﻣﻘﺒﺲ اﻟﻬﺎﺗﻒ اﻟﻤﻮﺟﻮد ﺏﺎﻟﺤﺎﺋﻂ ﺏﺎﻟﻤﻨﺘﺞ ،ﻓﻘﺪ ﻻ ﺗﺘﻤﻜﻦ ﻣﻦ إرﺳﺎل واﺳﺘﻘﺒﺎل اﻟﻔﺎآﺴﺎت ﺏﻨﺠﺎح .إن ﺳﻠﻚ اﻟﻬﺎﺗﻒ اﻟﺨﺎص هﺬا یﺨﺘﻠﻒ ﻋﻦ أﺳﻼك اﻟﻬﺎﺗﻒ اﻟﺘﻲ ﻗﺪ ﺗﻮﺟﺪ ﻟﺪیﻚ ﻓﻲ اﻟﻤﻨﺰل أو ﻓﻲ اﻟﻤﻜﺘﺐ. ) .
اﻟﻔﺼﻞ ٢ • • ﻓﻲ ﺡﺎﻟﺔ اﺡﺘﻮاء اﻟﻜﻤﺒﻴﻮﺗﺮ ﻋﻠﻰ ﻣﻨﻔﺬ هﺎﺗﻒ واﺡﺪ ,ﻓﺘﺤﺘﺎج إﻟﻰ ﺵﺮاء وﺡﺪة ﺗﻘﺴﻴﻢ ﻣﺘﻮازیﺔ )واﻟﺬي یﻄﻠﻖ ﻋﻠﻴﻬﺎ آﺬﻟﻚ وﺻﻠﺔ( .راﺟﻊ اﻟﺘﻌﻠﻴﻤﺎت اﻹﻟﻜﺘﺮوﻧﻴﺔ ﻟﻠﺤﺼﻮل ﻋﻠﻰ اﻹرﺵﺎدات اﻟﺨﺎﺻﺔ ﺏﺎﻹﻋﺪاد. ﻓﻲ ﺡﺎﻟﺔ اﺡﺘﻮاء اﻟﻜﻤﺒﻴﻮﺗﺮ ﻋﻠﻰ ﻣﻨﻔﺬي اﻟﻬﺎﺗﻒ ,ﻓﻘﻢ ﺏﺈﻋﺪاد ﺟﻬﺎز HP Photosmartآﻤﺎ هﻮ ﻣﻮﺿﺢ أدﻧﺎﻩ.
یﺠﺐ أن ﺗﻜﻮن ﻣﺘﻮاﺟﺪًا ﻟﻜﻲ ﺗﺮد ﺏﻨﻔﺴﻚ ﻋﻠﻰ ﻣﻜﺎﻟﻤﺎت اﻟﻔﺎآﺲ اﻟﻮاردة ،وإﻻ ﻓﺈن ﺟﻬﺎز HP Photosmartﻟﻦ یﺘﻤﻜﻦ ﻣﻦ اﺳﺘﻘﺒﺎل اﻟﻔﺎآﺴﺎت. ﺕﻐﻴﻴﺮ اﻹﻋﺪادات اﻟﻤﻮﺟﻮدة ﻓﻲ ﺟﻬﺎز HP Photosmartﻻﺱﺘﻘﺒﺎل اﻟﻔﺎآﺴﺎت ﻗﺪ ﺗﺤﺘﺎج إﻟﻰ ﺗﻐﻴﻴﺮ ﺏﻌﺾ اﻹﻋﺪادات ﻓﻲ HP Photosmartﺏﺤﻴﺚ ﺗﺘﻤﻜﻦ ﻣﻦ اﺳﺘﻼم اﻟﻔﺎآﺴﺎت ﺏﻨﺠﺎح .إذا ﻟﻢ ﺗﻜﻦ ﻣﺘﺄآﺪًا ﻣﺎ هﻮ اﻹﻋﺪاد اﻟﺬي یﺠﺐ اﺥﺘﻴﺎرﻩ ﻟﺨﻴﺎر ﻓﺎآﺲ ﻣﻌﻴﻦ ,راﺟﻊ إرﺵﺎدات إﻋﺪاد اﻟﻔﺎآﺲ اﻟﻤﻔﺼﻠﺔ اﻟﻤﺘﻮﻓﺮة ﻓﻲ اﻟﻮﺙﺎﺋﻖ اﻟﻤﻄﺒﻮﻋﺔ.
اﻟﻔﺼﻞ ٢ ﻡﻼﺡﻈﺔ :ﻓﻲ ﺏﻌﺾ اﻟﺒﻠﺪان/اﻟﻤﻨﺎﻃﻖ ،ﺗﺼﺒﺢ ﻣﻌﻠﻮﻣﺎت ﺗﺮویﺴﺔ اﻟﻔﺎآﺲ ﻣﻦ اﻟﺸﺮوط اﻟﻘﺎﻧﻮﻧﻴﺔ. ﻟﻀﺒﻂ ﺕﺮوﻳﺴﺔ ﻓﺎآﺲ اﻓﺘﺮاﺿﻴﺔ ﻡﻦ ﺧﻼل ﻟﻮﺡﺔ اﻟﺘﺤﻜﻢ .١اﺿﻐﻂ ﻋﻠﻰ إﻋﺪاد. .٤ .٥ ﻋﺮﺑﻲ .٢ .٣ اﺿﻐﻂ ﻋﻠﻰ زر اﻟﺴﻬﻢ ﻷﺳﻔﻞ ﻟﺘﻤﻴﻴﺰ إﻋﺪاد ﻓﺎآﺲ أﺱﺎﺱﻲ ﺙﻢ اﺿﻐﻂ ﻋﻠﻰ .OK اﺿﻐﻂ ﻋﻠﻰ زر اﻟﺴﻬﻢ ﻷﺳﻔﻞ ﻟﺘﻤﻴﻴﺰ رأس اﻟﻔﺎآﺲ ،ﺙﻢ اﺿﻐﻂ ﻋﻠﻰ .OK ﺳﺘﻈﻬﺮ ﻟﻮﺡﺔ اﻟﻤﻔﺎﺗﻴﺢ اﻟﻤﺮﺋﻴﺔ ﻋﻠﻰ ﺵﺎﺵﺔ اﻟﻌﺮض. اﺳﺘﺨﺪم ﻟﻮﺡﺔ اﻟﻤﻔﺎﺗﻴﺢ اﻟﻤﺮﺋﻴﺔ ﻹدﺥﺎل اﻻﺳﻢ اﻟﺸﺨﺼﻰ أو اﺳﻢ ﺵﺮآﺘﻚ .
.٥ﻗﻢ ﺏﻤﺮاﺟﻌﺔ اﻟﺘﻘﺮیﺮ. • إذا اﻧﺘﻬﻰ اﻻﺥﺘﺒﺎر وﻣﺎ زﻟﺖ ﺗﻌﺎﻧﻲ ﻣﻦ ﻣﺸﺎآﻞ إرﺳﺎل واﺳﺘﻼم اﻟﻔﺎآﺲ ،ﻓﺮاﺟﻊ إﻋﺪادات اﻟﻔﺎآﺲ اﻟﻮاردة ﻓﻲ اﻟﺘﻘﺮیﺮ ﻟﻠﺘﺤﻘﻖ ﻣﻦ ﺻﺤﺔ هﺬﻩ اﻹﻋﺪادات .ﻣﻦ اﻟﻤﻤﻜﻦ أن یﺆدي وﺟﻮد إﻋﺪاد ﻓﺎرغ أو ﻏﻴﺮ ﺻﺤﻴﺢ إﻟﻰ ﻣﺸﺎآﻞ ﻓﻲ إرﺳﺎل أو اﺳﺘﻼم اﻟﻔﺎآﺲ. • ﻓﻲ ﺡﺎﻟﺔ ﻓﺸﻞ اﻻﺥﺘﺒﺎر ،راﺟﻊ اﻟﺘﻘﺮیﺮ ﻟﻠﺤﺼﻮل ﻋﻠﻰ ﻣﺰی ٍﺪ ﻣﻦ اﻟﻤﻌﻠﻮﻣﺎت ﺡﻮل آﻴﻔﻴﺔ إﺻﻼح أي ﻣﺸﻜﻼت ﺗﻢ اآﺘﺸﺎﻓﻬﺎ. .٦ﺏﻌﺪ اﻟﺤﺼﻮل ﻋﻠﻰ ﺗﻘﺮیﺮ اﻟﻔﺎآﺲ ﻣﻦ ﺟﻬﺎز ,HP Photosmartاﺿﻐﻂ ﻋﻠﻰ .OK إذا ﻟﺰم اﻷﻣﺮ ،ﻓﻘﻢ ﺏﺤﻞ أیﺔ ﻣﺸﻜﻼت اآﺘﺸﻔﺖ ،ﺙﻢ أﻋﺪ إﺟﺮاء اﻻﺥﺘﺒﺎر.
٣ ﻧﻈﺮة ﻋﺎﻡﺔ ﻋﻦ HP Photosmart اﺳﺘﺨﺪم HP Photosmartﻟﺘﻨﻔﻴﺬ ﻣﻬﺎم ﻣﺜﻞ ﻋﻤﻞ ﻧﺴﺨﺔ ,ﻣﺴﺢ ﻣﺴﺘﻨﺪات ﺿﻮﺋﻴًﺎ ,أو ﻃﺒﺎﻋﺔ ﺻﻮر ﺏﺴﺮﻋﺔ وﺳﻬﻮﻟﺔ ﻣﻦ ﺥﻼل ﺏﻄﺎﻗﺔ اﻟﺬاآﺮة أو ﻣﻦ ﺟﻬﺎز ﺗﺨﺰیﻦ ﺏﺘﻮﺻﻴﻞ .USBیﻤﻜﻦ اﻟﻮﺻﻮل إﻟﻰ اﻟﻜﺜﻴﺮ ﻣﻦ وﻇﺎﺋﻒ HP Photosmart ﻣﺒﺎﺵﺮ ًة ﻣﻦ ﻟﻮﺡﺔ اﻟﺘﺤﻜﻢ ,دون ﺗﺸﻐﻴﻞ اﻟﻜﻤﺒﻴﻮﺗﺮ. ﻡﻼﺡﻈﺔ :یﻘﻮم هﺬا اﻟﺪﻟﻴﻞ ﺏﺘﻘﺪیﻢ ﻋﻤﻠﻴﺎت أﺳﺎﺳﻴﺔ وﻣﻌﻠﻮﻣﺎت ﺡﻮل ﺡﻞ اﻟﻤﺸﻜﻼت ,آﻤﺎ یﻮﻓﺮ ﻣﻌﻠﻮﻣﺎت ﺡﻮل اﻻﺗﺼﺎل ﺏﺪﻋﻢ HPوﻃﻠﺐ اﻟﻤﺴﺘﻠﺰﻣﺎت.
)ﺗﺎﺏﻊ( اﻟﻌﻨﻮان اﻟﻮﺻﻒ 13 ﻓﺘﺤﺔ ﺏﻄﺎﻗﺎت اﻟﺬاآﺮة ﻟﺒﻄﺎﻗﺎت CompactFlash 14 ﻣﻨﻔﺬ USB/PictBridgeاﻷﻣﺎﻣﻲ ﻟﻠﻜﺎﻣﻴﺮا أو ﻟﺠﻬﺎز ﺗﺨﺰیﻦ ﺁﺥﺮ 15 ﻇﻬﺮ اﻟﻐﻄﺎء 16 ﻏﻄﺎء 17 اﻟﺴﻄﺢ اﻟﺰﺟﺎﺟﻲ 18 ﻣﻘﺒﺾ اﻟﻮﺻﻮل إﻟﻰ ﺏﺎب اﻟﺨﺮﻃﻮﺵﺎت 19 دﻟﻴﻞ ﻋﺮض اﻟﻮرق ﻟﺪرج اﻹدﺥﺎل اﻟﺮﺋﻴﺴﻲ 20 أیﻀﺎ آﺪرج اﻹدﺥﺎل( درج اﻹدﺥﺎل اﻟﺮﺋﻴﺴﻲ )یُﺸﺎر إﻟﻴﻪ ً ﻋﺮﺑﻲ ﺵﻜﻞ ٢-٣ﻡﻨﻈﺮ ﻋﻠﻮي وﺧﻠﻔﻲ ﻟﻠﻄﺎﺑﻌﺔ اﻟﻌﻨﻮان اﻟﻮﺻﻒ 21 وﺡﺪة رؤوس اﻟﻄﺒﺎﻋﺔ 22 ﻣﻨﻄﻘﺔ اﻟﻮﺻﻮل إﻟﻰ اﻟﺨﺮﻃﻮﺵﺎت 23 ﻣﻮﺿﻊ ر
اﻟﻔﺼﻞ ٣ 3 def 2 abc 1 6 mno 5 jkl 4 ghi 9 wxyz 8 tuv 7 pqrs # 0 * OK ﻋﺮﺑﻲ CD/DVD اﻟﻌﻨﻮان اﻻﺱﻢ واﻟﻮﺻﻒ 1 أیﻀﺎ آﺸﺎﺵﺔ اﻟﻌﺮض( :ﻟﻌﺮض اﻟﻘﻮاﺋﻢ ,اﻟﺼﻮر واﻟﺮﺳﺎﺋﻞ .یﻤﻜﻦ ﺳﺤﺐ ﺵﺎﺵﺔ ﺵﺎﺵﺔ اﻟﺮﺳﻮم اﻟﻤﻠﻮﻧﺔ )یﺸﺎر إﻟﻴﻬﺎ ً اﻟﻌﺮض إﻟﻰ اﻷﻋﻠﻰ وﻃﻴﻬﺎ ﻣﻦ أﺟﻞ ﺗﺤﺴﻴﻦ اﻟﻌﺮض. 2 اﻟﺴﺎﺏﻖ :اﻟﺮﺟﻮع إﻟﻰ اﻟﺸﺎﺵﺔ اﻟﺴﺎﺏﻘﺔ. 3 ﻗﺎﺋﻤﺔ :یﻤﺜﻞ ﻣﺠﻤﻮﻋﺔ ﻣﻦ اﻟﺨﻴﺎرات اﻟﻤﺘﻌﻠﻘﺔ ﺏﺎﻟﺸﺎﺵﺔ اﻟﺤﺎﻟﻴﺔ. 4 ﻣﺼﺒﺎح اﻟﺘﻨﺒﻴﻪ :یﺸﻴﺮ إﻟﻰ ﺡﺪوث ﻣﺸﻜﻠﺔ .
)ﺗﺎﺏﻊ( اﻟﻌﻨﻮان اﻻﺱﻢ واﻟﻮﺻﻒ 22 ﺑﺪء اﻟﻨﺴﺦ :ﺏﺪء ﻣﻬﻤﺔ ﻧﺴﺦ ﺏﺎﻷﺏﻴﺾ واﻷﺳﻮد أو ﺏﺎﻷﻟﻮان. 23 ﺑﺪء اﻟﻤﺴﺢ اﻟﻀﻮﺋﻲ :ﻓﺘﺢ ﻗﺎﺋﻤﺔ اﻟﻤﺴﺢ اﻟﻀﻮﺋﻲ ﺡﻴﺚ یﻤﻜﻨﻚ ﺗﺤﺪیﺪ وﺟﻬﺔ ﻟﻠﻤﺴﺢ اﻟﻀﻮﺋﻲ. 24 ﻃﺒﺎﻋﺔ اﻟﺼﻮر :ﻃﺒﺎﻋﺔ اﻟﺼﻮر اﻟﻤﺤﺪدة ﻓﻲ ﺏﻄﺎﻗﺔ اﻟﺬاآﺮة .ﻋﻨﺪ ﻋﺪم ﺗﺤﺪیﺪ ﺻﻮر ﺡﺎﻟﻴًﺎ ،یﻘﻮم اﻟﻤﻨﺘﺞ ﺏﻄﺒﺎﻋﺔ اﻟﺼﻮرة اﻟﻤﻌﺮوﺿﺔ ﺡﺎﻟﻴًﺎ ﻋﻠﻰ اﻟﺸﺎﺵﺔ. 25 إﻟﻐﺎء اﻷﻣﺮ :یﻘﻮم ﺏﺈیﻘﺎف اﻟﻌﻤﻠﻴﺔ اﻟﺤﺎﻟﻴﺔ. 26 ﺕﻌﻠﻴﻤﺎت :ﺗﻘﺪیﻢ ﺗﻌﻠﻴﻤﺎت ﺗﺨﺺ اﻟﺸﺎﺵﺔ اﻟﺤﺎﻟﻴﺔ.
اﻟﻔﺼﻞ ٣ ﺕﺤﻤﻴﻞ اﻟﻮرق یﻤﻜﻦ ﺗﺤﻤﻴﻞ أﻧﻮاع وأﺡﺠﺎم اﻟﻮرق اﻟﻤﺨﺘﻠﻔﺔ ﻓﻲ ﺟﻬﺎز ,HP Photosmartﺏﻤﺎ ﻓﻲ ذﻟﻚ ورق ﺏﺤﺠﻢ letterأو ,A4ورق اﻟﺼﻮر ,أوراق ﺵﻔﺎﻓﺔ وأﻇﺮف .ﻟﻠﻤﺰیﺪ ﻣﻦ اﻟﻤﻌﻠﻮﻣﺎت ،راﺟﻊ اﻟﺘﻌﻠﻴﻤﺎت اﻹﻟﻜﺘﺮوﻧﻴﺔ. ﻋﺮﺑﻲ ﻟﺘﺤﻤﻴﻞ ورق ﺑﺤﺠﻢ آﺎﻡﻞ .١ارﻓﻊ درج اﻹﺥﺮاج. ﺕﻠﻤﻴﺢ :ﻗﻢ ﺏﺎﻟﻀﺮب ﻋﻠﻰ ﺡﺰﻣﺔ اﻟﻮرق ﻋﻠﻰ ﺳﻄﺢ ﻣﺴﺘﻮ ﻟﻤﺤﺎذاة اﻟﺤﻮاف .ﺗﺄآﺪ ﻣﻦ ﺗﻄﺎﺏﻖ ﺡﺠﻢ وﻧﻮع ﺟﻤﻴﻊ اﻟﻮرﻗﺎت اﻟﻤﻮﺟﻮدة ﻓﻲ اﻟﺮزﻣﺔ .ﺗﺄآﺪ ﻣﻦ ﺥﻠﻮهﺎ ﻣﻦ اﻟﺘﺸﻘﻘﺎت واﻷﺗﺮﺏﺔ واﻟﺘﺠﻌﺪات واﻟﺤﺎﻓﺎت اﻟﻤﻨﺤﻨﻴﺔ أو اﻟﻤﻨﺜﻨﻴﺔ. .
ﺕﻨﺒﻴﻪ :ﺗﺄآﺪ ﻣﻦ أن اﻟﻤﻨﺘﺞ ﻗﻴﺪ اﻟﺨﻤﻮل وﻣﻦ أﻧﻪ ﺻﺎﻣﺖ ﻋﻨﺪ ﺗﺤﻤﻴﻞ اﻟﻮرق ﻓﻲ درج اﻹدﺥﺎل اﻟﺮﺋﻴﺴﻲ .ﻓﻲ ﺡﺎﻟﺔ ﻗﻴﺎم اﻟﻤﻨﺘﺞ ﺏﺼﻴﺎﻧﺔ ﺥﺮﻃﻮﺵﺎت اﻟﺤﺒﺮ أو ﺏﺘﻨﻔﻴﺬ أي ﻣﻬﻤﺔ ,ﻓﻘﺪ ﻻ یﻜﻮن ﺡﺎﺟﺰ اﻟﻮرق ﻓﻲ ﻣﻮﺿﻌﻪ داﺥﻞ اﻟﺠﻬﺎز. ﻓﺈﻧﻚ ﻗﺪ ﺗﺪﻓﻊ اﻟﻮرق إﻟﻰ ﺁﺥﺮ ﻣﺪى ﻟﻪ ,ﻣﻤﺎ یﺆدي إﻟﻰ ﺥﺮوج ﺻﻔﺤﺎت ﻓﺎرﻏﺔ ﻣﻦ اﻟﺠﻬﺎز . ﻻ ﻣﻊ ﺗﻮﺟﻴﻪ اﻟﻮﺟﻪ ﺕﻠﻤﻴﺢ :إذا آﻨﺖ ﺗﺴﺘﺨﺪم ورق ﻋﻠﻴﻪ ﻋﻨﻮان اﻟﺸﺮآﺔ ,ﻓﺄدﺥﻞ اﻟﺠﺰء اﻟﻌﻠﻮي ﻣﻦ اﻟﺼﻔﺤﺔ أو ً اﻟﻤﺨﺼﺺ ﻟﻠﻄﺒﺎﻋﺔ إﻟﻰ اﻷﺳﻔﻞ. .٤ﻗﻢ ﺏﺘﺤﺮیﻚ دﻟﻴﻞ ﻋﺮض اﻟﻮرق ﻟﻠﺪاﺥﻞ ﺡﺘﻰ یﺘﻮﻗﻒ ﻋﻨﺪ ﺡﺎﻓﺔ اﻟﻮرق.
اﻟﻔﺼﻞ ٣ .٣ﻗﻢ ﺏﺈدﺥﺎل رزﻣﺔ اﻟﻮرق إﻟﻰ درج اﻟﺼﻮر ﻣﻊ ﺗﻮﺟﻴﻪ اﻟﺤﺎﻓﺔ اﻟﻘﺼﻴﺮة ﻟﻸﻣﺎم واﻟﻮﺟﻪ اﻟﻤﺨﺼﺺ ﻟﻠﻄﺒﺎﻋﺔ إﻟﻰ اﻷﺳﻔﻞ .ﻗﻢ ﺏﺈﻣﺎﻟﺔ رزﻣﺔ ورق اﻟﺼﻮر ﻟﻸﻣﺎم ﺡﺘﻰ ﺗﺘﻮﻗﻒ. إذا آﺎن ورق اﻟﺼﻮر اﻟﺬي ﺗﺴﺘﺨﺪﻣﻪ ﺏﻪ ﻋﻼﻣﺎت ﻣﺜﻘﺒﺔ ,ﻓﻘﻢ ﺏﺘﺤﻤﻴﻞ ورق اﻟﺼﻮر ﺏﺤﻴﺚ ﺗﻜﻮن اﻟﻌﻼﻣﺎت اﻟﻤﺜﻘﺒﺔ ﻓﻲ اﻟﺠﻬﺔ اﻟﻘﺮیﺒﺔ ﻣﻨﻚ. .٤ﻗﻢ ﺏﺘﺤﺮیﻚ دﻟﻴﻞ ﻋﺮض اﻟﻮرق ﻟﻠﺪاﺥﻞ ﺡﺘﻰ یﺘﻮﻗﻒ ﻋﻨﺪ ﺡﺎﻓﺔ اﻟﻮرق. ﻻ ﺗﻘﻢ ﺏﺰیﺎدة ﺗﺤﻤﻴﻞ درج اﻟﺼﻮر ,ﻋﻠﻴﻚ اﻟﺘﺄآﺪ ﻣﻦ أن رزﻣﺔ ورق اﻟﺼﻮر یﻤﻜﻦ ﺗﺜﺒﻴﺘﻬﺎ داﺥﻞ ﺡﺎویﺔ اﻟﺼﻮر وأن ارﺗﻔﺎﻋﻬﺎ ﻻ یﺰیﺪ ﻋﻠﻰ أﻋﻠﻰ ارﺗﻔﺎع ﻟﺪﻟﻴﻞ ﻋﺮض اﻟﻮرق.
ﺕﺠﻨﺐ اﻧﺤﺸﺎر اﻟﻮرق ﻟﻠﻤﺴﺎﻋﺪة ﻓﻲ ﺗﺠﻨﺐ اﻧﺤﺸﺎرات اﻟﻮرق ،اﺗﺒﻊ اﻟﺘﻮﺟﻴﻬﺎت اﻟﺘﺎﻟﻴﺔ. ﻋﺮﺑﻲ • • • • • • • • أﺥﺮج اﻟﻮرق اﻟﻤﻄﺒﻮع ﻣﻦ درج اﻹﺥﺮاج ﺏﺼﻮرة ﻣﺘﻜﺮرة. ﻣﺴﺘﻮ ﻓﻲ آﻴﺲ یﻤﻜﻦ إﻋﺎدة إﺡﻜﺎم ٍ اﻣﻨﻊ ﺗﺠﻌﺪ ورق اﻟﺼﻮر أو ﺙﻨﻴﻪ ﺏﺘﺨﺰیﻦ ﺟﻤﻴﻊ ورق اﻟﺼﻮر ﻏﻴﺮ اﻟﻤﺴﺘﺨﺪم ﺏﺸﻜﻞ إﻏﻼﻗﻪ. ﻣﺴﺘﻮ وأن اﻟﺤﻮاف ﻟﻢ یﺘﻢ ﺙﻨﻴﻬﺎ أو ﺗﻤﺰیﻘﻬﺎ. ٍ ﺗﺄآﺪ ﻣﻦ أن اﻷوراق اﻟﺘﻲ ﺗﻢ ﺗﺤﻤﻴﻠﻬﺎ ﻓﻲ درج اﻹدﺥﺎل ﻓﻲ وﺿﻊ ﻋﻨﺪ ﻃﺒﺎﻋﺔ اﻟﻤﻠﺼﻘﺎت ,ﺗﺄآﺪ ﻣﻦ أﻧﻪ ﻻ یﺠﺎوز ﻋﻤﺮ أوراق اﻟﻤﻠﺼﻘﺎت اﻟﺴﻨﺘﻴﻦ .
ﻋﺮﺑﻲ اﻟﻔﺼﻞ ٣ ١ Memory Stick, Memory Stick Pro, Memory Stick Select, Memory Stick Magic Gate, Memory Stick Duoأو ) Duo Proاﻟﻤﺤﻮل اﺥﺘﻴﺎري( ,أو ) Memory Stick Microیﺘﻄﻠﺐ ﻣﺤﻮل( ٢ ) MultiMedia Card (MMCو MMC Plusو Secure MultiMedia Cardو ;RS-MMC) MMC Mobile یﻄﻠﺐ ﻣﺤﻮل( و ) Secure Digital (SDو) Secure Digital Miniیﺘﻄﻠﺐ ﻣﺤﻮل( وSecure Digital High Capacity ﻻ( او xD-Picture card ) (SDHCو) TransFlash MicroSD Cardیﻄﻠﺐ ﻣﺤﻮ ً ٣ (CF) CompactFlashاﻟﻨﻮع
ﻡﺴﺢ اﻟﺼﻮرة ﺿﻮﺋﻴًﺎ یﻤﻜﻨﻚ ﺏﺪء اﻟﻤﺴﺢ اﻟﻀﻮﺋﻲ ﻣﻦ ﺟﻬﺎز اﻟﻜﻤﺒﻴﻮﺗﺮ أو ﻣﻦ ﻟﻮﺡﺔ اﻟﺘﺤﻜﻢ اﻟﺨﺎﺻﺔ ﺏﺠﻬﺎز .HP Photosmartیﻮﺿﺢ هﺬا اﻟﻘﺴﻢ ﻃﺮیﻘﺔ اﻟﻤﺴﺢ اﻟﻀﻮﺋﻲ ﻣﻦ ﻟﻮﺡﺔ اﻟﺘﺤﻜﻢ ﻟﺠﻬﺎز HP Photosmartﻓﻘﻂ. أیﻀﺎ اﺳﺘﺨﺪام اﻟﺒﺮﻧﺎﻣﺞ اﻟﺬي ﻗﻤﺖ ﺏﺘﺜﺒﻴﺘﻪ ﻣﻊ HP Photosmartﻟﻤﺴﺢ اﻟﺼﻮر .ﻣﻦ ﺥﻼل اﺳﺘﺨﺪام ﻡﻼﺡﻈﺔ یﻤﻜﻨﻚ ً هﺬا اﻟﺒﺮﻧﺎﻣﺞ ,یﻤﻜﻦ ﺗﺤﺮیﺮ ﺻﻮرة ﻣﻤﺴﻮﺡﺔ ﺿﻮﺋﻴًﺎ وإﻧﺸﺎء ﻣﺸﺎریﻊ ﺥﺎﺻﺔ ﺏﺎﺳﺘﺨﺪام اﻟﺼﻮرة اﻟﻤﻤﺴﻮﺡﺔ ﺿﻮﺋﻴًﺎ. ﻹﺟﺮاء اﻟﻤﺴﺢ اﻟﻀﻮﺋﻲ إﻟﻰ اﻟﻜﻤﺒﻴﻮﺕﺮ .
اﻟﻔﺼﻞ ٣ ﻹرﺱﺎل ﻓﺎآﺲ أﺱﺎﺱﻲ ﻡﻦ ﺧﻼل ﻟﻮﺡﺔ اﻟﺘﺤﻜﻢ .١ﻗﻢ ﺏﺘﺤﻤﻴﻞ اﻟﻨُﺴﺦ اﻷﺻﻠﻴﺔ ,ﻣﻊ ﺗﻮﺟﻴﻪ اﻟﻮﺟﻪ اﻟﻤﺨﺼﺺ ﻟﻠﻄﺒﺎﻋﺔ إﻟﻰ اﻷﻋﻠﻰ ,ﻓﻲ درج اﻟﺘﻐﺬیﺔ اﻵﻟﻴﺔ ﻟﻠﻤﺴﺘﻨﺪات .ﻓﻲ ﺡﺎﻟﺔ أیﻀﺎ ﺗﺤﻤﻴﻞ اﻟﻨﺴﺨﺔ اﻷﺻﻠﻴﺔ ﻣﻊ ﺗﻮﺟﻴﻪ اﻟﻮﺟﻪ إرﺳﺎل ﻓﺎآﺲ ﻣﻦ ﺻﻔﺤﺔ واﺡﺪة ,ﻣﺜﻞ ﺻﻮرة ﻓﻮﺗﻮﻏﺮاﻓﻴﺔ ,ﻓﻴﻤﻜﻨﻚ ً اﻟﻤﺨﺼﺺ ﻟﻠﻄﺒﺎﻋﺔ إﻟﻰ اﻷﺳﻔﻞ ﻋﻠﻰ اﻟﺴﻄﺢ اﻟﺰﺟﺎﺟﻲ. ﻡﻼﺡﻈﺔ :ﻓﻲ ﺡﺎﻟﺔ إرﺳﺎل ﻓﺎآﺲ ﻣﻦ ﺻﻔﺤﺎت ﻣﺘﻌﺪدة ,ﻓﻴﺠﺐ ﻋﻠﻴﻚ ﺗﺤﻤﻴﻞ اﻟﻨُﺴﺦ اﻷﺻﻠﻴﺔ ﻓﻲ درج ﺗﻐﺬیﺔ اﻟﻤﺴﺘﻨﺪات .ﻻ ﺗﺘﻤﻜﻦ ﻣﻦ إرﺳﺎل ﻣﺴﺘﻨﺪ ﻣﻦ ﺻﻔﺤﺎت ﻣﺘﻌﺪدة ﻋﺒﺮ اﻟﻔﺎآﺲ ﻣﻦ ﺥﻼل اﻟﺴﻄﺢ اﻟﺰﺟﺎﺟﻲ. .
ﻋﺮﺑﻲ ﺗﻨﺘﻘﻞ ﻋﺮﺏﺔ اﻟﻄﺒﺎﻋﺔ إﻟﻰ وﺳﻂ اﻟﻤﻨﺘﺞ. ﻡﻼﺡﻈﺔ :اﻧﺘﻈﺮ ﺡﺘﻰ ﺗﺘﻮﻗﻒ ﺡﺮآﺔ ﻋﺮﺏﺔ اﻟﻄﺒﺎﻋﺔ ﻗﺒﻞ اﻟﻤﻮاﺻﻠﺔ. .٤اﺿﻐﻂ ﻋﻠﻰ اﻟﻠﺴﺎن اﻟﻤﻮﺟﻮد ﻓﻲ اﻟﺠﺰء اﻷﻣﺎﻣﻲ ﻣﻦ اﻟﺨﺮﻃﻮﺵﺔ ﻟﺘﺤﺮیﺮهﺎ ,ﺙﻢ أزﻟﻬﺎ ﻣﻦ ﻓﺘﺤﺘﻬﺎ. ﺕﻨﺒﻴﻪ :ﻻ ﺗﺮﻓﻊ ﻣﻘﺒﺾ اﻟﻤﺰﻻج اﻟﺬي ﻋﻠﻰ ﻋﺮﺏﺔ اﻟﻄﺒﺎﻋﺔ ﻹزاﻟﺔ اﻟﺨﺮﻃﻮﺵﺎت. .٥أزل اﻟﺨﺮﻃﻮﺵﺔ اﻟﺠﺪیﺪة ﻣﻦ ﻋﺒﻮﺗﻬﺎ ﺏﺴﺤﺐ اﻟﻠﺴﺎن اﻟﺒﺮﺗﻘﺎﻟﻲ اﻟﻠﻮن ﻟﻠﻮراء ﻣﻦ أﺟﻞ إزاﻟﺔ اﻟﺘﻐﻠﻴﻒ اﻟﺒﻼﺳﺘﻴﻜﻲ ﻣﻦ اﻟﺨﺮﻃﻮﺵﺔ. ﻡﻼﺡﻈﺔ :ﺗﺄآﺪ ﻣﻦ إزاﻟﺔ اﻟﻐﻼف اﻟﺒﻼﺳﺘﻴﻜﻲ ﻣﻦ اﻟﺨﺮﻃﻮﺵﺔ ﻗﺒﻞ ﺗﺮآﻴﺒﻬﺎ ﻓﻲ اﻟﻤﻨﺘﺞ وإﻻ ﻗﺪ ﺗﻔﺸﻞ اﻟﻄﺒﺎﻋﺔ.
اﻟﻔﺼﻞ ٣ .٧ﺏﺎﺳﺘﺨﺪام اﻟﺮﻣﻮز اﻟﻤﻠﻮﻧﺔ واﻟﻤﺸﻜّﻠﺔ ﻟﻤﺴﺎﻋﺪﺗﻚ ,ادﻓﻊ اﻟﺨﺮﻃﻮﺵﺔ ﻓﻲ اﻟﻔﺘﺤﺔ اﻟﻔﺎرﻏﺔ ﺡﺘﻰ ﺗﺴﺘﻘﺮ ﻓﻲ ﻓﺘﺤﺘﻬﺎ ﺏﺈﺡﻜﺎم. ﻋﺮﺑﻲ ﺕﻨﺒﻴﻪ :ﻻ ﺗﺮﻓﻊ ﻣﻘﺒﺾ اﻟﻤﺰﻻج اﻟﺬي ﻋﻠﻰ ﻋﺮﺏﺔ اﻟﻄﺒﺎﻋﺔ ﻟﺘﺜﺒﻴﺖ اﻟﺨﺮﻃﻮﺵﺎت .ﻗﺪ یﺆدي ذﻟﻚ إﻟﻰ وﺿﻊ ﻣﻨﺨﻔﻀﺎ ﻟﺘﺜﺒﻴﺖ اﻟﺨﺮﻃﻮﺵﺎت ً اﻟﺨﺮﻃﻮﺵﺎت ﺏﺸﻜﻞ ﻏﻴﺮ ﺻﺤﻴﺢ وإﻟﻰ ﻣﺸﺎآﻞ ﻓﻲ اﻟﻄﺒﺎﻋﺔ .ﻓﻌﻠﻰ اﻟﻤﺰﻻج أن یﺒﻘﻰ ﺏﺸﻜﻞ ﺻﺤﻴﺢ. ﺗﺄآﺪ ﻣﻦ إدﺥﺎل اﻟﺨﺮﻃﻮﺵﺔ إﻟﻰ اﻟﻔﺘﺤﺔ ذات ﻧﻔﺲ اﻟﺮﻣﺰ واﻟﻠﻮن ﻣﺜﻞ اﻟﺨﺮﻃﻮﺵﺔ اﻟﺘﻲ ﺗﻘﻮم ﺏﺘﺜﺒﻴﺘﻬﺎ. .٨آﺮر ﺥﻄﻮات 3إﻟﻰ 6ﻟﻜﻞ ﻣﻦ اﻟﺨﺮﻃﻮﺵﺎت اﻟﺘﻲ ﺗﻘﻮم ﺏﺎﺳﺘﺒﺪاﻟﻬﺎ. .
٤ ﺡﻞ اﻟﻤﺸﻜﻼت واﻟﺪﻋﻢ یﺤﺘﻮي هﺬا اﻟﻔﺼﻞ ﻋﻠﻰ ﻣﻌﻠﻮﻣﺎت ﺡﻞ اﻟﻤﺸﻜﻼت ﺏﺎﻟﻨﺴﺒﺔ ﻟﺠﻬﺎز .HP Photosmartﺗﺘﻮﻓﺮ ﻣﻌﻠﻮﻣﺎت ﻣﺤﺪدة ﺡﻮل ﻗﻀﺎیﺎ اﻟﺘﺜﺒﻴﺖ واﻟﺘﻜﻮیﻦ وﺏﻌﺾ ﻣﻮاﺿﻴﻊ اﻟﺘﺸﻐﻴﻞ .ﻟﻠﻤﺰیﺪ ﻣﻦ اﻟﻤﻌﻠﻮﻣﺎت ﺡﻮل ﺡﻞ اﻟﻤﺸﻜﻼت ،راﺟﻊ اﻟﺘﻌﻠﻴﻤﺎت اﻹﻟﻜﺘﺮوﻧﻴﺔ ﻋﻠﻰ اﻟﺸﺎﺵﺔ اﻟﻤﺰودة ﺏﺎﻟﺒﺮﻧﺎﻣﺞ اﻟﺨﺎص ﺏﻚ. ﺗﺤﺪث اﻟﻜﺜﻴﺮ ﻣﻦ اﻟﻘﻀﺎیﺎ ﻋﻨﺪﻣﺎ یﺘﻢ ﺗﻮﺻﻴﻞ HP Photosmartﺏﺎﻟﻜﻤﺒﻴﻮﺗﺮ ﺏﺎﺳﺘﺨﺪام آﺎﺏﻞ USBﻗﺒﻞ أن یﺘﻢ ﺗﺜﺒﻴﺖ ﺏﺮﻧﺎﻣﺞ HP Photosmartﻋﻠﻰ اﻟﻜﻤﺒﻴﻮﺗﺮ .
اﻟﻔﺼﻞ ٤ ﻻ ﻳﻤﻜﻦ ﺕﺸﻐﻴﻞ اﻟﻤﻨﺘﺞ ﺡﺎول اﻟﺤﻠﻮل اﻟﺘﺎﻟﻴﺔ إذا ﻟﻢ ﺗﺼﺪر أي إﺵﺎرات ﺿﻮﺋﻴﺔ أو ﺿﻮﺿﺎء أو ﺡﺮآﺔ ﻣﻦ اﻟﻤﻨﺘﺞ ﻋﻨﺪﻣﺎ ﺗﻘﻮم ﺏﺘﺸﻐﻴﻠﻪ. اﻟﺤﻞ ﺏﻜﻞ ﻣﻦ اﻟﻤﻨﺘﺞ وﻣﺤﻮل اﻟﻄﺎﻗﺔ .ﻗﻢ ﺏﺘﻮﺻﻴﻞ ﺳﻠﻚ اﻟﻄﺎﻗﺔ ﺏﻤﺄﺥﺬ ﻃﺎﻗﺔ ,أو ﺏﺠﻬﺎز ﺡﻤﺎیﺔ ﻣﻦ ﺗﺄآﺪ ﻣﻦ ﺗﻮﺻﻴﻞ ﺳﻠﻚ اﻟﻄﺎﻗﺔ ﺏﺈﺡﻜﺎم ٍ • ارﺗﻔﺎع اﻟﺘﻴﺎر اﻟﻤﻔﺎﺟﺊ أو ﺏﻘﻄﺎع آﻬﺮﺏﺎء .ﺗﺄآﺪ ﻣﻦ إﺿﺎءة اﻟﻤﺼﺒﺎح اﻟﻤﻮﺟﻮد ﻋﻠﻰ اﻟﻤﺤﻮل. • إذا آﻨﺖ ﺗﺴﺘﺨﺪم ﻗﻄﺎع آﻬﺮﺏﺎء ،ﻓﺘﺄآﺪ ﻣﻦ أﻧﻪ ﻗﻴﺪ اﻟﺘﺸﻐﻴﻞ .أو ,ﺡﺎول ﺗﻮﺻﻴﻞ اﻟﻤﻨﺘﺞ ﻣﺒﺎﺵﺮ ًة ﺏﻤﺄﺥﺬ اﻟﻄﺎﻗﺔ. ﻼ ﺏﺎﻟﻄﺎﻗﺔ أم ﻻ .
ﺑﻌﺪ إﻋﺪاد اﻟﻤﻨﺘﺞ ،ﺕﻌﺬرت اﻟﻄﺒﺎﻋﺔ ﻡﻨﻪ ﻻ .إذا ﻟﻢ یﺆدي اﻟﺤﻞ اﻷول إﻟﻰ ﺡﻞ ﻗﻢ ﺏﺘﺠﺮیﺐ اﻟﺤﻠﻮل اﻟﺘﺎﻟﻴﺔ ﻟﺤﻞ اﻟﻤﺸﻜﻠﺔ .ﺗﻢ ﺳﺮد اﻟﺤﻠﻮل ﺏﺎﻟﺘﺮﺗﻴﺐ ﻣﻊ وﺿﻊ أآﺜﺮ اﻟﺤﻠﻮل اﻟﻤﻼﺋﻤﺔ أو ً اﻟﻤﺸﻜﻠﺔ ،ﻓﺎﺳﺘﻤﺮ ﻓﻲ ﺗﺠﺮیﺐ اﻟﺤﻠﻮل اﻟﻤﺘﺒﻘﻴﺔ ﺡﺘﻰ یﺘﻢ ﺡﻞ اﻟﻤﺸﻜﻠﺔ. اﻟﺤﻞ اﻷول :اﺿﻐﻂ ﻋﻠﻰ زر اﻟﺘﺸﻐﻴﻞ ﻟﺘﺸﻐﻴﻞ اﻟﻤﻨﺘﺞ اﻟﺤﻞ :اﻧﻈﺮ إﻟﻰ ﺵﺎﺵﺔ اﻟﻌﺮض ﺏﺎﻟﻤﻨﺘﺞ .إذا آﺎﻧﺖ ﺵﺎﺵﺔ اﻟﻌﺮض ﻓﺎرﻏﺔ وزر اﻟﺘﺸﻐﻴﻞ ﻏﻴﺮ ﻣﻀﺎء ،ﻓﻴﺸﻴﺮ ذﻟﻚ إﻟﻰ إیﻘﺎف ﺗﺸﻐﻴﻞ اﻟﻤﻨﺘﺞ .ﺗﺄآﺪ ﻣﻦ ﺗﻮﺻﻴﻞ ﺳﻠﻚ اﻟﻄﺎﻗﺔ ﺏﺈﺡﻜﺎم ﺏﺎﻟﻤﻨﺘﺞ وﺏﻤﻘﺒﺲ اﻟﻄﺎﻗﺔ .اﺿﻐﻂ ﻋﻠﻰ زر اﻟﺘﺸﻐﻴﻞ ﻟﺘﺸﻐﻴﻞ اﻟﻤﻨﺘﺞ.
اﻟﻔﺼﻞ ٤ ﻡﻼﺡﻈﺔ :ﻗﺪ یﻄﺎﻟﺒﻚ اﻻﺥﺘﺒﺎر اﻟﺘﺸﺨﻴﺼﻲ أن ﺗﻘﻮم ﺏﺘﻮﺻﻴﻞ آﺎﺏﻞ USBﺏﻴﻦ اﻟﻤﻨﺘﺞ واﻟﻜﻤﺒﻴﻮﺗﺮ .ﺿﻊ اﻟﻤﻨﺘﺞ ﺏﺎﻟﻘﺮب ﻣﻦ اﻟﻜﻤﺒﻴﻮﺗﺮ واﺗﺮك آﺎﺏﻞ USBﻓﻲ ﻣﺘﻨﺎوﻟﻚ اﻟﻔﻮري. ﻟﺘﺸﻐﻴﻞ أداة ) Network Diagnosticﺕﺸﺨﻴﺺ اﻟﺸﺒﻜﺔ( ▲ ﻓﻲ ) Solution Centerﻣﺮآﺰ اﻟﺤﻠﻮل( ,اﻧﻘﺮ ﻓﻮق ) Settingsإﻋﺪادات( ,اﻗﻨﺮ ﻓﻮق ) Other Settingsإﻋﺪادات أﺧﺮى( ,ﺙﻢ اﻧﻘﺮ ﻓﻮق ) Network Toolboxﺻﻨﺪوق أدوات اﻟﺸﺒﻜﺔ( .ﻓﻲ ﻋﻼﻣﺔ اﻟﺘﺒﻮیﺐ ) Utilitiesأدوات ﻡﺴﺎﻋﺪة(, اﻧﻘﺮ ﻓﻮق ) Run Network Diagnosticsﺕﺸﻐﻴﻞ ﺕﺸﺨﻴﺺ اﻟﺸﺒﻜﺔ(.
ﻣﻔﺘﻮﺡﺎ ﻣﺘﺎﺏﻌًﺎ إﻟﻰ اﻟﺨﻄﻮة اﻟﻘﺎدﻣﺔ. ً اﺗﺮك ﻣﺮﺏﻊ اﻟﺤﻮار اﻟﺨﺎص ﺏﺎﻟﺸﺒﻜﺔ ب .ﻗﻢ ﺏﻔﺼﻞ ﺳﻠﻚ اﻟﻄﺎﻗﺔ ﻋﻦ اﻟﻤﻮﺟﻪ اﻟﻼﺳﻠﻜﻲ .ﻣﻦ اﻟﻤﺘﻮﻗﻊ أن ﺗﺘﻐﻴﺮ ﺡﺎﻟﺔ اﺗﺼﺎل اﻟﻜﻤﺒﻴﻮﺗﺮ إﻟﻰ ) Not Connectedﻏﻴﺮ ﻡﺘﺼﻞ(. ج .أﻋﺪ ﺗﻮﺻﻴﻞ ﺳﻠﻚ اﻟﻄﺎﻗﺔ ﺏﺎﻟﻤﻮﺟﻪ اﻟﻼﺳﻠﻜﻲ .ﻣﻦ اﻟﻤﺘﻮﻗﻊ أن ﺗﺘﻐﻴﺮ ﺡﺎﻟﺔ اﺗﺼﺎل اﻟﻜﻤﺒﻴﻮﺗﺮ إﻟﻰ ) Connectedﻡﺘﺼﻞ(. إذا ﺗﻌﺬر ﻋﻠﻴﻚ ﺗﻮﺻﻴﻞ اﻟﻜﻤﺒﻴﻮﺗﺮ ﺏﺎﻟﺸﺒﻜﺔ ,ﻓﺎﺗﺼﻞ ﺏﺎﻟﺬي أﻋﺪ اﻟﺸﺒﻜﺔ أو ﺏﻤﺼﻨﻊ اﻟﻤﻮﺟﻪ وذﻟﻚ ﻷﻧﻪ ﻗﺪ ﺗﻮاﺟﻪ ﻣﺸﻜﻠﺔ ﻓﻲ أﺟﻬﺰة اﻟﻤﻮﺟﻪ أو اﻟﻜﻤﺒﻴﻮﺗﺮ.
اﻟﻔﺼﻞ ٤ اﻟﺨﻄﻮة اﻟﺜﺎﻟﺜﺔ :اﻓﺤﺺ ﻡﺎ إذا ﺡﻈﺮ ﺑﺮﻧﺎﻡﺞ ﺟﺪار اﻟﺤﻤﺎﻳﺔ اﻻﺕﺼﺎل إذا ﺗﻌﺬر ﻋﻠﻴﻚ ﺗﺸﻐﻴﻞ اﻟﺼﻔﺤﺔ اﻟﺮﺋﻴﺴﻴﺔ ﻟـ HP Photosmart Premium Fax C309 seriesﻣﻊ أﻧﻚ ﺗﺘﺄآﺪ ﻣﻦ أﻧﻪ ﻟﻠﻜﻤﺒﻴﻮﺗﺮ وﻟـ HP Photosmart Premium Fax C309 seriesاﺗﺼﺎل ﻧﺸﻂ ﺏﺬات اﻟﺸﺒﻜﺔ ,ﻓﻘﺪ یﺤﻈﺮ ﺏﺮﻧﺎﻣﺞ اﻟﺤﻤﺎیﺔ اﻟﺨﺎص ﺏﺠﺪار اﻟﺤﻤﺎیﺔ اﻻﺗﺼﺎل .أوﻗﻒ ﺗﺸﻐﻴﻞ أي ﺏﺮﻧﺎﻣﺞ ﺟﺪار ﺡﻤﺎیﺔ یﺸﺘﻐﻞ ﻓﻲ اﻟﻜﻤﺒﻴﻮﺗﺮ ﺙﻢ ﺡﺎول اﻟﻮﺻﻮل إﻟﻰ اﻟﺼﻔﺤﺔ اﻟﺮﺋﻴﺴﻴﺔ ﻟـ HP Photosmart Premium Fax C309 seriesﺙﺎﻧﻴ ًﺔ .
• • • • • ﻻ یﺴﺘﻄﻴﻊ اﻟﻤﻨﺘﺞ إرﺳﺎل ﻓﺎآﺴﺎت ،وﻟﻜﻨﻪ یﺴﺘﻄﻴﻊ اﺳﺘﻘﺒﺎﻟﻬﺎ یﺘﻌﺮض اﻟﻤﻨﺘﺞ إﻟﻰ ﻣﺸﺎآﻞ أﺙﻨﺎء إرﺳﺎل ﻓﺎآﺲ یﺪویًﺎ یﺘﻢ ﺗﺴﺠﻴﻞ ﻧﻐﻤﺎت اﻟﻔﺎآﺲ ﻓﻲ ﺁﻟﺔ اﻟﺮد ﻋﻠﻰ اﻟﻤﻜﺎﻟﻤﺎت ﻻ یﺴﺘﻄﻴﻊ اﻟﻤﻨﺘﺞ اﺳﺘﻘﺒﺎل ﻓﺎآﺴﺎت ،وﻟﻜﻨﻪ یﺴﺘﻄﻴﻊ إرﺳﺎﻟﻬﺎ ﻓﺸﻞ اﺥﺘﺒﺎر اﻟﻔﺎآﺲ ﻳﺘﻌﺮض اﻟﻤﻨﺘﺞ إﻟﻰ ﻡﺸﺎآﻞ ﻓﻲ إرﺱﺎل اﻟﻔﺎآﺴﺎت واﺱﺘﻘﺒﺎﻟﻬﺎ ﻋﺮﺑﻲ یﺤﻞ اﻟﺤﻞ اﻷول اﻟﻤﺸﻜﻠﺔ ,ﻓﺤﺎول ﻻ .إذا ﻟﻢ ّ ﺵﻴﻮﻋﺎ أو ً ً ﺡﺎول اﻟﻘﻴﺎم ﺏﺎﻟﺤﻠﻮل اﻟﺘﺎﻟﻴﺔ ﻟﺤﻞ اﻟﻤﺸﻜﻠﺔ .
اﻟﻔﺼﻞ ٤ اﻟﺤﻞ اﻟﺜﺎﻧﻲ :ﻗﻢ ﺑﺘﺸﻐﻴﻞ اﻟﻤﻨﺘﺞ اﻟﺤﻞ :اﻧﻈﺮ إﻟﻰ ﺵﺎﺵﺔ اﻟﻌﺮض ﻟﻠﻤﻨﺘﺞ .إذا آﺎﻧﺖ ﺵﺎﺵﺔ اﻟﻌﺮض ﻓﺎرﻏﺔ وآﺎن اﻟﻤﺼﺒﺎح اﻟﺘﺸﻐﻴﻞ ﻏﻴﺮ ﻣﻀﺎء ,ﻓﻴﺸﻴﺮ ذﻟﻚ إﻟﻰ إیﻘﺎف ﺗﺸﻐﻴﻞ اﻟﻤﻨﺘﺞ .ﺗﺄآﺪ ﻣﻦ ﺗﻮﺻﻴﻞ ﺳﻠﻚ اﻟﻄﺎﻗﺔ ﺏﺈﺡﻜﺎم ﺏﺎﻟﻤﻨﺘﺞ وﺏﻤﻘﺒﺲ اﻟﻄﺎﻗﺔ .اﺿﻐﻂ ﻋﻠﻰ زر اﻟﺘﺸﻐﻴﻞ ﻟﺘﺸﻐﻴﻞ اﻟﻤﻨﺘﺞ. اﻟﺴﺒﺐ :ﺗﻢ إیﻘﺎف ﺗﺸﻐﻴﻞ اﻟﻤﻨﺘﺞ. ﻓﻲ ﺡﺎﻟﺔ اﺳﺘﻤﺮار اﻟﻤﺸﻜﻠﺔ ,ﺡﺎول اﻟﻘﻴﺎم ﺏﺎﻟﺤﻞ اﻟﻘﺎدم.
ﻟﻠﻤﺰیﺪ ﻣﻦ اﻟﻤﻌﻠﻮﻣﺎت ﺡﻮل إﻋﺪاد اﻟﻤﻨﺘﺞ ﻹرﺳﺎل اﻟﻔﺎآﺴﺎت واﺳﺘﻘﺒﺎﻟﻬﺎ ،راﺟﻊ اﻟﻮﺙﺎﺋﻖ اﻟﻤﻄﺒﻮﻋﺔ اﻟﻤﺰودة ﺏﺎﻟﻤﻨﺘﺞ. اﻟﺴﺒﺐ :ﺗﻢ اﺳﺘﺨﺪام ﺳﻠﻚ هﺎﺗﻒ ﻏﻴﺮ ﺻﺤﻴﺢ ﻟﺘﻮﺻﻴﻞ اﻟﻤﻨﺘﺞ أو ﻗﺪ ﺗﻢ ﺗﻮﺻﻴﻞ ﺳﻠﻚ اﻟﻬﺎﺗﻒ ﻓﻲ ﻣﻨﻔﺬ ﻏﻴﺮ ﺻﺤﻴﺢ. ﻓﻲ ﺡﺎﻟﺔ اﺳﺘﻤﺮار اﻟﻤﺸﻜﻠﺔ ,ﺡﺎول اﻟﻘﻴﺎم ﺏﺎﻟﺤﻞ اﻟﻘﺎدم.
اﻟﻔﺼﻞ ٤ ﻓﻲ ﺡﺎﻟﺔ اﺳﺘﻤﺮار اﻟﻤﺸﻜﻠﺔ ,ﺡﺎول اﻟﻘﻴﺎم ﺏﺎﻟﺤﻞ اﻟﻘﺎدم. اﻟﺤﻞ اﻟﺴﺎﺑﻊ :اﻓﺤﺺ ﺧﻂ اﻟﻬﺎﺕﻒ ﺑﺤﺜًﺎ ﻋﻦ ﺿﺠﻴﺞ اﻟﺤﻞ :یﻤﻜﻨﻚ اﻟﺘﺤﻘﻖ ﻣﻦ ﺟﻮدة اﻟﺼﻮت ﻓﻲ ﺥﻂ اﻟﻬﺎﺗﻒ ﻋﻦ ﻃﺮیﻖ ﺗﻮﺻﻴﻞ هﺎﺗﻒ ﻓﻲ ﻣﻘﺒﺲ اﻟﻬﺎﺗﻒ اﻟﻤﻮﺟﻮد ﺏﺎﻟﺤﺎﺋﻂ واﻟﺘﺼﻨﺖ إﻟﻰ أي ﺗﺸﻮیﺶ ﻣﺘﻮاﺻﻞ أو أي ﺗﺸﻮیﺶ ﺁﺥﺮ .ﻋﻨﺪ ﺡﺪوث اﻟﻔﺸﻞ ﺏﺴﺒﺐ ﺗﺸﻮیﺶ ﻋﻠﻰ ﺥﻂ اﻟﻬﺎﺗﻒ ,راﺟﻊ اﻟﻤﺮﺳﻞ ﺏﺤﻴﺚ یﻘﻮم ﺏﺈﻋﺎدة إرﺳﺎل اﻟﻔﺎآﺲ .ﻗﺪ ﺗﺘﺤﺴﻦ اﻟﺠﻮدة ﻋﻨﺪ إﻋﺎدة اﻟﻤﺤﺎوﻟﺔ .ﻋﻨﺪ اﺳﺘﻤﺮار اﻟﻤﺸﻜﻠﺔ ,ﻗﻢ ﺏﺈیﻘﺎف ﺗﺸﻐﻴﻞ وﺿﻊ ﺕﺼﺤﻴﺢ اﻷﺧﻄﺎء ) (ECMوراﺟﻊ ﺵﺮآﺔ اﻟﻬﻮاﺗﻒ.
اﻟﺤﻞ اﻟﺤﺎدي ﻋﺸﺮ :ﻓﻲ ﺡﺎﻟﺔ اﺱﺘﺨﺪام ﺧﺪﻡﺔ ,DSLﺕﺄآﺪ ﻡﻦ ﺕﺄرﻳﺾ ﻡﻮدم DSLﺑﺸﻜﻞ ﺻﺤﻴﺢ ﺿﺠﻴﺠﺎ ﻋﻠﻰ ﺥﻂ اﻟﻬﺎﺗﻒ .ﺥﻄﻮط اﻟﻬﺎﺗﻒ ﻣﻊ ﺻﻮت ً ﻣﺆرﺿﺎ ﺏﺸﻜﻞ ﺻﺤﻴﺢ ،ﻓﻤﻦ اﻟﻤﻤﻜﻦ أﻧﻪ یﺴﺒﺐ ً اﻟﺤﻞ :إذا ﻟﻢ یﻜﻦ ﻣﻮدم DSL ﺏﺠﻮدة ﺿﻌﻴﻔﺔ )ﺏﻬﺎ ﺿﻮﺿﺎء( ﻗﺪ ﺗﺴﺒﺐ ﻣﺸﻜﻼت ﻓﻲ إرﺳﺎل اﻟﻔﺎآﺴﺎت واﺳﺘﻘﺒﺎﻟﻬﺎ .یﻤﻜﻨﻚ اﻟﺘﺤﻘﻖ ﻣﻦ ﺟﻮدة اﻟﺼﻮت ﻓﻲ ﺥﻂ اﻟﻬﺎﺗﻒ ﻋﻦ ﻃﺮیﻖ ﺗﻮﺻﻴﻞ هﺎﺗﻒ ﻓﻲ ﻣﻘﺒﺲ اﻟﻬﺎﺗﻒ اﻟﻤﻮﺟﻮد ﺏﺎﻟﺤﺎﺋﻂ واﻟﺘﺼﻨﺖ إﻟﻰ أي ﺗﺸﻮیﺶ ﻣﺘﻮاﺻﻞ أو أي ﺗﺸﻮیﺶ ﺁﺥﺮ. ﺿﺠﻴﺠﺎ ,ﻓﻘﻢ ﺏﺈیﻘﺎف ﺗﺸﻐﻴﻞ ﻣﻮدم .
اﻟﻔﺼﻞ ٤ .٢ .٣ .٤ اﺿﻐﻂ ﻋﻠﻰ زر اﻟﺴﻬﻢ ﻷﺳﻔﻞ ﻟﺘﻤﻴﻴﺰ إﻋﺪاد ﻓﺎآﺲ ﻡﺘﻘﺪم ،ﺙﻢ اﺿﻐﻂ ﻋﻠﻰ .OK اﺿﻐﻂ ﻋﻠﻰ زر اﻟﺴﻬﻢ ﻷﺳﻔﻞ ﻟﺘﻤﻴﻴﺰ ﺱﺮﻋﺔ اﻟﻔﺎآﺲ ،ﺙﻢ اﺿﻐﻂ ﻋﻠﻰ .OK اﺿﻐﻂ زر اﻟﺴﻬﻢ ﻷﺳﻔﻞ ﻟﺘﺤﺪیﺪ إﺡﺪى اﻹﻋﺪادات اﻟﺘﺎﻟﻴﺔ ,ﺙﻢ اﺿﻐﻂ ﻋﻠﻰ .OK إﻋﺪاد ﺱﺮﻋﺔ اﻟﻔﺎآﺲ ﺱﺮﻋﺔ اﻟﻔﺎآﺲ ﺱﺮﻳﻌﺔ )(33600 33600) v.34ﺏﺎود( ﻡﺘﻮﺱﻄﺔ )(14400 14400) v.17ﺏﺎود( ﺑﻄﻴﺌﺔ )(9600 9600) v.29ﺏﺎود( ﻋﺮﺑﻲ اﻟﺴﺒﺐ :ﺗﻢ ﺿﺒﻂ اﻹﻋﺪاد اﻟﺨﺎص ﺏـ ﺱﺮﻋﺔ اﻟﻔﺎآﺲ ﺏﺼﻮرة ﺳﺮیﻌﺔ ﺟﺪًا.
اﻟﺴﺒﺐ :ﺗﻢ ﺿﺒﻂ اﻟﻤﻨﺘﺞ ﺏﺸﻜﻞ ﻏﻴﺮ ﺻﺤﻴﺢ ﻟﻠﻘﻴﺎم ﺏﺈرﺳﺎل اﻟﻔﺎآﺴﺎت واﺳﺘﻘﺒﺎﻟﻬﺎ. ﻓﻲ ﺡﺎﻟﺔ اﺳﺘﻤﺮار اﻟﻤﺸﻜﻠﺔ ,ﺡﺎول اﻟﻘﻴﺎم ﺏﺎﻟﺤﻞ اﻟﻘﺎدم. اﻟﺤﻞ اﻟﺜﺎﻧﻲ :اﻓﺤﺺ رﻗﻢ اﻟﻔﺎآﺲ اﻟﺤﻞ :ﺗﺄآﺪ ﻣﻦ ﺻﺤﺔ إدﺥﺎل رﻗﻢ اﻟﻔﺎآﺲ ﺏﺎﻟﺘﻨﺴﻴﻖ اﻟﺼﺤﻴﺢ .ﻋﻠﻰ ﺳﺒﻴﻞ اﻟﻤﺜﺎل ،ﻗﺪ ﺗﺤﺘﺎج إﻟﻰ ﻃﻠﺐ اﻟﺒﺎدﺋﺔ " ،"9وﻓﻘًﺎ ﻟﻨﻈﺎم اﻟﻬﺎﺗﻒ اﻟﺨﺎص ﺏﻚ. إذا آﺎن ﺥﻂ اﻟﻬﺎﺗﻒ ﺏﻪ ﻧﻈﺎم ,PBXﻓﺘﺄآﺪ ﻣﻦ أﻧﻚ ﺗﻄﻠﺐ اﻟﺮﻗﻢ ﻣﻦ ﺥﻂ ﺥﺎرﺟﻲ ﻗﺒﻞ ﻃﻠﺐ رﻗﻢ اﻟﻔﺎآﺲ. ﺻﺤﻴﺤﺎ.
ﻋﺮﺑﻲ اﻟﻔﺼﻞ ٤ ١ ﻣﻘﺒﺲ اﻟﻬﺎﺗﻒ اﻟﻤﻮﺟﻮد ﺏﺎﻟﺤﺎﺋﻂ ٢ اﺳﺘﺨﺪام ﺳﻠﻚ اﻟﻬﺎﺗﻒ اﻟﻤﺰود ﺏﺎﻟﻌﻠﺒﺔ ﻣﻊ اﻟﻤﻨﺘﺞ ٣ اﻟﻬﺎﺗﻒ ﻟﻠﻤﺰیﺪ ﻣﻦ اﻟﻤﻌﻠﻮﻣﺎت ﺡﻮل إﻋﺪاد اﻟﻤﻨﺘﺞ ﻣﻊ هﺎﺗﻔﻚ ،راﺟﻊ اﻟﻮﺙﺎﺋﻖ اﻟﻤﻄﺒﻮﻋﺔ اﻟﻤﺰودة ﺏﺎﻟﻤﻨﺘﺞ. اﻟﺴﺒﺐ :اﻟﻬﺎﺗﻒ اﻟﻤﺴﺘﺨﺪم ﻹﻧﺸﺎء ﻣﻜﺎﻟﻤﺔ اﻟﻔﺎآﺲ ﻏﻴﺮ ﻣﺘﺼﻞ ﻣﺒﺎﺵﺮة ﺏﺎﻟﻤﻨﺘﺞ أو أﻧﻪ ﻣﺘﺼﻞ ﺏﺼﻮرة ﻏﻴﺮ ﺻﺤﻴﺤﺔ. ﻓﻲ ﺡﺎﻟﺔ اﺳﺘﻤﺮار اﻟﻤﺸﻜﻠﺔ ,ﺡﺎول اﻟﻘﻴﺎم ﺏﺎﻟﺤﻞ اﻟﻘﺎدم.
إﻋﺪاد ﺱﺮﻋﺔ اﻟﻔﺎآﺲ ﺱﺮﻋﺔ اﻟﻔﺎآﺲ ﻡﺘﻮﺱﻄﺔ )(14400 14400) v.17ﺏﺎود( ﺑﻄﻴﺌﺔ )(9600 اﻟﺴﺒﺐ: 9600) v.29ﺏﺎود( رﺏﻤﺎ ﺗﻢ إﻋﺪاد ﺱﺮﻋﺔ اﻟﻔﺎآﺲ ﺏﺼﻮرة ﺳﺮیﻌﺔ ﺟﺪًا. ﻳﺘﻢ ﺕﺴﺠﻴﻞ ﻧﻐﻤﺎت اﻟﻔﺎآﺲ ﻓﻲ ﺁﻟﺔ اﻟﺮد ﻋﻠﻰ اﻟﻤﻜﺎﻟﻤﺎت یﺤﻞ اﻟﺤﻞ اﻷول اﻟﻤﺸﻜﻠﺔ ,ﻓﺤﺎول ﻻ .إذا ﻟﻢ ّ ﺵﻴﻮﻋﺎ أو ً ً ﺡﺎول اﻟﻘﻴﺎم ﺏﺎﻟﺤﻠﻮل اﻟﺘﺎﻟﻴﺔ ﻟﺤﻞ اﻟﻤﺸﻜﻠﺔ .یﺘﻢ ﺳﺮد اﻟﺤﻠﻮل ﺏﺘﺮﺗﻴﺐ ,ﻓﻴﻪ یﻮﺟﺪ اﻟﺤﻞ اﻷآﺜﺮ اﻟﻘﻴﺎم ﺏﺎﻟﺤﻠﻮل اﻟﺒﺎﻗﻴﺔ ﺡﺘﻰ ﺡﻞ اﻟﻤﺸﻜﻠﺔ.
اﻟﻔﺼﻞ ٤ ﻗﻢ ﺏﻀﺒﻂ ﺁﻟﺔ اﻟﺮد ﻋﻠﻰ اﻟﻤﻜﺎﻟﻤﺎت إﻟﻰ ﻋﺪد ﻣﻨﺨﻔﺾ ﻟﻠﺮﻧﺎت وﺏﻀﺒﻂ اﻟﻤﻨﺘﺞ ﺏﺤﻴﺚ یﺮد ﻋﻠﻰ اﻟﻤﻜﺎﻟﻤﺎت ﺏﻌﺪ ﻋﺪد اﻟﺮﻧﺎت اﻷﻗﺼﻰ اﻟﻤﻌﺘﻤﺪ. )یﺨﺘﻠﻒ اﻟﺤﺪ اﻷﻗﺼﻰ ﻟﻌﺪد اﻟﺮﻧﺎت ﺏﺎﺥﺘﻼف اﻟﺒﻠﺪ/اﻟﻤﻨﻄﻘﺔ( .ﻓﻲ هﺬا اﻹﻋﺪاد ،ﺳﺘﻘﻮم ﺁﻟﺔ اﻟﺮد ﻋﻠﻰ اﻟﻤﻜﺎﻟﻤﺎت ﺏﺎﻟﺮد ﻋﻠﻰ اﻟﻤﻜﺎﻟﻤﺔ ویﻘﻮم اﻟﻤﻨﺘﺞ ﺏﻤﺮاﻗﺒﺔ اﻟﺨﻂ .إذا اآﺘﺸﻒ اﻟﻤﻨﺘﺞ ﻧﻐﻤﺎت اﻟﻔﺎآﺲ ,ﻓﻴﻘﻮم اﻟﻤﻨﺘﺞ ﺏﺎﺳﺘﻘﺒﺎل اﻟﻔﺎآﺲ .إذا آﺎﻧﺖ اﻟﻤﻜﺎﻟﻤﺔ ﻣﻜﺎﻟﻤﺔ ﺻﻮﺗﻴﺔ ،ﻓﺘﻘﻮم ﺁﻟﺔ اﻟﺮد ﻋﻠﻰ اﻟﻤﻜﺎﻟﻤﺎت ﺏﺘﺴﺠﻴﻞ اﻟﺮﺳﺎﻟﺔ اﻟﻮاردة.
.٥ﻗﻢ ﺏﻤﺮاﺟﻌﺔ اﻟﺘﻘﺮیﺮ. إذا اﻧﺘﻬﻰ اﻻﺥﺘﺒﺎر وﻣﺎ زﻟﺖ ﺗﻌﺎﻧﻲ ﻣﻦ ﻣﺸﺎآﻞ إرﺳﺎل واﺳﺘﻼم اﻟﻔﺎآﺲ ،ﻓﺮاﺟﻊ إﻋﺪادات اﻟﻔﺎآﺲ اﻟﻮاردة ﻓﻲ اﻟﺘﻘﺮیﺮ ﻟﻠﺘﺤﻘﻖ • ﻣﻦ ﺻﺤﺔ هﺬﻩ اﻹﻋﺪادات .ﻣﻦ اﻟﻤﻤﻜﻦ أن یﺆدي وﺟﻮد إﻋﺪاد ﻓﺎرغ أو ﻏﻴﺮ ﺻﺤﻴﺢ إﻟﻰ ﻣﺸﺎآﻞ ﻓﻲ إرﺳﺎل أو اﺳﺘﻼم اﻟﻔﺎآﺲ. ﻓﻲ ﺡﺎﻟﺔ ﻓﺸﻞ اﻻﺥﺘﺒﺎر ،راﺟﻊ اﻟﺘﻘﺮیﺮ ﻟﻠﺤﺼﻮل ﻋﻠﻰ ﻣﺰی ٍﺪ ﻣﻦ اﻟﻤﻌﻠﻮﻣﺎت ﺡﻮل آﻴﻔﻴﺔ إﺻﻼح أي ﻣﺸﻜﻼت ﺗﻢ اآﺘﺸﺎﻓﻬﺎ. • .٦ﺏﻌﺪ اﻟﺤﺼﻮل ﻋﻠﻰ ﺗﻘﺮیﺮ اﻟﻔﺎآﺲ ﻣﻦ ﺟﻬﺎز ,HP Photosmartاﺿﻐﻂ ﻋﻠﻰ .OK إذا ﻟﺰم اﻷﻣﺮ ،ﻓﻘﻢ ﺏﺤﻞ أیﺔ ﻣﺸﻜﻼت اآﺘﺸﻔﺖ ،ﺙﻢ أﻋﺪ إﺟﺮاء اﻻﺥﺘﺒﺎر.
اﻟﻔﺼﻞ ٤ ﻓﻲ ﺡﺎﻟﺔ اﺳﺘﻤﺮار اﻟﻤﺸﻜﻠﺔ ,ﺡﺎول اﻟﻘﻴﺎم ﺏﺎﻟﺤﻞ اﻟﻘﺎدم.
اﻟﺤﻞ اﻟﺴﺎﺑﻊ :ﻓﻲ ﺡﺎﻟﺔ اﺱﺘﺨﺪام ﺧﺪﻡﺔ اﻟﺮﻧﻴﻦ اﻟﻤﻤﻴﺰ ,ﺕﺄآﺪ ﻡﻦ ﺕﻮاﻓﻖ إﻋﺪاد ﻧﻤﻂ اﻟﺮﻧﻴﻦ ﻟﻠﺮد ﻡﻊ ﻧﻤﻮذج اﻟﺮﻧﻴﻦ ﻟﻠﺮد اﻟﺨﺎص ﺑﺮﻗﻢ اﻟﻔﺎآﺲ اﻟﺤﻞ :ﻓﻲ ﺡﺎﻟﺔ اﺳﺘﺨﺪام ﻧﻤﻮذج رﻧﻴﻦ ﺥﺎص ﻟﺮﻗﻢ هﺎﺗﻒ اﻟﻔﺎآﺲ )ﺏﺎﺳﺘﺨﺪام ﺥﺪﻣﺔ اﻟﺮﻧﻴﻦ اﻟﻤﻤﻴﺰ ﻣﻦ ﻗﺒﻞ ﺵﺮآﺔ اﻟﻬﻮاﺗﻒ اﻟﺨﺎﺻﺔ ﺏﻚ(، ﻓﺘﺄآﺪ ﻣﻦ ﺗﻮاﻓﻖ إﻋﺪاد ﻧﻤﻂ اﻟﺮﻧﻴﻦ ﻟﻠﺮد اﻟﺨﺎص ﺏﺎﻟﻤﻨﺘﺞ ﻣﻊ ﺏﻌﻀﻬﻤﺎ اﻟﺒﻌﺾ .ﻋﻠﻰ ﺳﺒﻴﻞ اﻟﻤﺜﺎل ،إذا ﻗﺎﻣﺖ ﺵﺮآﺔ اﻟﻬﻮاﺗﻒ ﺏﺘﻌﻴﻴﻦ ﻧﻤﻮذج رﻧﻴﻦ ﻣﺰدوج ،ﻓﺘﺄآﺪ ﻣﻦ ﺗﺤﺪیﺪ ﻧﻐﻤﺎت رﻧﻴﻦ ﻡﺰدوﺟﺔ آﺈﻋﺪاد ﻧﻤﻂ اﻟﺮﻧﻴﻦ ﻟﻠﺮد.
ﻋﺪم ﺡﻈﺮ ﻋﺮﺏﺔ اﻟﻄﺒﺎﻋﺔ أو إﻋﺎﻗﺘﻬﺎ .ﻗﻢ ﺏﺈیﻘﺎف ﺗﺸﻐﻴﻞ اﻟﻤﻨﺘﺞ ,أزل أیﺔ ﻋﻨﺎﺻﺮ ﻗﺪ ﺗﺤﻈﺮ ﻋﺮﺏﺔ ﺥﺮﻃﻮﺵﺔ اﻟﻄﺒﺎﻋﺔ )ﺏﻤﺎ ﻓﻲ ذﻟﻚ • أیﺔ ﻣﻮاد ﺗﻐﻠﻴﻒ( ,ﺙﻢ ﻗﻢ ﺏﺘﺸﻐﻴﻞ اﻟﻤﻨﺘﺞ ﺙﺎﻧﻴ ًﺔ. ﻗﻢ ﺏﺤﻞ أیﺔ ﻣﺸﻜﻼت ﺗﻢ اﻟﻌﺜﻮر ﻋﻠﻴﻬﺎ .یﻘﻮم اﻟﻤﻨﺘﺞ ﺁﻟﻴًﺎ ﺏﺒﺪء ﻃﺒﺎﻋﺔ آﺎﻓﺔ اﻟﻔﺎآﺴﺎت ﻏﻴﺮ اﻟﻤﻄﺒﻮﻋﺔ ﻣﻦ اﻟﺬاآﺮة .ﻟﻤﺤﻮ اﻟﺬاآﺮة ،یﻤﻜﻨﻚ ً أیﻀﺎ ﺡﺬف اﻟﻔﺎآﺴﺎت اﻟﻤﺨﺰﻧﺔ ﻓﻲ اﻟﺬاآﺮة ﻋﻦ ﻃﺮیﻖ إیﻘﺎف ﺗﺸﻐﻴﻞ اﻟﻤﻨﺘﺞ. اﻟﺴﺒﺐ :ﻗﺪ اﻣﺘﻸت ذاآﺮة اﻟﻤﻨﺘﺞ. ﻓﻲ ﺡﺎﻟﺔ اﺳﺘﻤﺮار اﻟﻤﺸﻜﻠﺔ ,ﺡﺎول اﻟﻘﻴﺎم ﺏﺎﻟﺤﻞ اﻟﻘﺎدم.
ﻓﺸﻞ اﺧﺘﺒﺎر اﻟﻔﺎآﺲ إذا ﺡﺎوﻟﺖ ﺗﺸﻐﻴﻞ اﺥﺘﺒﺎر اﻟﻔﺎآﺲ ﻣﻦ ﺥﻼل اﻟﻜﻤﺒﻴﻮﺗﺮ وﻓﺸﻞ ﺗﺸﻐﻴﻞ هﺬا اﻻﺥﺘﺒﺎر ،ﻓﻘﺪ یﻜﻮن اﻟﻤﻨﺘﺞ ﻣﺸﻐﻮل ﻓﻲ ﺗﻨﻔﻴﺬ ﻣﻬﻤﺔ أﺥﺮى أو ﻗﻴﺪ ﺡﺎﻟﺔ ﺥﻄﺄ ﻓﻼ یﺘﻤﻜﻦ ﻣﻦ ﺗﺸﻐﻴﻞ اﺥﺘﺒﺎر اﻟﻔﺎآﺲ. ﻋﺮﺑﻲ ﻡﺎذا ﻳﺠﺐ ﻓﺤﺼﻪ ﺿﺒﻂ اﻟﻤﻨﺘﺞ ﺏﺸﻜﻞ ﺻﺤﻴﺢ وﺗﻮﺻﻴﻠﻪ ﺏﻤﺼﺪر اﻟﻄﺎﻗﺔ وﺗﻮﺻﻴﻠﻪ ﺏﺠﻬﺎز اﻟﻜﻤﺒﻴﻮﺗﺮ .ﻟﻠﻤﺰیﺪ ﻣﻦ اﻟﻤﻌﻠﻮﻣﺎت ﺡﻮل إﻋﺪاد اﻟﻤﻨﺘﺞ ،راﺟﻊ دﻟﻴﻞ • اﻹﻋﺪاد اﻟﻤﺰود ﻣﻊ اﻟﻤﻨﺘﺞ. وﺟﻮد اﻟﻤﻨﺘﺞ ﻗﻴﺪ اﻟﺘﺸﻐﻴﻞ .إذا ﻟﻢ یﻜﻦ ﻗﻴﺪ اﻟﺘﺸﻐﻴﻞ ،اﺿﻐﻂ ﻋﻠﻰ زر اﻟﺘﺸﻐﻴﻞ ﻟﺘﺸﻐﻴﻞ اﻟﻤﻨﺘﺞ.
١ ﻣﻘﺒﺲ اﻟﻬﺎﺗﻒ اﻟﻤﻮﺟﻮد ﺏﺎﻟﺤﺎﺋﻂ ٢ اﺳﺘﺨﺪام ﺳﻠﻚ اﻟﻬﺎﺗﻒ اﻟﻤﺰود ﺏﺎﻟﻌﻠﺒﺔ ﻣﻊ اﻟﻤﻨﺘﺞ ﻋﺮﺑﻲ اﻟﻔﺼﻞ ٤ إذا آﻨﺖ ﺗﺴﺘﺨﺪم وﺡﺪة ﺗﻘﺴﻴﻢ ﻟﻠﻬﺎﺗﻒ ،ﻓﻘﺪ یﺆدي هﺬا إﻟﻰ ﻣﺸﻜﻼت ﻓﻲ إرﺳﺎل اﻟﻔﺎآﺲ) .وﺡﺪة اﻟﺘﻘﺴﻴﻢ هﻲ ﻋﺒﺎرة ﻋﻦ ﻣﻮﺻﻞ • ﺏﺴﻠﻜﻴﻦ یﺘﺼﻞ ﺏﻤﻘﺒﺲ اﻟﻬﺎﺗﻒ اﻟﻤﻮﺟﻮد ﺏﺎﻟﺤﺎﺋﻂ( .ﺡﺎول إزاﻟﺔ وﺡﺪة اﻟﺘﻘﺴﻴﻢ وﺗﻮﺻﻴﻞ اﻟﻤﻨﺘﺞ ﻣﺒﺎﺵﺮ ًة ﺏﻤﻘﺒﺲ اﻟﻬﺎﺗﻒ اﻟﻤﻮﺟﻮد ﺏﺎﻟﺤﺎﺋﻂ. ﺡﺎول ﺗﻮﺻﻴﻞ هﺎﺗﻒ یﻌﻤﻞ وﺳﻠﻚ اﻟﻬﺎﺗﻒ ﺏﻤﻘﺒﺲ اﻟﻬﺎﺗﻒ اﻟﻤﻮﺟﻮد ﺏﺎﻟﺤﺎﺋﻂ اﻟﺬي ﺗﺴﺘﺨﺪﻣﻪ ﻟﻠﻤﻨﺘﺞ ﺙﻢ ﻗﻢ ﺏﻔﺤﺺ ﻧﻐﻤﺔ اﻟﻄﻠﺐ .
.٢ .٣ ﺏﻌﺪ ﺗﻮﺻﻴﻞ ﺳﻠﻚ اﻟﻬﺎﺗﻒ ﺏﺎﻟﻤﻨﻔﺬ اﻟﻤﻜﺘﻮب ﻋﻠﻴﻪ ،1-LINEﻗﻢ ﺏﺘﺸﻐﻴﻞ اﺥﺘﺒﺎر اﻟﻔﺎآﺲ ﺙﺎﻧﻴ ًﺔ ﻟﻠﺘﺄآﺪ ﻣﻦ ﻧﺠﺎﺡﻪ وﻣﻦ أن اﻟﻤﻨﺘﺞ ﺟﺎهﺰ ﻹرﺳﺎل اﻟﻔﺎآﺴﺎت واﺳﺘﻘﺒﺎﻟﻬﺎ. ﺡﺎول إرﺳﺎل ﻓﺎآﺲ اﺥﺘﺒﺎر أو اﺳﺘﻘﺒﺎﻟﻪ. ﻓﺸﻞ اﺧﺘﺒﺎر "اﺱﺘﺨﺪام اﻟﻨﻮع اﻟﺼﺤﻴﺢ ﻡﻦ أﺱﻼك اﻟﻬﺎﺕﻒ ﻡﻊ ﺁﻟﺔ اﻟﻔﺎآﺲ" اﻟﺤﻞ • ﺗﺄآﺪ ﻣﻦ اﺳﺘﺨﺪام ﺳﻠﻚ اﻟﻬﺎﺗﻒ اﻟﻤﺰود ﺏﺎﻟﻌﻠﺒﺔ ﻣﻊ اﻟﻤﻨﺘﺞ ﻟﻠﺘﻮﺻﻴﻞ ﺏﻤﻘﺒﺲ اﻟﻬﺎﺗﻒ اﻟﻤﻮﺟﻮد ﺏﺎﻟﺤﺎﺋﻂ .
اﻟﻔﺼﻞ ٤ ﻡﻼﺡﻈﺔ :إذا آﻨﺖ ﻏﻴﺮ ﻣﺘﺄآﺪ ﻣﻦ ﺥﻂ اﻟﻬﺎﺗﻒ ﻟﺪیﻚ )ﺗﻨﺎﻇﺮي أو رﻗﻤﻲ( ,ﻓﻌﻠﻴﻚ ﻣﺮاﺟﻌﺔ ﻣﺰود اﻟﺨﺪﻣﺔ. اﻟﺤﻞ • • • • • • • اﻷﺟﻬﺰة اﻷﺥﺮى ،اﻟﺘﻲ ﺗﺴﺘﺨﺪم ﻧﻔﺲ ﺥﻂ اﻟﻬﺎﺗﻒ اﻟﺬي یﺴﺘﺨﺪﻣﻪ اﻟﻤﻨﺘﺞ ،ﻗﺪ ﺗﺴﺒﺐ ﻓﺸﻞ اﻻﺥﺘﺒﺎر .ﻟﻤﻌﺮﻓﺔ ﻣﺎ إذا آﺎن هﻨﺎك ﺟﻬﺎز ﺁﺥﺮ یﺘﺴﺒﺐ ﻓﻲ ﺡﺪوث ﻣﺸﻜﻼت ،اﻓﺼﻞ آﻞ ﺵﻲء ﻣﺎ ﻋﺪا اﻟﻤﻨﺘﺞ ﻣﻦ ﺥﻂ اﻟﻬﺎﺗﻒ ،ﺙﻢ ﺡﺎول إﺟﺮاء اﻻﺥﺘﺒﺎر ﺙﺎﻧﻴ ًﺔ .
آﺬﻟﻚ ﻣﻦ اﻟﻤﻤﻜﻦ أن یﻨﺤﺸﺮ اﻟﻮرق ﻓﻲ درج اﻟﺘﻐﺬیﺔ اﻵﻟﻴﺔ ﻟﻠﻤﺴﺘﻨﺪات .هﻨﺎك ﺏﻌﺾ اﻹﺟﺮاءات اﻟﺸﺎﺋﻌﺔ اﻟﺘﻲ ﻗﺪ ﺗﺆدي إﻟﻰ اﻧﺤﺸﺎر اﻟﻮرق ﻓﻲ درج اﻟﺘﻐﺬیﺔ اﻵﻟﻴﺔ ﻟﻠﻤﺴﺘﻨﺪات. وﺿﻊ ورق ﺏﻜﻤﻴﺔ آﺒﻴﺮة ﺟﺪًا ﻓﻲ درج اﻟﺘﻐﺬیﺔ اﻵﻟﻴﺔ ﻟﻠﻤﺴﺘﻨﺪات .یﻤﻜﻦ ﻟﺪرج اﻟﺘﻐﺬیﺔ اﻵﻟﻴﺔ ﻟﻠﻤﺴﺘﻨﺪات ﺡﻤﻞ ﺡﺘﻰ 50ورﻗﺔ ﻣﻦ ورق • letterأو ،A4أو 35ورﻗﺔ ﻣﻦ ورق .legal اﺳﺘﺨﺪام ورق ﺳﻤﻴﻚ ﺟﺪًا أو دﻗﻴﻖ ﺟﺪًا ﻟﺠﻬﺎز .HP Photosmart • ﻣﺤﺎوﻟﺔ إﺿﺎﻓﺔ ورق إﻟﻰ درج اﻟﺘﻐﺬیﺔ اﻵﻟﻴﺔ ﻟﻠﻤﺴﺘﻨﺪات أﺙﻨﺎء ﻗﻴﺎم ﺟﻬﺎز HP Photosmartﺏﺘﻐﺬیﺔ اﻟﺼﻔﺤﺎت.
اﻟﻔﺼﻞ ٤ .٢ ﻗﻢ ﺏﺴﺤﺐ اﻟﻮرق ﻣﻦ ﺁﻟﻴﺔ درج اﻟﺘﻐﺬیﺔ اﻵﻟﻴﺔ ﻟﻠﻤﺴﺘﻨﺪات ﺏﻠﻄﻒ. ﺕﻨﺒﻴﻪ :إذا ﺗﻤﺰق اﻟﻮرق ﻋﻨﺪ إزاﻟﺘﻪ ﻣﻦ اﻻﺳﻄﻮاﻧﺎت ،ﻓﻘﻢ ﺏﺒﺤﺚ اﻻﺳﻄﻮاﻧﺎت واﻟﻌﺠﻼت ﻋﻦ ﻗﻄﻊ اﻟﻮرق اﻟﺘﻲ ﻗﺪ ﺗﻜﻮن ﻗﺪ ﺏﻘﻴﺖ داﺥﻞ اﻟﺠﻬﺎز .إذا ﻟﻢ ﺗﻘﻢ ﺏﺈزاﻟﺔ ﺟﻤﻴﻊ ﻗﻄﻊ اﻟﻮرق ﻣﻦ ،HP Photosmartﺳﻴﺤﺪث ،ﻋﻠﻰ اﻷرﺟﺢ ،اﻟﻤﺰیﺪ ﻣﻦ اﻧﺤﺸﺎرات اﻟﻮرق. .٣ ﻗﻢ ﺏﺈﻏﻼق ﻏﻄﺎء درج اﻟﺘﻐﺬیﺔ اﻵﻟﻴﺔ ﻟﻠﻤﺴﺘﻨﺪات. ﻋﻤﻠﻴﺔ اﻟﺪﻋﻢ ﻋﻨﺪ اﻟﺘﻌﺮض إﻟﻰ ﻡﺸﻜﻠﺔ ،اﺕﺒﻊ هﺬﻩ اﻟﺨﻄﻮات: .١راﺟﻊ اﻟﻮﺙﺎﺋﻖ اﻟﻤﺰودة ﻣﻊ اﻟﻤﻨﺘﺞ. .
٥ اﻟﻤﻌﻠﻮﻡﺎت اﻟﻔﻨﻴﺔ یﺘﻨﺎول هﺬا اﻟﻘﺴﻢ اﻟﻤﻮاﺻﻔﺎت اﻟﻔﻨﻴﺔ واﻟﻤﻌﻠﻮﻣﺎت اﻟﺘﻨﻈﻴﻤﻴﺔ اﻟﺪوﻟﻴﺔ ﻟﺠﻬﺎز .HP Photosmart ﻟﻠﺤﺼﻮل ﻋﻠﻰ اﻟﻤﺰیﺪ ﻣﻦ اﻟﻤﻌﻠﻮﻣﺎت اﻟﺘﻨﻈﻴﻤﻴﺔ واﻟﺒﻴﺌﻴﺔ ﺏﻤﺎ ﻓﻲ ذﻟﻚ إﻋﻼن اﻟﺘﻮاﻓﻖ ،راﺟﻊ اﻟﺘﻌﻠﻴﻤﺎت اﻹﻟﻜﺘﺮوﻧﻴﺔ. ﻡﺘﻄﻠﺒﺎت اﻟﻨﻈﺎم ﻣﺘﻄﻠﺒﺎت ﺏﺮﻧﺎﻣﺞ اﻟﻨﻈﺎم ﻣﻮﺟﻮدة ﻓﻲ ﻣﻠﻒ .Readme ﻡﻮاﺻﻔﺎت اﻟﻤﻨﺘﺞ ﻟﻠﺤﺼﻮل ﻋﻠﻰ ﻣﻮاﺻﻔﺎت اﻟﻤﻨﺘﺞ ,زر ﻣﻮﻗﻊ اﻟﻮیﺐ ﻟـ HPﻋﻠﻰ .www.hp.com/supportﻟﻠﺤﺼﻮل ﻋﻠﻰ ﺟﺪول آﺎﻣﻞ ﻣﻦ اﻟﻤﻮاﺻﻔﺎت اﻟﺒﻴﺌﻴﺔ ,راﺟﻊ اﻟﺘﻌﻠﻴﻤﺎت اﻹﻟﻜﺘﺮوﻧﻴﺔ.
اﻟﻔﺼﻞ ٥ اﻟﻀﻤﺎن ﺪﺤﻣ ﺎﻤﻀﻟ ﺪﻣ ﺞﺘﻨﻣ HP ًﺎ ﺳﺎﺋﻂ ﻟﺒﺮ ﻣﺞ ً. ُ ﺪﺤﻤﻟ ﺎﻤﻀﻟ ﺪﺣﺔﻛﺮﺷ ﻦﻤﻀﺗ Hewlett-Packard ١- HP HP ﻋﺮﺑﻲ ُ HP ً ً ﻲﻓ ﺔﻣﺎﺨﻟ ﻲﻓ HP ًءﺎﻄﺧﻷ ﻦﻣ ﺎ. HP HP؛ )ﺎﺠﺘﻨﻤﻟ ﺔﺒﺴﻨﻻﺑ HP ٤- HP HP HP HPﺤﺘﺑ ﺔﻛﺮﺷ ﺖﻘﻠﺗ HP ٥- ,/ ً HP ﺔﻛﺮﺷ ﻰﻠﻋ @ﺬﻌﺗ HP ٦- ,/ HP ﺔﻛﺮﺷ ﻞﻤﺤﺘﺗ ﻻ HP ٧- .
ﻋﺮﺑﻲ ٧٢ اﻟﻤﻌﻠﻮﻣﺎت اﻟﻔﻨﻴﺔ
www.hp.com/support $IULFD (QJOLVK VSHDNLQJ $IULTXH IUDQFRSKRQH $UJHQWLQD %XHQRV $LUHV $UJHQWLQD $XVWUDOLD $XVWUDOLD RXW RI ZDUUDQW\ VWHUUHLFK ﺍﻟﺠﺰﺍﺋﺮ S P ﺍﻟﺒﺤﺮﻳﻦ %HOJL %HOJLTXH %UDVLO 6DR 3DXOR %UDVLO &DQDGD &HQWUDO $PHULFD 7KH &DULEEHDQ &KLOH Ё Ё KS LQYHQW