HP LaserJet M9040/M9050 MFP Embedded Web Server User Guide
HP LaserJet M9040/M9050 MFP Embedded Web Server User Guide
Copyright and Warranty Trademarks and credits © 2007 Copyright Hewlett-Packard Development Company, L.P. Adobe® and PostScript® are trademarks of Adobe Systems Incorporated. Reproduction, adaptation or translation without prior written permission is prohibited, except as allowed under the copyright laws. Microsoft® and Windows® are U.S. registered trademarks of Microsoft Corp. The information contained herein is subject to change without notice.
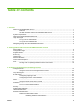
Table of contents 1 Overview What is an embedded Web server? .................................................................................................... 1 Features .............................................................................................................................. 1 HP Web Jetadmin and the HP Embedded Web Server ...................................................... 2 System requirements .....................................................................................
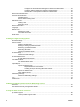
Configure the Authentication Manager for Kerberos Authentication ................. 39 Configure Address Settings for Kerberos Authentication .................................. 39 Use the MFP control panel for Kerberos Authentication ................................... 40 Device PIN Authentication .................................................................................................................. 41 User PIN Authentication ........................................................................
Information you can get from hp instant support ............................................................... 86 Shop for Supplies ............................................................................................................................... 86 Product Support ................................................................................................................................ 87 My Service Provider and My Service Contract ........................................................
vi ENWW
List of tables Table 1-1 Table 2-1 Table 2-2 Table 2-3 Table 2-4 Table 2-5 Table 2-6 Table 3-1 Table 3-2 Table 3-3 Table 3-4 Table 3-5 Table 3-6 Table 3-7 Table 3-8 Table 3-9 Table 3-10 Table 3-11 Table 3-12 Table 3-13 Table 4-1 Table 4-2 Table 4-3 Table 4-4 Table 4-5 Table 4-6 Table 4-7 Table 4-8 Table 4-9 Table 4-10 Table 4-11 Table 4-12 Table 5-1 ENWW HP Embedded Web Server ................................................................................................................
viii ENWW
List of figures Figure 1-1 Figure 1-2 Figure 2-1 Figure 2-2 Figure 2-3 Figure 2-4 Figure 2-5 Figure 2-6 Figure 2-7 Figure 2-8 Figure 2-9 Figure 3-1 Figure 3-2 Figure 3-3 Figure 3-4 Figure 3-5 Figure 3-6 Figure 3-7 Figure 3-8 Figure 3-9 Figure 3-10 Figure 3-11 Figure 3-12 Figure 3-13 Figure 3-14 Figure 3-15 Figure 3-16 Figure 3-17 Figure 3-18 Figure 3-19 Figure 3-20 Figure 4-1 Figure 4-2 Figure 4-3 Figure 4-4 Figure 4-5 Figure 4-6 Figure 4-7 Figure 4-8 ENWW Enter Network Password dialog box ..............
Figure 4-9 Figure 4-10 Figure 4-11 Figure 4-12 Figure 4-13 Figure 4-14 Figure 4-15 Figure 4-16 Figure 5-1 Figure 5-2 Figure 6-1 x E-mail Address Book screen ........................................................................................................... 66 Fax Address Book screen ............................................................................................................. 68 Import/Export screen ....................................................................................
1 Overview What is an embedded Web server? A Web server provides an environment in which Web programs can run, in much the same way that an operating system, such as Microsoft® Windows®, provides an environment in which programs can run on your computer. A Web browser, such as Microsoft Internet Explorer, Apple Safari, or Mozilla Firefox, can show output from a Web server.
● Select the language in which to display the HP EWS screens. ● Print to an HP product without having to install the product print driver. ● Conserve energy by scheduling the product sleep delay so that the product will go into sleep mode after a period of time of not being used. ● Schedule wakeup times for each day so that the product has finished initializing and calibrating by the time it is to be used.
NOTE: You cannot view the HP EWS screens from outside of a firewall. 1. Open a supported Web browser. 2. In the Address or Go to field, type the IPv4 or IPv6 TCP/IP address, the host name, or the configured host name that is assigned to the product. See the following examples. ● IPv4 TCP/IP address: http://192.168.1.
Login and logoff The HP EWS has screens that can be used to view product information and change configuration options. The screens that appear, and the settings on them, vary according to how you gain access to the HP EWS: as a general user, an information technology (IT) administrator, or a service provider. These passwords can be customized by an IT administrator or a service provider. In a password-protected HP EWS, only the Information tab is available to users who do not log in by using the password.
Navigating through the HP Embedded Web Server To navigate through the HP EWS screens, click one of the tabs (such as Information or Settings), and then click one of the menus on the navigation bar that is located on the left side of the screen. The following illustration and table provide information about the HP EWS screens.
Table 1-1 HP Embedded Web Server (continued) Callout HP EWS screen feature Description 3 Menus Different on each tab Click a tab to show the menus. 4 Other Links hp instant support Connect to a set of Web ● resources that help solve problems and describe the ● additional services that are available for your HP product. ● Use the Internet to order ● genuine HP supplies for your HP product.
2 Viewing product status from the HP EWS Information screens The screens available from the Information tab are for informational purposes only; you cannot configure the product from these screens. To configure the product through the HP EWS, see Configuring the product from the Settings screens on page 19. NOTE: ENWW Some products do not support all of these screens.
Device Status Use the Device Status screen to view the current status of the product. The following illustration and table describe how to use this screen. Figure 2-1 Device Status screen Table 2-1 Device Status Callout Area on the screen Information or capability that the area provides 1 HP EWS tabs and menus For more information, see Navigating through the HP Embedded Web Server on page 5. 2 Status Shows the device status (the same information that appears on the control-panel display).
Configuration Page Use the Configuration Page screen to view current product settings, help troubleshoot problems, and verify the installation of optional accessories such as dual inline memory modules (DIMMs). The following illustration and table describe how to use this screen.
Table 2-2 Configuration Page Callout Area on the screen Information or capability that the area provides 1 HP EWS tabs and menus For more information, see Navigating through the HP Embedded Web Server on page 5. 2 Device Information Lists the serial number, version numbers, and other information for the device. 3 Options Displays information about optional accessories and configurations.
Supplies Status The Supplies Status screen shows more detailed supplies information and provides part numbers for genuine HP supplies. (It is helpful to have the part numbers available when ordering supplies.) The following illustration and table describe how to use this screen.
Event Log The Event Log screen shows the most recent product events, including jams, service errors, and other printer errors. The following illustration and table describe how to use this screen. Figure 2-4 Event Log screen Table 2-4 Event Log 12 Callout Area on the screen Information or capability that the area provides 1 HP EWS tabs and menus For more information, see Navigating through the HP Embedded Web Server on page 5.
Usage Page The Usage Page screen gives a page count for each size of media that has passed through the product, as well as the number of duplexed pages. The total is calculated by multiplying the sum of the print count values by the Units value. The information on this screen can be used to determine how much toner or paper to keep on hand. The following illustration and table describe how to use this screen.
Figure 2-6 Usage Page2 of 2 Table 2-5 Usage Page 14 Callout Area on the screen Information or capability that the area provides 1 HP EWS tabs and menus For more information, see Navigating through the HP Embedded Web Server on page 5. 2 Usage Totals (equivalent) Indicates the types of pages that have been printed, the number of singlesided pages that have been printed, the number of duplexed pages that have been printed, and the total number of pages that have been printed.
Device Information The Device Information screen shows the following information: ● Device name ● Device location ● Asset number ● Company name ● Contact person ● Product name ● Device model ● Device serial number The product name, device model, and device serial number are generated automatically. You can configure the other information on this screen from the Device Information screen on the Settings tab.
Control Panel Snapshot The Control Panel Snapshot screen shows the product control-panel display as if you were standing at the product. Because this view shows the product status, it can help you troubleshoot problems with the product. NOTE: The appearance of the screen might vary, depending on your product.
Print NOTE: The Print screen (and the Print menu on the left) is available only if it has been configured to appear on the Security screen under the Settings tab. Use the Security screen to disable the Print screen if you do not want it to appear for security reasons. For more information, see Security on page 31. Use the Print screen to print print-ready files or to update your product firmware remotely. You can use the Print screen to print one file at a time from a product that supports the HP EWS.
Printing a file or updating firmware from the Print screen Use the following procedure to print a file or update product firmware from the Print screen. 18 1. Select a file that resides on your machine or on your network by clicking Browse to browse to a file that you want to print. 2. Click Apply.
3 Configuring the product from the Settings screens Use the screens on the Settings tab to configure the product from your computer. Configure Device You can use the Configure Device screen to print device information pages and configure the device remotely. The menus on this screen are similar to the menus that are available at your device control panel. Some of the device control-panel menus are not available from the HP EWS.
Table 3-1 Configure Device (continued) Callout Area on the screen Information or capability that the area provides 2 Select A Menu Information menu Print device information pages, which provide details about the device and its configuration. Default Job Options menu Use this menu to define the default job options for each function. Time/Scheduling menu Use this menu to set options for setting the time and for setting the device to enter and exit sleep mode.
Tray Sizes/Types Use the Tray Sizes/Types screen to assign paper sizes and paper types for each tray on the product. The following illustration and table describe how to use this screen. Figure 3-2 Tray Sizes/Types screen Table 3-2 Tray Sizes/Types ENWW Callout Area on the screen Information or capability that the area provides 1 HP EWS tabs and menus For more information, see Navigating through the HP Embedded Web Server on page 5.
E-mail Server Use the E-mail Server screen to configure e-mail settings for outgoing e-mail. Use the settings on this screen to send and receive e-mail messages, including product alerts. The following illustration, table, and procedures describe how to use this screen.
4. Type the domain name in the Domain Name text box. 5. Click Apply to save the changes. Configuring the return e-mail address When you configure the return e-mail address on the E-mail Server page, you are configuring the identity of the product. For example, if you type anyone in the Username field and yourdomain.com in the Domain Name field, all e-mails sent out by the product will come from anyone@yourdomain.com. In this example, anyone@yourdomain.com is the identity of the product.
Alerts From the Alerts screen, IT administrators can set up the product to send problem and status alerts to anyone through e-mail messages. When this function is configured, alerts are automatically triggered about supplies, paper-path status, and other service and advisory information. More than one individual can receive alerts, with each person receiving only specific alerts.
Using the Alerts screen with a product You can set up four different lists, with up to 20 recipients on each list.
The Alerts - setup screen that appears when you click either Edit or New Destination List looks similar to the following illustration.
To configure alerts 1. Do one of the following: ● To create a new destination list, click New Destination List. -Or- ● To modify an existing destination list, click Edit next to the list that you want to modify. The Alerts - setup screen appears. 2. Type a name in the List Name field, such as Service or Supplies. 3. Type the e-mail addresses for people who you want to receive alerts.
8. Click Apply to save the information. 9. Repeat steps 1 through 7 for each additional list or destination. Use the following procedure to test the destination list configuration. To test the configuration of a destination list 1. Click the Test button next to the destination list that you want to test. The following window appears. Figure 3-6 Alerts - test screen 28 2. Select the destinations that you want to test. 3. The return address is the product's e-mail address.
To delete destinations and destination lists 1. If you have multiple destinations configured, you can delete a destination or destination list by clicking the Delete button next to the destination or destination list that you want to delete. 2. Click OK to confirm the deletion. AutoSend Use the AutoSend screen to send product-configuration and supplies-usage information periodically to e-mail destinations of your choice, such as service providers.
Table 3-5 AutoSend (continued) Callout Area on the screen Information or capability that the area provides 5 Send to HP Select this check box to send device configuration and supplies status information to HP on a regular basis. The information will be sent to an HP e-mail address (for example, myproduct@hp.com) in a text-based file with an .XML file extension. This file will be created in English.
Security The following illustration and table describe how to use the Security screen. Figure 3-8 Security screen Table 3-6 Security ENWW Callout Area on the screen Information or capability that the area provides 1 HP EWS tabs and menus For more information, see Navigating through the HP Embedded Web Server on page 5. 2 Set Password Set a security password to prevent unauthorized users from gaining access to the HP Embedded Web Server.
Authentication Manager Use the Authentication Manager screen to set the Device Functions that require users to successfully log in before use. The following illustration and table describe how to use this screen. Figure 3-9 Authentication Manager screen Table 3-7 Authentication Manager Callout Area on the screen Information or capability that the area provides 1 HP EWS tabs and menus For more information, see Navigating through the HP Embedded Web Server on page 5.
LDAP Authentication Use the LDAP Authentication page to configure a Lightweight Directory Access Protocol (LDAP) server to authenticate device users. When LDAP authentication is selected as the Log In Method for one or more Device Functions on the Authentication Manager page, the user at the device must enter valid credentials (username and password) to gain access to those functions. Authentication consists of two interdependent parts. First, the device verifies the user's credentials with the LDAP server.
Table 3-8 LDAP Authentication (continued) Callout Area on the screen Information or capability that the area provides Also, the device network interface must be configured with a Certificate Authority (CA) certificate to validate the LDAP server. The CA certificate is configured on the Networking tab of the Web interface. In some LDAP server configurations, a client certificate is also required and is configured on the same Networking tab.
Table 3-8 LDAP Authentication (continued) Callout Area on the screen Information or capability that the area provides and the user information is found in the LDAP database, a success message appears. Otherwise, an error message appears indicating why authentication failed.
Kerberos Authentication Use the Kerberos Authentication page to configure the device (multi-function peripheral or digital sender) to authenticate users to a Kerberos Realm. When Kerberos authentication is selected as the Log In Method for one or more Device Functions on the Authentication Manager page, the user at the device must enter valid credentials (username, password, and realm) to gain access to those functions. Authentication consists of two interdependent parts.
Table 3-9 Kerberos Authentication (continued) Callout Area on the screen Information or capability that the area provides not available, the IP address of the Kerberos Server may be used. 4 Kerberos Server Port The Kerberos Server Port is the default IP port used by the Kerberos authentication method. Note that the default is port 88, but this can be different in different network environments. Please contact your IT administrator to determine the appropriate port if the default port does not work.
Kerberos Authentication Tasks Kerberos is a network authentication protocol. It is designed to provide secure authentication for client/ server applications by using secret keys delivered with session tickets. Before following the steps outlined here, you must have completed the following steps: 1. Install the Microsoft LDP tool. 2. Discover the LDAP server. 3. Set up LDP. After you have performed these steps, perform the steps in the following section, Initializing Kerberos authentication on page 38.
5. c. Type the LDAP server in the LDAP Server field. d. Type 389 in the Port field. Under the Searching the LDAP Database section, perform the following steps: a. Paste the Search Prefix into the Search Root field. b. Type in the sAMAccountName into the Match the name entered with the LDAP attribute of field. c. Find the device user e-mail address in the LDP trace.
3. Under the Accessing to LDAP Server section, perform the following steps: a. Select Kerberos from the LDAP Server Bind Method drop-down menu. NOTE: The LDAP Server Bind Methods on the Addressing Settings and Kerberos Authentication screens must match for Kerberos authentication to work properly. b. 4. 5. Under Credentials, click to select the Use Public Credentials option. ◦ Type in the Username and Password. ◦ Type in the Kerberos Default Realm (Domain), for example: TECHNICAL.MARKETING.
Device PIN Authentication If PIN Authentication is selected for one or more Device Functions on the Authentication Manager page, the user will be prompted for a PIN before they can access those Device Functions. If the PIN is entered incorrectly the user will be returned to the previous screen. When a PIN is entered correctly all functions that use that PIN are then accessible to the user. For example, you could configure Copy for Group 1 PIN and E-mail and Fax for Group 2 PIN.
User PIN Authentication The User PIN Authentication page enables you to add user PIN records into the device one at a time, and to edit or delete user PIN records that have already been saved in the device. You can also use the device Import/Export feature to load a large list of users all at once, rather than adding them one at a time. You can set up the device to require each user to provide their PIN when they access the device.
Adding a new user To add a new user and PIN, do the following: 1. Click Add New User.... The Add User page appears. 2. Type the person's name in the Name field. The maximum length is 245 characters, or less depending on the language being used. 3. Type the person's e-mail address in the E-mail Address field. It must be less than 255 characters. NOTE: If e-mail address validation has been enabled on the device, the e-mail address is required to have an @ sign. 4.
Edit Other Links Use the Edit Other Links screen to add or customize up to five links to the Web sites of your choice (see the following note). These links appear throughout the HP EWS screens in the Other Links box beneath the left navigational bar. Three permanent links (hp instant support, Shop for Supplies, and Product Support) have already been established. The following illustration, table, and procedures describe how to use this screen.
Removing a link Use this procedure to remove a link. ENWW 1. Under User-defined Links, select the link or links that you would like to remove. 2. Click Remove Selected Link.
Device Information Use the Device Information screen to provide a name of your choice for the device, assign an asset number, and configure the company name, the person to contact about the device, and the physical location of the device. The device name, device model, and serial number are also available on this screen. Figure 3-15 Device Information screen NOTE: If you make any changes on the Device Information screen, click Apply to save the changes.
Language Use the Language screen to select the language in which the HP EWS screens appear. The following illustration and table describe how to use this screen. Figure 3-16 Language screen CAUTION: Selecting View Pages in Device Language or Select A Language changes the language for everyone who uses the HP EWS.
Date & Time Use the Date & Time screen to update the product time. The following illustration and table describe how to use this screen. Figure 3-17 Date & Time screen Table 3-12 Date & Time 48 Callout Area on the screen Information or capability that the area provides 1 HP EWS tabs and menus For more information, see Navigating through the HP Embedded Web Server on page 5. 2 Current Date and Current Time Shows the product date and time when the EWS was opened.
Date/Time Format Use the Date & Time – Format screen to select the formats you prefer for displaying the date and time. The following illustration shows the Date & Time – Format screen. Figure 3-18 Date/Time – Format screen Clock Drift Correction Use the Date & Time - clock drift correction screen to enable clock drift correction. The following illustration shows the screen.
3. In the Local Port to Receive Time from Server field, type the number of the appropriate port. 4. Click OK. NOTE: Use this screen only to configure the time server for clock drift correction, not to set the clock. To set the clock, use the main Date & Time screen. For further information, see Date & Time on page 48.
Wake Time An IT administrator can use the Wake Time screen to schedule wake times and sleep delays on a daily basis. For example, the product can be set to wake up at 07:30, so the product has finished initializing and calibrating and is ready to use by 08:00. The administrator sets only one wakeup setting per day; however, each day can have a different wakeup setting. Additionally, to save energy, the sleep delay can be set to turn the product off after a specific period of inactivity.
52 Chapter 3 Configuring the product from the Settings screens ENWW
4 Setting the digital sending options Administrators can use the screens available from the Digital Sending tab to control the digital-sending features that some products offer. NOTE: Some products do not support all of these screens. General Settings Use the General Settings screen to set digital-sending administrator information. The following illustration and table describe how to use this screen.
Send to Folder Use the Send to Folder screen to send scanned documents to shared folders or FTP sites. NOTE: The shared folders or FTP sites must be operational before using this tool to add them as destinations. The following illustration and table describe how to use the Send to Folder screen.
Table 4-2 Send to Folder settings (continued) Callout Area on the screen Information or capability that the area provides To find the WINS Server, go to the Windows task bar and click Start, click All Programs, click Accessories, and then click Command Prompt. When the Command Prompt appears, type ipconfig /all. NOTE: If the hostname for your Shared Folder destinations are all specified as IP addresses (for example, \\192.000.0.1\Topfolder), then a WINS server does not need to be provided.
Sharing a folder in Windows XP 1. Right-click on the file or folder to be shared from Windows Explorer or My Computer, and then click Sharing and Security. On the dialog box that appears, the Sharing tab is selected by default. Figure 4-3 Sharing tab 2. 56 Select Share this folder. The name of the folder that appears on the network may be changed by typing in the new name in the Share name field.
3. If you selected Simple File Sharing you can skip the remaining steps and Press OK. If you did not, follow steps 3-7. a. Click on the Permissions button. Figure 4-4 Permissions dialog box ENWW b. If you wish to allow anyone on your network to access your folder, click on Everyone and select Allow Full Control and then click OK. (Skip to step 4) c. If you wish to only give certain users access to the folder: select Everyone and click Remove. d. Click Add.
e. In the Enter the object names to select field, type in the name of the first user account that will have access to the folder and then click Check Names. Figure 4-5 Select Users dialog box f. To add multiple user accounts, type a semicolon after the first account name and then repeat the steps above for each account you wish to add. Each user account will appear as COMPUTER NAME\user name and each user account will be separated by a semicolon. g. Click OK when you are done. h.
The folder icon will change to the following: . This indicates that this folder is now shared. Anyone who knows the username and password of the account(s) that were set up with access to the shared folder(s) above will be able to access the folders. You have successfully set up folder sharing. Repeat these steps for all folders you wish to share with other network users. Add a shared folder to the Send to Folder list 1. On the EWS Send to Folder screen, click Add....
Table 4-3 Add Shared Folder screen (continued) Callout Area on the screen Information or capability that the area provides 3 Default Filename Choose any name as the default filename. The filename you choose can be overridden each time by the device user. Because of this, it is advisable to give each scanned file a unique file name in order to preserve its content. 4 Address Credentials You can choose either Use Public Credentials or Use Device User’s Credentials. ● Use Public Credentials.
Table 4-3 Add Shared Folder screen (continued) Callout Area on the screen Information or capability that the area provides 9 Resolution The higher the resolution, the better the image quality will be. However the higher the resolution, the larger the file size will be. 10 Default file size This setting provides for different levels of compression. If you choose Small, the file size will be smaller, but the image quality might be lower.
When completed, a message box will be displayed in a gray box near the top of the page indicating the test results.
E-mail Settings The product requires a Simple Mail Transfer Protocol (SMTP) gateway server to forward e-mail messages to a destination. If the SMTP gateway is not responding or has not been configured, the following message appears on the screen: 0.0.0.0 is not responding or is not a valid SMTP Gateway Server. Use the E-mail Settings screen to configure SMTP settings, set the maximum e-mail attachment size, and set the default e-mail address for the product.
Table 4-4 E-mail Settings (continued) Callout Area on the screen Information or capability that the area provides 6 Enable SMTP Authentication Use this setting to require SMTP authentication for outgoing e-mail. SMTP authentication is used to provide a username and password to the SMTP server if required. Most Internet Service Providers (ISP) require these credentials.
Advanced E-mail Settings The following illustration and table describe how to use the Advanced E-Mail Settings screen. Figure 4-8 Advanced E-mail Settings screen Table 4-5 Advanced E-mail Settings Callout Area on the screen Information or capability that the area provides 1 HP EWS tabs and menus For more information, see Navigating through the HP Embedded Web Server on page 5. 2 Help Click to open a help file that contains information about the screens on the Digital Sending tab.
E-mail Address Book An e-mail address book is a list of e-mail addresses that are stored on the device. The address book can store frequently-used e-mail addresses so that you can quickly choose the right e-mail address when sending a document from the front panel of the device. The E-mail Address Book page enables you to add e-mail addresses into the device one at a time, and to edit e-mail addresses that have already been saved in the device.
Table 4-6 E-mail Address Book screen (continued) Callout Area on the Screen Information or capability that the area provides 5 Delete Entry Click the Delete Entry button to delete an E-mail address or E-mail address book stored on the device. 6 Delete All Entries Click the Delete All Entries button to delete all E-mail addresses or E-mail addres books stored on the device. E-mail Address Book tasks You can add an e-mail address by clicking Add E-mail Address....
Fax Address Book A fax address book is a list of fax numbers that are stored on the device. The address book can store frequently-used fax numbers so that you can quickly choose the right destination when faxing a document from the front panel of the MFP device. The Fax Address Book page enables you to add fax numbers into the device one at a time, and to edit fax numbers that have already been saved in the device.
Fax Address Book tasks You can add a fax number by clicking Add Fax Number.... This takes you to the Add Fax Number page, which has instructions for completing the task. Adding a fax number To add a new fax number, do the following: 1. Click Add Fax Number.... The Add Fax Number page appears. 2. Type the person's name in the Name field. The name is what appears in the list on the device control panel when a user is searching for a fax number.
Import/Export Use this page to import and export address book and user information to and from the device. When you import data to the device, you add new e-mail addresses, fax numbers, or user records, so that they can be accessed on this device. This can help make it easy to create initial lists, or to keep your HP device current with changes in your organization. When you export records, you save e-mail, fax, or user records from the device into a file on your computer.
Import an address book You can import address book information by first creating a file with a comma-separated value (CSV) format. The CSV format is a common data format that is often used to transfer data between database programs or devices. This file can be created using either a spreadsheet program such as Microsoft Excel, or a text program such as Microsoft Notepad. After creating the file, you must be sure to save or export it as a .CSV file type.
4. To import your source file into the device, click Browse... next to the Address Book File Name field on the Import/Export page to browse to the source file on your computer. 5. Click Import to import the data file into the device. The import process will take approximately 1 minute for each 1,000 records, depending on the network speed. When the import process is complete, a message appears indicating how many records were successfully imported and whether there were any import errors.
5. Type in a name for the file, with a .CSV extension. Click Browse to choose a location on your computer to save the file. Click Next. 6. Click Finish to finish the wizard and export the file. 7. To import the .CSV file into the device, follow Steps 4 and 5 of the Import an address book on page 71 instructions. Export an address book You can also export the address book or user information that has been saved in the device.
Addressing Settings NOTE: The LDAP protocol is typically only used in corporate e-mail environments. If you are using an ISP for e-mail services, HP recommends that you use the E-mail Address Book function. In order for the product to send scanned documents, you must provide one or more destination addresses. The product addressing feature simplifies this process by accessing the network LDAP server.
Table 4-9 Addressing Settings (continued) Callout Area on the screen Information or capability that the area provides 4 LDAP Server Bind Method Anonymous Select this option to connect to the LDAP server if the LDAP server does not require user credentials to access the LDAP database. Simple Select this option to connect to the LDAP server if the LDAP server requires user credentials to use the LDAP database. When this option is selected, you must enter the user, password, and domain.
Table 4-9 Addressing Settings (continued) Callout Area on the screen Information or capability that the area provides 11 Search Root Type the Distinguished Name (DN) of the entry in the LDAP directory structure where address searching is to begin. A DN is made up of "attribute=value" pairs, separated by commas. For example: ou=departmentname,o=companyname ou=marketing,o=Hewlett Packard,c=US o=hp.
Advanced Addressing Settings The following illustration and table describe how to use the Advanced Addressing Settings screen. Figure 4-13 Advanced Addressing Settings screen Table 4-10 Advanced Addressing Settings Callout Area on the screen Information or capability that the area provides 1 HP EWS tabs and menus For more information, see Navigating through the HP Embedded Web Server on page 5. 2 Help Click to open a help file that contains information about the screens on the Digital Sending tab.
Log Use the Log screen to view digital sending job information, including any errors that occur. The following illustration and table describe how to use this screen. NOTE: If the HP DSS has been installed, digital-sending activities are logged in the HP DSS instead of in the HP EWS. To view the log, open the HP MFP DSS Configuration Utility, and then click the Log tab. The entries visible in HP EWS are only those related to activities configured either at the control panel or through HP EWS screens.
Table 4-11 Log (continued) Callout Area on the screen Information or capability that the area provides 9 Details Select the log entry and then click the Details button to view the log entry details. 10 Refresh Click this button to update the view to include the latest log information. 11 Clear Click this button to clear the information from the log. NOTE: Clicking the Clear button merely clears the log that appears onscreen. The log entries remain on the product for job-accounting purposes.
Preferences Use the Preferences Settings screen to configure general settings for the digital-sending features. The following illustration and table describe how to use this screen. Figure 4-16 Preferences Settings screen Table 4-12 Preferences Settings 80 Callout Area on screen Information or capability that the area provides 1 HP EWS tabs and menus For more information, see Navigating through the HP Embedded Web Server on page 5.
5 Managing network operation from the Networking screens Overview Use the Networking screens to configure and manage your product on your network. The appearance and features of the screens available from the Networking tab differ, depending on the model and version of your HP Jetdirect print server. The following screen is similar to what you might see when you click Networking. From the left navigational bar, click the Networking menu for the screen that you want to view.
Depending on your HP Jetdirect print server model and operating version, the following are some tasks that you can perform from the Networking screens: ● Change network configuration settings for various types of network connections. ● Turn on or turn off management protocols. ● Set up a support contact and support URLs. ● Set a password to control access to the product and network configuration settings.
HP Jetdirect Security Configuration Wizard Use the HP Jetdirect Security Configuration Wizard to configure security settings for HP Jetdirect print server management. HP Web Jetadmin is a powerful web-based software utility for installing, configuring, and managing network-connected devices. Since it can install and configure devices, it must be able to secure itself against unwanted access.
84 Chapter 5 Managing network operation from the Networking screens ENWW
6 Using the Other Links as a resource The Other Links box contains three permanent links that provide quick access to product-specific information, such as interactive troubleshooting and ordering information for genuine HP supplies. Figure 6-1 Device Status screen NOTE: You can use the Edit Other Links screen on the Settings tab to add up to five customized links to the Web sites of your choice. These links appear throughout the EWS screens, in the Other Links box beneath the left navigational bar.
Information you can get from hp instant support The hp instant support Web site provides these tools for troubleshooting and for maintenance: ● Firmware and software updates. ● Troubleshooting for recent events that are listed on the Event Log. For example, the product might show a jam as the most recent event listed in the event Log. The hp instant support Web site detects the event and provides troubleshooting information for the jam. ● Support packs.
Product Support The Product Support link connects you to a Web page that brings together a comprehensive menu of support resources that business people need. From this Web page, you can accomplish these tasks and more: ● Find a list of HP products at one site: computers, workstations, servers, storage devices, printer, scanners, digital imaging, and mobile devices. ● Obtain technical support.
88 Chapter 6 Using the Other Links as a resource ENWW
Index A accessing the HP Embedded Web Server 2 accessories, verifying installed 9 activity logs digital sending 78 addressing Kerberos Authentication 39 settings 74 administrators alerts, setting up 24 Digital Sending settings 53 logging off 4 logging on 4 sleep schedule settings 51 Advanced E-mail Settings screen 65 alerts configuring 25 deleting destination lists 29 e-mail configuration 22 features 24 testing destination lists 28 asset number 15 attachments, e-mail 63, 65 authentication addressing 75 e-m
F FAQs 44, 87 features 1 Firefox, versions supported firewalls 2 firmware, updating 17 folders, sending to 54 2 G gateway settings, SMTP 63 General screen, Digital Sending 53 General security settings, general 31 General Security screen 31 group product management 2 H help instant support 44, 85 product support 44, 87 HP Embedded Web Server defined 1 features 1 hp instant support 44, 85 HP Jetdirect print server 82 HP Jetdirect Security Configuration Wizard screen 83 HP Web Jetadmin 2 I Information menu 2
S Safari, versions supported 2 Security 83 security addressing 75 Authentication Manager 32 Kerberos Authentication 36 LDAP Authentication 33 Send to E-mail 63 status 10 Send to E-mail screen 63 Send to Folder screen 54 serial number 15 server, HP Jetdirect 82 service providers alerts, setting up 24 logging off 4 logging on as 4 Settings tab 5, 19 Shop for Supplies link 44, 86 shutdown, setting sleep schedule 51 Sleep Schedule screen 51 SMTP gateway settings 63 status alerts 24 device 8 network 81 supplies
92 Index ENWW
© 2007 Hewlett-Packard Development Company, L.P. www.hp.