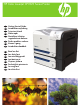
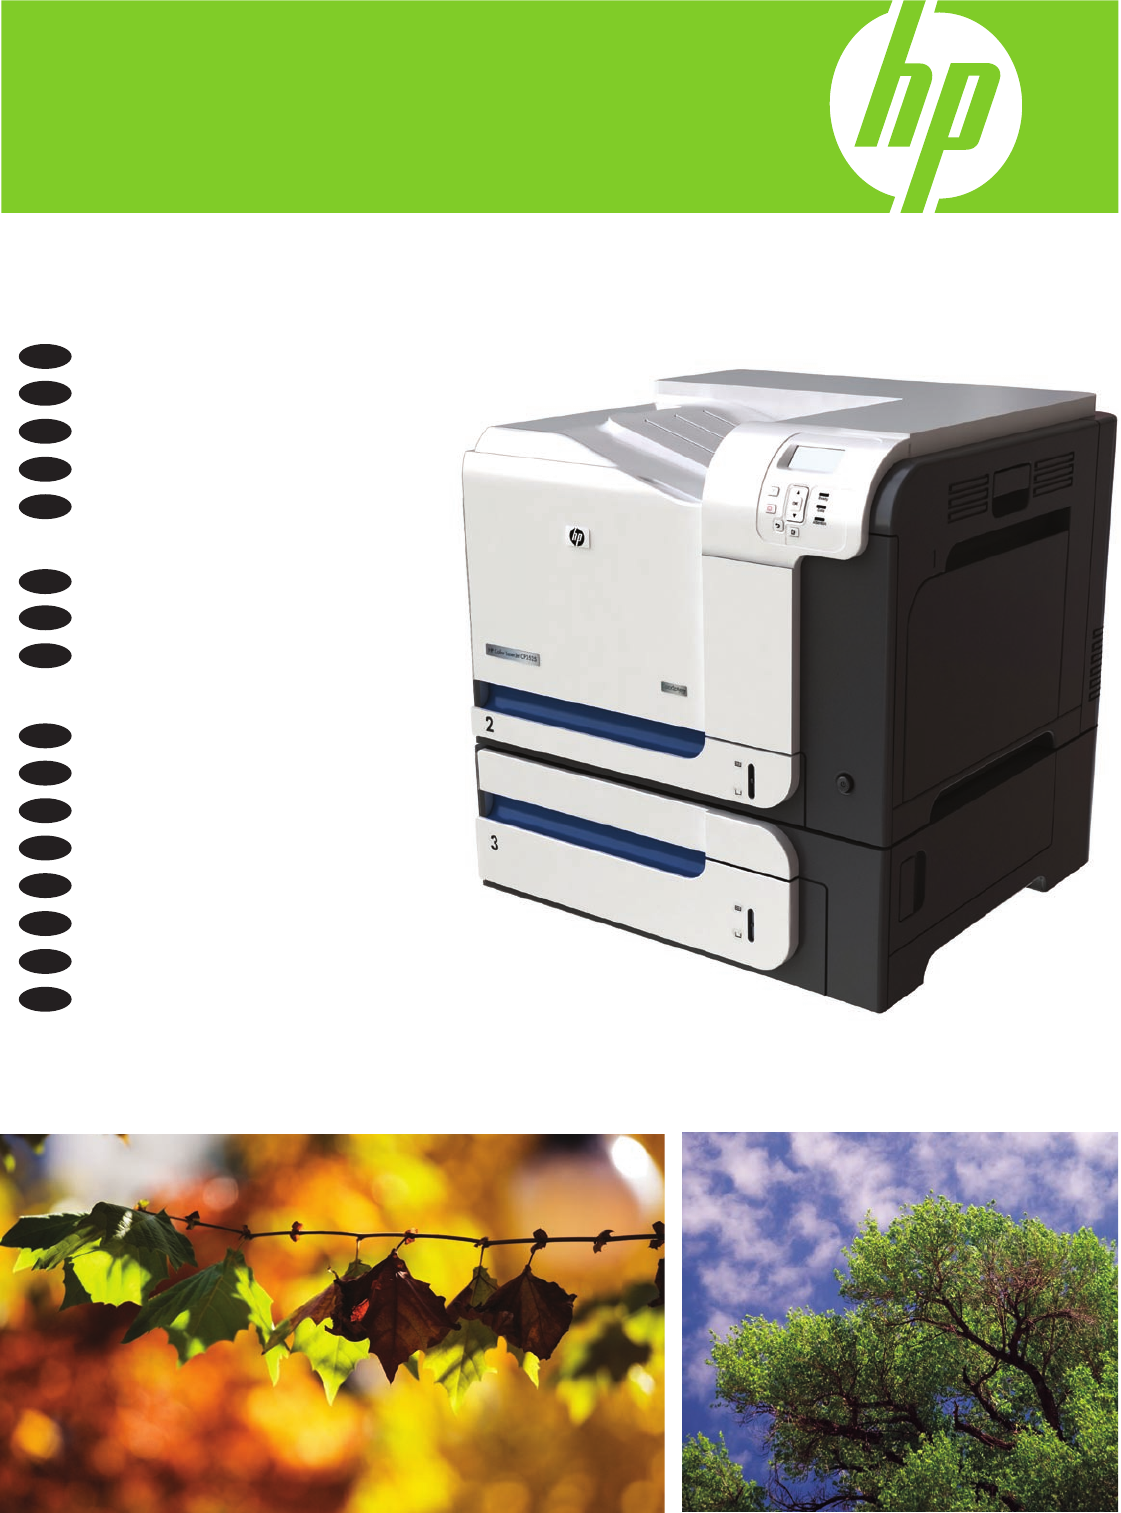
HP Color LaserJet CP3525 Series Printer EN DA ET FI LV LT NO SV EN DA ET FI LV LT NO SV Getting Started Guide Introduktionsvejledning Tutvustav juhend Aloitusopas Norādījumi iekārtas sagatavošanai darbam Darbo pradžios vadovas Komme i gang Introduktionshandbok Read me first Læs dette først Loe mind kõigepealt Lue tämä ensin Vispirms jāizlasa Perskaitykite pirmiausia Les meg først Läs detta först
Copyright and License © 2008 Copyright Hewlett-Packard Development Company, L.P. Reproduction, adaptation or translation without prior written permission is prohibited, except as allowed under the copyright laws. The information contained herein is subject to change without notice. The only warranties for HP products and services are set forth in the express warranty statements accompanying such products and services. Nothing herein should be construed as constituting an additional warranty.
FI EN Topic Aihe Page Sivu In-box documentation and CD contents 3 Pakkauksessa olevat oppaat ja CD-levyn sisältö 3 Set up the product hardware 7 Laitteiston asentaminen 7 Install the product software 14 Laitteen ohjelmiston asentaminen 14 Solve problems 40 Ongelmanratkaisu 40 DA LV Emne Side Medfølgende dokumentation og cd-indhold 3 Konfiguration af produkthardwaren 7 Installation af produktsoftwaren.
LT Tema SV Avsnitt Puslapis Sida Dėžutėje esančių dokumentų ir CD turinys 3 Dokumentation i förpackningen och på cd-skivan 3 Sumontuokite gaminio įrangą 7 Konfigurera produkten 7 Įdiekite gaminio programinę įrangą 14 Installera produktens programvara 14 Problemų sprendimas 41 Lösa problem 41 NO Emne Side Dokumentasjon i esken og innhold på CDen 3 Konfigurere produktmaskinvaren 7 Installere produktprogramvaren 14 Problemløsing 41
EN LT In-box documentation HP pagalbos lankstinukas Programinės įrangos CD turinys: • Vartotojo vadovas • Pagalbinės priemonės • Programinės įrangos tvarkyklės • Diegimo programa • Integruotojo tinklo serverio vadovas HP Support Flyer Software CD contents: • User Guide • Job Aids • Software drivers • Installer • Embedded Web Server Guide DA Medfølgende dokumentation NO Karbis olev dokumentatsioon SV HP tugiteenuste teabeleht Tarkvara CD sisu: • Kasutusjuhend • Abiteave • Tarkvara draiverid • Insta
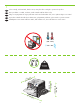
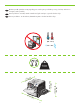
1 EN Select a sturdy, well-ventilated, dust-free area, away from direct sunlight to position the product. DA Placer produktet i et stabilt, ventileret, støvfrit område væk fra direkte sollys. ET Valige toote paigutamiseks tugev pind hästi ventileeritud tolmuvabas alas, otsese päikesevalguse eest eemal. FI Sijoita laite vakaalle alustalle hyvin ilmastoituun, pölyttömään paikkaan, johon aurinko ei paista suoraan.
LT Gaminiui padėti pasirinkite tvirtą pagrindą gerai ventiliuojamoje nedulkėtoje vietoje, kuri būtų atokiau nuo tiesioginių saulės spindulių. NO Plasser produktet i et stabilt, støvfritt område med god ventilasjon og utenfor direkte sollys. SV Placera produkten i ett välventilerat, dammfritt utrymme och fritt från direkt solljus. 10° - 30°C (50° - 86°F) 10% - 80% NJ OE 82 63.7 2 mm inch es 520 mm 20.5 inches 358 mm 14.1 inches mm 739 inches 29.
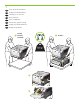
2 EN Unpack the product. DA Pak produktet ud. ET Võtke toode pakendist välja. FI Poista laite pakkauksesta. LV Izsaiņojiet izstrādājumu. LT Išpakuokite gaminį. NO Pakk opp produktet. SV Packa upp produkten.
3 EN Set up the product hardware. DA Konfigurer produkthardwaren. ET Seadistage toote riistvara. FI Asenna laitteisto. LV Ierīces uzstādīšana. LT Sumontuokite gaminio įrangą. NO Konfigurer produktmaskinvaren. SV Konfigurera produkten.
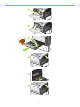
4 5 6 7 8 9
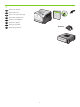
4 EN Connect the power. DA Tilslut netledningen. ET Ühendage toide. FI Liitä laite pistorasiaan. LV Pievienojiet ierīci pie elektrotīkla. LT Prijunkite maitinimą. NO Koble til strømmen. SV Anslut strömmen.
EN Caution! Do not connect the USB now. Wait until the software prompts you. DA Advarsel! Tilslut ikke USB-kablet nu. Vent, indtil softwaren beder dig om det. ET Ettevaatust! Ärge praegu USB-d ühendage. Oodake tarkvara viipa. FI Muistutus! Älä liitä USB-kaapelia nyt. Odota, kunnes ohjelmisto kehottaa siihen. LV Uzmanību! Pagaidām nepievienojiet USB kabeli. Pagaidiet, līdz programmatūra aicinās to darīt. LT Atsargiai! Dabar neprijunkite USB. Palaukite, kol būsite paraginti programinės įrangos.
5 EN Turn on the product. On the control panel, if prompted, select a language and a country/region for the product. DA Tænd for produktet. Vælg sprog og land/område for produktet på kontrolpanelet, hvis du bliver bedt om det. ET Lülitage printer sisse. Kui kuvatakse vastav viip, valige juhtpaneelil toote keel ja riik/regioon. FI Kytke laitteeseen virta. Jos ohjauspaneeliin tulee kehote, valitse laitteen kieli ja maa/alue. LV Ieslēdziet iekārtu.
6 EN Load paper. Make sure the paper is against the right edge of the tray. Adjust the guides so they point to the correct paper size in the tray or so they are against the stack of paper. After closing the tray, use the control panel to configure the correct paper size and type. DA Ilæg papir. Sørg for, at papiret rører ved bakkens højre kant. Juster styrene, så de peger på det korrekte papirformat, eller så de rører ved papirstakken.
1 3 2 4 5 6 7 13
Įdiekite gaminio programinę įrangą. EN Install the product software. DA Installer produktsoftwaren. NO Installer produktprogramvaren. ET Installige toote tarkvara. SV Installera produktens programvara. FI Asenna laitteen ohjelmisto. LV Izstrādājuma programmatūras instalēšana. LT EN For Windows network connections, go to step 7 (page 16). DA Ved Windows-netværksforbindelser skal du gå til trin 7 (side 16). ET Windowsi võrguühenduste teavet saate 7. juhisest (lk 16).
EN For Macintosh network connections, go to step 11 (page 23). DA Ved Macintosh-forbindelser skal du gå til trin 11 (side 23). ET Macintoshi võrguühenduste teavet saate 11. juhisest (lk 23). FI Lisätietoja Macintoshin verkkoyhteyksistä on vaiheessa 11 (sivu 23). LV Tīkla savienojumiem operētājsistēmā Macintosh, pārejiet pie 11. soļa (23. lpp.). LT Norėdami sužinoti apie „Macintosh“ tinklo jungtis, atlikite 11 veiksmą (24 psl.).
7 EN Windows network connection At the product control panel, press Menu Press to highlight INFORMATION, and press OK. Press to highlight PRINT CONFIGURATION, and press OK. Locate the IP address on the Embedded Jetdirect page. DA Windows-netværksforbindelse Tryk på Menu på produktets kontrolpanel. Tryk på for at fremhæve OPLYSNINGER, og tryk på OK. Tryk på for at fremhæve UDSKRIV KONFIGURATION, og tryk på OK. Find IP-adressen på siden Integreret Jetdirect.
LT „Windows“ tinklo jungtis Gaminio derinimo pulte paspauskite Meniu Paspauskite norėdami pažymėti INFORMACIJA ir paspauskite GERAI. Paspauskite norėdami paryškinti SPAUSDINTI KONFIGŪRACIJĄ ir paspauskite GERAI. Integruoto „Jetdirect“ puslapyje raskite IP adresą. NO Windows-nettverkstilkobling På produktets kontrollpanel trykker du på Meny Trykk på for å utheve INFORMASJON, og trykk på OK. Trykk på for å utheve SKRIV UT KONFIGURASJON, og trykk på OK. Finn IP-adressen på siden for innebygd Jetdirect.
8 EN If the IP address is something other than 0.0.0.0, or 192.0.0.192, or 169.254.x.x, the network configuration was successful. Go to step 9. Otherwise, you must manually assign the IP address. Ask your network administrator for the IP address. At the product control panel, press Menu . Press to highlight CONFIGURE DEVICE, and press OK. Highlight I/O, and press OK. Highlight EMBEDDED JETDIRECT MENU, and press OK. Highlight TCP/IP, and press OK. Highlight IPV4 SETTINGS, and press OK.
LT Jei IP adresas nėra 0.0.0.0 arba 192.0.0.192, arba 169.254.x.x, tinklo konfigūravimas pavyko. Atlikite 9 veiksmą. Jo neatlikę, turėsite priskirti IP adresą rankiniu būdu. Paprašykite, kad tinklo administratorius pateiktų IP adresą. Gaminio derinimo pulte paspauskite Meniu . Paspauskite , jei norite pažymėti KONFIGŪRUOTI ĮRENGINĮ ir paspauskite GERAI. Pažymėkite I / O ir paspauskite GERAI. Pažymėkite INTEGRUOTAS „JETDIRECT“ MENIU ir paspauskite GERAI. Pažymėkite TCP / IP ir paspauskite GERAI.
9 EN Quit all open programs on the print server or on each computer that will share the product. Install the software from the CD. Follow the onscreen instructions. When prompted, select Connected via the Network, and then click Install Now. The installer shows the available printers. Select the printer that has the appropriate IP address. Click Finish. On the Additional Options screen, you can install additional software, or click exit. Go to step 20.
10 EN Windows USB connection Quit all open programs on the computer. Install the software from the CD. Follow the onscreen instructions. When prompted, select Connected directly to the computer, and then click Install Now. Do not connect the USB cable until you are prompted. At the end of the installation, click Finish. On the Additional Options screen, you can install additional software, or click exit. Go to step 20. DA Windows USB-forbindelse Afslut alle åbne programmer på computeren.
LT „Windows“ USB jungtis Uždarykite visas kompiuteryje paleistas programas. Įdiekite CD esančią programinę įrangą. Vykdykite nurodymus ekrane. Kai pasirodys raginimas, pasirinkite Tiesiogiai prijungtas prie kompiuterio ir spustelėkite Diegti dabar. USB kabelio nejunkite, kol nepasirodys raginimas. Baigę diegimą, spustelėkite Baigti. Ekrane Papildomos parinktys galite įdiegti papildomą programinę įrangą, arba paspauskite „išeiti“. Atlikite 20 veiksmą.
11 EN Macintosh network connection At the product control panel, press Menu . Press to highlight INFORMATION, and press OK. Press to highlight PRINT CONFIGURATION, and press OK. Locate the IP address on the Embedded Jetdirect page. DA Macintosh-netværksforbindelse Tryk på Menu på produktets kontrolpanel. Tryk på for at fremhæve OPLYSNINGER, og tryk på OK. Tryk på for at fremhæve UDSKRIV KONFIGURATION, og tryk derefter på OK. Find IP-adressen på siden Integreret Jetdirect.
LT „Macintosh“ tinklo jungtis Gaminio derinimo pulte paspauskite Meniu . Paspauskite , norėdami pažymėti INFORMACIJA, ir paspauskite GERAI. Paspauskite , norėdami pažymėti SPAUSDINTI KONFIGŪRACIJĄ ir paspauskite GERAI. Integruoto „Jetdirect“ puslapyje raskite IP adresą. NO Macintosh-nettverkstilkobling På kontrollpanelet på produktet trykker du på Meny . Trykk på for å utheve INFORMASJON, og trykk på OK. Trykk på for å utheve SKRIV UT KONFIGURASJON, og trykk på OK.
12 EN If the IP address is something other than 0.0.0.0, or 192.0.0.192, or 169.254.x.x, the network configuration was successful. Go to step 13. Otherwise, you must manually assign the IP address. Ask your network administrator for the IP address. At the product control panel, press Menu . Press to highlight CONFIGURE DEVICE, and press OK. Highlight I/O, and press OK. Highlight EMBEDDED JETDIRECT MENU, and press OK. Highlight TCP/IP, and press OK. Highlight IPV4 SETTINGS, and press OK.
LV Ja IP adrese atšķiras no 0.0.0.0, vai 192.0.0.192, vai 169.254.x.x, tīkla konfigurēšana notika veiksmīgi. Pārejiet pie 13. soļa. Pretējā gadījumā IP adrese jāievada manuāli. Pajautājiet IP adresi savam tīkla administratoram. Izstrādājuma vadības panelī nospiediet Izvēlne . Nospiediet lai izceltu IERĪCES KONFIGURĒŠANA, un tad nospiediet Labi. Izceliet I/O un nospiediet Labi. Izceliet IEBŪVĒTĀ JETDIRECT IZVĒLNE un nospiediet Labi. Izceliet TCP/IP un nospiediet Labi.
SV Om IP-adressen är något annat än 0.0.0.0 eller 192.0.0.192 eller 169.254.x.x lyckades nätverkskonfigurationen. Gå till steg 13. Om inte måste du ange IP-adressen manuellt. Fråga din nätverksadministratör om IP-adressen. På produktens kontrollpanel trycker du på Meny . Tryck på för att markera KONFIGURERA ENHETEN och tryck på OK. Markera I/O och tryck på OK. Markera INBÄDDAD JETDIRECT-MENY och tryck på OK. Markera TCP/IP och tryck på OK. Markera IPV4-INSTÄLLNINGAR och tryck på OK.
13 EN Quit all open programs on the print server or on each computer that will share the product. Install the software from the CD. Click the product icon, and follow the onscreen instructions. Click Close when the installation is finished. DA Afslut alle åbne programmer på printerserveren eller på de computere, der skal dele produktet. Installer softwaren fra cd'en. Klik på produktikonet, og følg vejledningen på skærmen. Klik på Luk, når installationen er fuldført.
14 EN At the computer, open the Apple menu and click System Preferences and then click Print & Fax. click Add or +, and then select the connection type (Default Browser or IP Printer). Default Browser: Select the product from the list. From the Print Using drop-down list, select the printer model if one is not already selected. Click Add. IP Printer: From the Protocol drop-down list, select Socket/HP Jet Direct. Enter the IP address for the product.
LT Kompiuteryje atidarykite „Apple“ meniu, spustelėkite Sistemos parinktys ir tada spustelėkite Spausdinti ir siųsti faksą. spustelėkite Pridėti arba + ir pasirinkite jungties tipą (Standartinė naršyklė arba IP spausdintuvas). Standartinė naršyklė: Iš sąrašo pasirinkite gaminį. Iš Spausdinti naudojant išskleidžiamo sąrašo pasirinkite spausdintuvo modelį, jei jo dar nepasirinkote. Spustelėkite Pridėti. IP spausdintuvas: Protokolo išskleidžiamame sąraše pasirinkite Lizdas / „HP Jet Direct“.
15 EN Configure the product software to recognize the installed accessories. Highlight the product and select Printer Setup. The Installable Options dialog box appears. Select the product options that you are using. Click Apply Changes. Go to step 20. DA Konfigurer produktsoftwaren til at genkende det installerede ekstraudstyr. Marker produktet, og vælg Printerværktøj. Dialogboksen Installerbart ekstraudstyr vises. Vælg det produkttilbehør, du bruger. Klik på Anvend ændringer. Gå til trin 20.
16 EN Macintosh USB connection Install the software from the CD. Click the product icon, and follow the onscreen instructions. Click Close when the installation is finished. DA Macintosh-USB-forbindelse Installer softwaren fra cd'en. Klik på produktikonet, og følg vejledningen på skærmen. Klik på Luk, når installationen er fuldført. ET Macintoshi USB-ühendus Installige CD-lt tarkvara. Klõpsake toote ikoonile ja järgige ekraanil kuvatavaid juhiseid. Kui installimine on lõpetatud, klõpsake Sule.
17 EN Connect the USB cable between the product and the computer. DA Tilslut USB-kablet mellem produktet og computeren. ET Ühendage USB-kaabel toote ja arvutiga. FI Liitä USB-kaapeli laitteeseen ja tietokoneeseen. LV Pievienojiet USB kabeli pie izstrādājuma un datora. LT Gaminį prijunkite prie kompiuterio USB kabeliu. NO Koble produktet til datamaskinen via USB-kabelen. SV Anslut USB-kabeln mellan produkten och datorn.
18 EN At the computer, open the Apple menu and click System Preferences and then click Print & Fax. If the product name appears in the printer list, go to step 19. Otherwise, click Add or +, and then select Default Browser or Default. Select the product name from the printer list, and click Add. DA Åbn menuen Apple på computeren, klik på Systemindstillinger og derefter på Udskriv & Fax. Hvis produktnavnet vises på printerlisten, skal du gå til trin 19.
19 EN Configure the product software to recognize the installed accessories. Highlight the product and select Printer Setup. The Installable Options dialog box appears. Select the product options that you are using. Click Apply Changes. Go to step 20. DA Konfigurer produktsoftwaren til at genkende det installerede ekstraudstyr. Marker produktet, og vælg Printerværktøj. Dialogboksen Installerbart ekstraudstyr vises. Vælg det produkttilbehør, du bruger. Klik på Anvend ændringer. Gå til trin 20.
20 EN Test the software installation. Print a page from any program to make sure that the software is correctly installed. Note: If the installation failed, reinstall the software, or see the problem solving section in the User Guide. DA Test softwareinstallationen. Udskriv en side fra et program for at sikre, at softwaren er korrekt installeret. Bemærk: Hvis installationen fejler, skal du installere softwaren igen eller se afsnittet med problemløsning i brugervejledningen.
EN Product setup is complete. Register your product at www.register.hp.com. This is the quickest and easiest way for you to register to receive the following information: • Technical support updates • Enhanced support options • Ideas for and ways to use your new HP product • News about emerging technologies. For more information about the following topics, see the electronic User Guide on the CD-ROM or go to: www.hp.com/support/cljcp3525. • Detailed user instructions. • Important safety notices.
LV Izstrādājums ir iestatīts. Reģistrējiet savu izstrādājumu vietnē www.register.hp.com. Šis ir ātrākais un vieglākais veids, kā reģistrēties, lai saņemtu šādu informāciju: • tehniskā atbalsta atjauninājumi; • uzlabotās atbalsta iespējas; • priekšlikumi un veidi, kā lietot jūsu jauno HP izstrādājumu; • jaunumi par jaunākajām tehnoloģijām. Lai iegūtu papildu informāciju par zemāk norādītajām tēmām, skatiet lasāmatmiņas kompaktdiskā iekļauto elektronisko Lietošanas rokasgrāmatu, vai apmeklējiet: www.hp.
SV Inställningarna är klara. Registrera produkten på www.register.hp.com. Det här är den snabbaste och enklaste vägen för att registrera dig så att du får tillgång till följande: • Uppdatering av teknisk support • Tillval för förbättrad support • Tips på hur du använder din nya HP-produkt • Nyheter om kommande teknik. För mer information om följande ämnen kan du läsa i den elektroniska användarhandboken på cd-romskivan eller gå till: www.hp.com/support/cljcp3525. • Detaljerade användaranvisningar.
Problemų sprendimas EN Solve problems LT DA Problemløsning NO Problemløsing ET Probleemilahendus SV Lösa problem FI Ongelmanratkaisu LV Problēmu risināšana EN 1. If the control panel is blank, verify that the product is connected to a working outlet and that the product is turned on. If the control panel is still blank, remove the formatter at the left rear corner of the product and reinstall it. 2. The product control panel alerts you when problems occur.
LV 1. Ja vadības panelis ir tukšs, pārbaudiet, vai izstrādājums ir pieslēgts darbderīgam izvadam un vai izstrādājums ir ieslēgts. Ja vadības panelis vēl joprojām ir tukšs, noņemiet formatētāju izstrādājuma kreisajā aizmugurējā stūrī un uzstādiet to no jauna. 2. Ja radīsies problēmas, izstrādājuma vadības panelis brīdinās jūs par to.
© 2008 Hewlett-Packard Development Company, L.P. www.hp.