
Basics of work
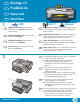


HP Photosmart D7200 series
2
1
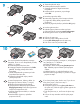
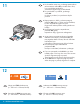
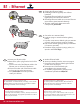
USB 802.11 Ethernet
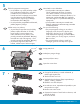
Remove all tape, tabs, and protective fi lm from the
lid and from the front and back of the device.
Lift the touchscreen display and remove the
protective fi lm. You can adjust the angle of the
display to a position suitable for viewing.
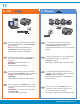
a.
b.
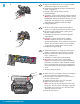
USB cable users : Do not connect the USB
cable until Section A2 .
Start Here
Wired network users : you must follow the instructions
in this Setup Guide to be successful adding the
HP Photosmart to your network.
Noņemiet visu lenti un aizsargplēvi no ierīces
vāka, priekšpuses un aizmugures.
Paceliet skārienekrāna displeju un noņemiet
aizsargplēvi. Varat displeju noregulēt leņķī, kas ir
ērts skatīšanai.
a.
b.
USB kabeļa lietotājiem : nepievienojiet
USB kabeli līdz sadaļai A2 .
Sāciet šeit
Kabeļu tīklu lietotājiem : lai ierīci HP Photosmart
sekmīgi pieslēgtu tīklam, izpildiet šajā uzstādīšanas
pamācībā sniegtos norādījumus.
USB kabelio naudotojams : nejunkite USB
kabelio iki A2 skyriaus .
Nuo įrenginio priekinės, galinės dalies ir nuo
dangčio nuimkite visas juostas, etiketes bei
apsauginę plėvelę.
Pakelkite liečiamąjį ekraną ir nuimkite apsauginę
plėvelę. Galima nustatyti tokį ekrano kampą, kad
ekrano padėtis būtų patogi žiūrėti.
a.
b.
Pradėkite čia
Laidinio tinklo vartotojams : norėdami sėkmingai prie
savo tinklo prijungti „HP Photosmart“, turite laikytis
šiame sąrankos vadove teikiamų instrukcijų.
USB-kaabli kasutajad : ärge ühendage
USB-kaablit enne jaotisele A2 eelnevate
juhiste täitmist.
Alustage siit
Eemaldage seadme kaanelt ning esi- ja tagaküljelt
kleeplint, kleepsud ja kaitsekile.
Tõstke puutetundlik näidik üles ja eemaldage
sellelt kaitsekile. Saate näidiku asendit
reguleerida, et see oleks vaatamiseks mugava
nurga all.
a.
b.
Kaabelvõrgu kasutajad : sarja HP Photosmart printeri
võrku lisamiseks peate järgima selles installijuhendis
toodud juhiseid.
a
b
EN
EN
EN
EN
ET
LT
LV
ET
LT
LV
LT
LV
ET
ET
LT
LV