LaserJet Professional P1100 Printer series User Guide www.hp.
HP LaserJet Professional P1100 Printer series User Guide
Copyright and License Trademark Credits © Copyright 2015 HP Development Company, L.P. Adobe®, Adobe Photoshop®, Acrobat®, and PostScript® are trademarks of Adobe Systems Incorporated. Reproduction, adaptation, or translation without prior written permission is prohibited, except as allowed under the copyright laws. The information contained herein is subject to change without notice.
Conventions used in this guide TIP: NOTE: Tips provide helpful hints or shortcuts. Notes provide important information to explain a concept or to complete a task. CAUTION: Cautions indicate procedures that you should follow to avoid losing data or damaging the product. WARNING! Warnings alert you to specific procedures that you should follow to avoid personal injury, catastrophic loss of data, or extensive damage to the product.
iv Conventions used in this guide ENWW
Table of contents 1 Product basics ............................................................................................................................................... 1 Product comparison .............................................................................................................................................. 2 Environmental features .........................................................................................................................................
Supported utilities for Mac (wireless models only) .......................................................................... 18 Embedded Web server .................................................................................................... 18 Print with Mac ...................................................................................................................................................... 20 Create and use printing presets in Macintosh .............................................
6 Print tasks .................................................................................................................................................. 37 Cancel a print job ................................................................................................................................................. 38 Stop the current print job from the control panel (wireless models only) ...................................... 38 Stop the current print job from the software program ............
Links ................................................................................................................................ 50 Economy settings ................................................................................................................................................ 51 Auto-Off mode .................................................................................................................................. 51 Print with EconoMode ........................................
Vertical lines ................................................................................................................... 85 Gray background ............................................................................................................. 85 Toner smear .................................................................................................................... 85 Loose toner .........................................................................................................
Czech Republic ................................................................................................................................ 106 Slovakia ........................................................................................................................................... 106 Poland ............................................................................................................................................. 106 Bulgaria .................................................
Restriction on Hazardous Substances statement (India) ................................................................................. 126 Restriction on Hazardous Substances statement (Turkey) ............................................................................. 126 Restriction on Hazardous Substances statement (Ukraine) ............................................................................ 127 Substances Table (China) .........................................................................
xii ENWW
1 ENWW Product basics ● Product comparison ● Environmental features ● Product features ● Product views 1
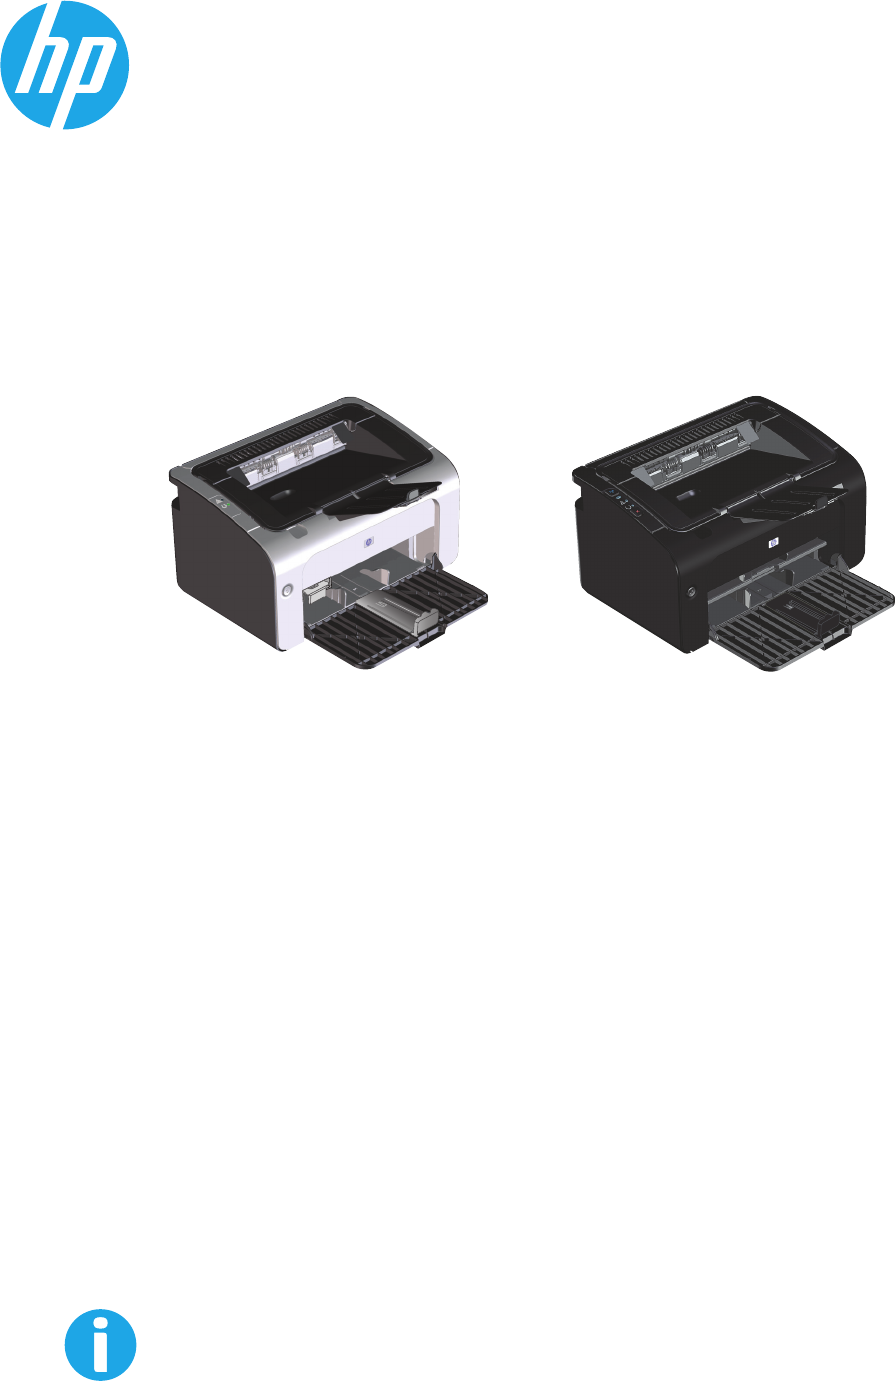
Product comparison HP LaserJet Professional P1100 Printer series ● Speed: Up to 18 A4 pages per minute (ppm), 19 letter-size ppm ● Tray: 150-sheet input tray ● Connectivity: Hi-Speed USB 2.0 port ● Duplexing: Manual duplexing (using the printer driver) HP LaserJet Professional P1100w Printer series ● Speed: 18 A4 pages per minute (ppm), 19 letter-size ppm ● Trays: 150-sheet main-input tray and 10-sheet priority input slot ● Connectivity: Hi-Speed USB 2.0 port and 802.
Product features Benefit Supporting features Excellent print quality ● Genuine HP print cartridge. ● FastRes 600 setting provides 600 dots per inch (dpi) effective print quality. FastRes 1200 setting provides 1,200 dpi effective print quality. ● Adjustable settings to optimize print quality. ● Windows Vista (32-bit and 64-bit) ● Windows XP (32-bit and 64-bit) ● Windows 7 ● Windows Server 2003 (32-bit and 64-bit) ● Windows Server 2008 (32-bit and 64-bit) ● Mac OS X v10.4, v10.5, v10.
Product views Front and left side view 1 2 7 3 6 5 4 1 Output bin 2 Foldable output tray extension 3 Input tray 4 Short media extender tool 5 Power button 6 Print-cartridge door lift-tab 7 Control panel Chapter 1 Product basics 4 ENWW
1 2 7 3 6 5 ENWW 1 Output bin 2 Foldable output tray extension 3 Priority input slot 4 Main input tray 5 Power button 6 Print-cartridge door lift-tab 7 Control panel 4 Product views 5
Back view 1 3 2 1 USB port 2 Power connector 3 Kensington lock Serial number and product number location The label that contains the product number and serial number is on the rear of the product.
Control-panel layout NOTE: mean. See Interpret control-panel light patterns on page 72 for a description of what the light patterns 1 2 1 Attention 2 Ready blinks. light: Indicates that the print cartridge door is open or other errors exist. light: When the product is ready to print, the ready light is on. When the product is processing data, the ready light 1 2 3 4 5 ENWW 1 Wireless feature. button: To detect wireless networks, press the wireless button.
8 Chapter 1 Product basics ENWW
2 ENWW Software for Windows ● Supported operating systems for Windows ● Supported printer-drivers for Windows ● Priority for print settings ● Change printer-driver settings for Windows ● Remove software for Windows ● Supported utilities (wireless models only) 9
Supported operating systems for Windows The product comes with software for the following Windows® operating systems: ● Windows Vista (32-bit and 64-bit) ● Windows XP (32-bit and 64-bit) ● Windows 7 ● Windows Server 2003 (32-bit and 64-bit) For more information about upgrading from Windows 2000 Server to Windows Server 2003, using Windows Server 2003 Point and Print, or using Windows Server 2003 Terminal Services and Printing, go to www.microsoft.com.
Priority for print settings Changes to print settings are prioritized depending on where the changes are made: NOTE: ENWW The names of commands and dialog boxes might vary depending on your software program. ● Page Setup dialog box: Click Page Setup or a similar command on the File menu of the program you are working in to open this dialog box. Settings changed here override settings changed anywhere else.
Change printer-driver settings for Windows Change the settings for all print jobs until the software program is closed Change the default settings for all print jobs Change the product configuration settings 1. On the File menu in the software program, click Print. 1. 1. 2. Select the driver, and then click Properties or Preferences. The steps can vary; this procedure is most common. 2.
Remove software for Windows Use the uninstall utility to remove Windows software 1. Click the Start button, and then click the Programs or All Programs menu item. 2. Click the HP menu item, and then click the HP LaserJet Professional P1100 Printer series menu item. 3. Click the Uninstall menu item, and then follow the onscreen instructions to remove the software. Use the Windows Control Panel to remove software Windows XP, Windows Server 2003, and Windows Server 2008 1.
Supported utilities (wireless models only) Embedded Web server The product is equipped with an embedded Web server, which provides access to information about product and network activities. This information appears in a Web browser, such as Microsoft Internet Explorer, Apple Safari, or Firefox. The embedded Web server resides on the product. It is not loaded on a network server.
3 ENWW Use the product with Mac ● Software for Mac ● Print with Mac 15
Software for Mac Supported operating systems for Macintosh The product supports the following Macintosh operating systems: ● Mac OS X v10.4, v10.5, and v10.6 NOTE: PPC and Intel® Core™ processors are supported. Supported printer drivers for Macintosh The HP LaserJet software installer provides PostScript® Printer Description (PPD) files, a CUPS driver, and the HP Printer Utilities for Mac OS X.
Change printer-driver settings for Macintosh Change the settings for all print jobs until the software program is closed Change the default settings for all print jobs Change the product configuration settings 1. On the File menu, click Print. 1. On the File menu, click Print. Mac OS X v10.4 2. Change the settings that you want on the various menus. 2. Change the settings that you want on the various menus. 1. From the Apple menu, click System Preferences and then Print & Fax. 3.
Software for Mac computers HP Printer Utility for Mac Use the HP LaserJet Utility to print the product information pages and to change the Auto-Off setting from a Mac computer. To open the HP LaserJet Utility, complete the procedure below. ▲ Open the Print Queue, and then click the Utility icon. Install software for Mac computers on a wireless network Before installing the product software, make sure the product is not connected to the network using a network cable. NOTE: You must have Mac OS X V10.
The embedded Web server provides an interface to the device that anyone who has a network-connected computer and a standard Web browser can use. No special software is installed or configured, but you must have a supported Web browser on your computer. To gain access to the embedded Web server, type the IP address for the device in the address line of the browser. (To find the IP address, print a configuration page.
Print with Mac Create and use printing presets in Macintosh Use printing presets to save the current printer driver settings for reuse. Create a printing preset 1. On the File menu, click Print. 2. Select the driver. 3. Select the print settings. 4. In the Presets box, click Save As..., and type a name for the preset. 5. Click OK. Use printing presets 1. On the File menu, click Print. 2. Select the driver. 3. In the Presets box, select the printing preset that you want to use.
Print multiple pages on one sheet of paper in Macintosh You can print more than one page on a single sheet of paper. This feature provides a cost-effective way to print draft pages. 1. On the File menu, click Print. 2. Select the driver. 3. Open the Layout menu. 4. Next to Pages per Sheet, select the number of pages that you want to print on each sheet (1, 2, 4, 6, 9, or 16). 5. Next to Layout Direction, select the order and placement of the pages on the sheet. 6.
22 Chapter 3 Use the product with Mac ENWW
4 ENWW Connect the product ● Supported network operating systems (wireless models only) ● USB connection ● Network connection (wireless models only) 23
Supported network operating systems (wireless models only) The product supports the following operating systems for wireless printing: 24 ● Windows Vista (32-bit and 64-bit) ● Windows XP (32-bit and 64-bit) ● Windows 7 ● Windows Server 2003 (32-bit and 64-bit) ● Windows Server 2008 (32-bit and 64-bit) ● Mac OS X v10.4, v10.5, and v10.
USB connection This product supports a Hi-Speed USB 2.0 connection. You must use an A-to-B type USB cable that is no longer than 2 m (6.56 ft). CD installation 1. Insert the software installation CD into the computer CD drive. NOTE: Do not connect the USB cable until prompted. 2. If the installation program does not start automatically, browse the CD contents and run the SETUP.EXE file. 3. Follow the onscreen instructions to install the software.
Network connection (wireless models only) The product can connect to wireless networks. Supported network protocols To connect a networking-equipped product to a network, you need a network that uses one of the following protocols. ● TCP/IP (IPv4 or IPv6) ● Port 9100 ● LPR ● DHCP ● AutoIP ● SNMP ● Bonjour ● SLP ● WSD ● NBNS Install the product on a wireless network with the software CD 1. Insert the software CD into the computer CD tray.
1. Connect the wireless product to the computer through a USB cable. 2. Click the Start button, and then click the Programs or All Programs menu item. 3. Click the HP menu item, and then click the HP LaserJet Professional P1100 Printer series menu item. 4. Click the Wireless Configuration menu item. 5. Follow the onscreen instructions to configure the product to print on a wireless network. Restore default wireless settings 1. Turn the product off. 2. Press and hold the wireless 3.
1. Open the HP Embedded Web Server, and then click the Networking tab. 2. In the navigation pane, click the IPv4 Configuration link or the IPv6 Configuration link. 3. In the IP Address Configuration section, click the Manual IP option. 4. Type the required data in the Manual IP Address box, the IP Subnet Mask box, and the Manual Default Gateway box. 5. Click the Apply button. Link speed setting Use the Networking tab in the HP Embedded Web Server to set the link speed if necessary.
5 ENWW Paper and print media ● Understand paper and print media use ● Special paper or print media guidelines ● Change the print driver to match the media type and size ● Supported paper sizes ● Supported paper types and tray capacity ● Paper orientation for loading trays ● Load paper trays 29
Understand paper and print media use This product supports a variety of paper and other print media in accordance with the guidelines in this user guide. Paper or print media that does not meet these guidelines might cause poor print quality, increased jams, and premature wear on the product. For best results, use only HP-brand paper and print media designed for laser printers or multiuse. Do not use paper or print media made for inkjet printers.
Special paper or print media guidelines This product supports printing on special media. Use the following guidelines to obtain satisfactory results. When using special paper or print media, be sure to set the type and size in the printer driver to obtain the best results. CAUTION: HP LaserJet products use fusers to bond dry toner particles to the paper in very precise dots. HP laser paper is designed to withstand this extreme heat. Using inkjet paper could damage the product.
Change the print driver to match the media type and size Selecting media by type and size results in significantly better print quality for heavy paper, glossy paper, and overhead transparencies. Using the wrong setting can result in unsatisfactory print quality. Always print by type for special print media, such as labels or transparencies. Always print by size for envelopes. NOTE: Depending on the software program, the commands and dialog box names that follow might be different. 32 1.
Supported paper sizes This product supports various paper sizes, and it adapts to various media. NOTE: To obtain best print results, select the appropriate paper size and type in your print driver before printing. Table 5-1 Supported paper and print media sizes Size Dimensions Letter 216 x 279 mm (8.5 x 11 in) Legal 216 x 356 mm (8.5 x 14 in) A4 210 x 297 mm (8.27 x 11.69 in) Executive 184 x 267 mm (7.25 x 10.5 in) A5 148 x 210 mm (5.83 x 8.27 in) A6 105 x 148 mm (4.13 x 5.
Supported paper types and tray capacity Supported paper and print media types For a complete list of specific HP-brand paper that this product supports, go to www.hp.com/support/ ljp1100series.
Paper orientation for loading trays If you are using paper that requires a specific orientation, load it according to the information in the following table.
36 2. Attach the tool to the adjustable media guide. 3. Insert the media into the product until it stops, and then slide the adjustable media guide, with the tool attached to support the media. 4. When finished printing with short media, remove the short media extender tool, and then place it back in the storage slot.
6 ENWW Print tasks ● Cancel a print job ● Print with Windows 37
Cancel a print job You can stop a print job by using the software program. NOTE: It can take several minutes for all print jobs to clear after you have canceled a print job. Stop the current print job from the control panel (wireless models only) ▲ Press the cancel button on the control panel. Stop the current print job from the software program When you send the print job, a dialog box opens briefly on the screen, giving you the option to cancel the print job.
Print with Windows NOTE: Depending on the software program, the commands and dialog box names that follow might be different. Open the Windows printer driver 1. On the File menu in the software program, click Print. 2. Select the product, and then click Properties or Preferences. Get help for any print option with Windows Printer-driver Help is separate from program Help. The printer-driver help provides explanations for the buttons, check boxes, and drop-down lists that are in the printer driver.
Create a custom printing quick set 1. Open the printer driver, and then click the Properties or Preferences button. The Print Tasks Quick Sets drop-down list appears on all tabs except the Services tab. 2. Select an existing quick set as a base. 3. Select the print options for the new quick set. 4. Click Save As, type a name for the quick set, and then click OK. Improve print quality with Windows Select a page size 1.
Print the first or last page on different paper with Windows 1. Open the printer driver, click the Properties or Preferences button, and then click the Paper/Quality tab. 2. Click the Use Different Paper/Covers check box, and then select the necessary settings for the front cover, other pages, and back cover. 3. Click the OK button. Scale a document to fit page size with Windows 1. Open the printer driver, click the Properties or Preferences button, and then click the Effects tab. 2.
6. Retrieve the printed stack from the output bin, and, maintaining the paper orientation, place it with the printed-side facing down in the input tray. 7. At the computer, click the Continue button to print the second side of the job. Create a booklet with Windows 42 1. Open the printer driver, click the Properties or Preferences button, and then click the Finishing tab. 2. Click the Print on both sides (manually) check box. 3.
Print multiple pages per sheet with Windows 1. Open the printer driver, click the Properties or Preferences button, and then click the Finishing tab. 2. Select the number of pages per sheet from the Pages per sheet drop-down list. 3. Select the correct options for Print Page Borders, Page Order, and Orientation. 4. Click the OK button. Select page orientation with Windows 1. Open the printer driver, click the Properties or Preferences button, and then click the Finishing tab. 2.
d. Select the HP Web Services tab and click the Enable button. The product configures the connection to the Internet, and then a message appears informing you that an information sheet will be printed. e. Click the OK button. An ePrint page prints out. On the ePrint page, look for the e-mail address that is automatically assigned to the product. 2. To print a document, attach it to an e-mail message, and then send the message to the product's e-mail address. Go to www.hpeprintcenter.
NOTE: To find the network name (SSID), click the Wireless Configuration menu in the Networking page. 2. To print a document from an application, select File, and then select Print. NOTE: If only one product that supports HP Direct Print is connected to the wireless network, the document prints. If more than one product that supports HP Direct Print is connected, a list of products appears; you must select your product before proceeding to the next step.
46 Chapter 6 Print tasks ENWW
7 ENWW Manage and maintain the product ● Print the information pages ● Use the HP Embedded Web Server (wireless models only) ● Economy settings ● Manage supplies and accessories ● Clean the product ● Product updates 47
Print the information pages You can print the following information pages. Configuration page The configuration page lists current product settings and properties. It also contains a status log report. To print a configuration page, do the following: 1. Open the printer driver, and then click the Properties or Preferences button. 2. Click the Services tab, and then, in the Print Information Pages drop-down list, click the Config Page list item. 3. Click the Print button.
Use the HP Embedded Web Server (wireless models only) Use the HP Embedded Web Server (EWS) to view product and network status and to manage printing functions from a computer. ● View product status information ● Determine the remaining life on all supplies and order new ones ● View and change the product default configuration settings ● View and change network configuration You do not need to install any software on the computer.
Settings tab Use this tab to configure the product from your computer. If this product is networked, always consult with the product administrator before changing settings on this tab. The Settings tab contains the Printing page where you can view and change the default print job settings. Networking tab Network administrators can use this tab to control network-related settings for the product when it is connected to an IP-based network.
Economy settings Auto-Off mode Auto-Off is an energy-saving feature of this product. After a user-specified time period, the product automatically reduces its power consumption (Auto-Off). The product returns to the ready state when a button is pressed or a print job is received. When the product is in Auto-Off mode, all of the control-panel LEDs and the power button backlight LED are off.
Manage supplies and accessories Correctly using, storing, and monitoring the print cartridge can help ensure high-quality print output. Check and order supplies Print-cartridge storage Do not remove the print cartridge from its package until you are ready to use it. CAUTION: To prevent damage to the print cartridge, do not expose it to light for more than a few minutes. HP Policy on non-HP print cartridges HP Company cannot recommend the use of non-HP print cartridges, either new or remanufactured.
Replacement instructions Redistribute toner When a small amount of toner remains in print cartridge, faded or light areas might appear on the printed page. You might be able to temporarily improve print quality by redistributing the toner. 1. Open the print-cartridge door, and then remove the print cartridge. 2. To redistribute the toner, gently rock the print cartridge from front to back. CAUTION: If toner gets on your clothing, wipe it off with a dry cloth and wash the clothing in cold water.
3. Reinsert the print cartridge into the product, and then close the print-cartridge door. If the print is still light, install a new print cartridge. Replace the print cartridge When a print cartridge approaches the end of useful life, you can continue printing with the current cartridge until redistributing the toner no longer yields acceptable print quality. 1. 54 Open the print-cartridge door, and then remove the old print cartridge.
2. Remove the new print cartridge from the packaging. Place the used print cartridge in the bag and box for recycling. CAUTION: To prevent damage to the print cartridge, hold the print cartridge at each end. Do not touch the cartridge shutter or the roller surface. 3. ENWW Grasp both sides of the print cartridge and gently rock the print cartridge to distribute the toner evenly inside the cartridge.
4. Bend the tab on the left side of the cartridge until the tab breaks loose, and then pull the tab until all the tape is removed from the cartridge. Place the tab and tape in the print-cartridge box to return for recycling. 5. Insert the print cartridge in the product, and then close the print-cartridge door. CAUTION: If toner gets on your clothing, wipe it off with a dry cloth and wash the clothing in cold water. Hot water sets toner into the fabric.
Replace the pickup roller Normal use with good media causes wear. The use of poor media might require more frequent replacement of the pickup roller. If the product regularly mispicks (no media feeds through), you might need to change or clean the pickup roller. See Clean the pickup roller on page 63 to order a new pickup roller. 1. Open the print-cartridge door, and then remove the print cartridge. CAUTION: To prevent damage to the print cartridge, minimize its exposure to direct light.
58 3. Release the small, white tabs on each side of the pickup roller, and rotate the pickup roller toward the front. 4. Gently pull the pickup roller up and out. 5. Position the new pickup roller in the slot. The circular and rectangular slots on each side prevents you from installing the roller incorrectly.
ENWW 6. Rotate the top of the new pickup roller away from you until both sides snap into place. 7. Insert the print cartridge in the product, and then close the print-cartridge door.
Replace the separation pad Normal use with good media causes wear. The use of poor media might require more frequent replacement of the separation pad. If the product regularly pulls multiple sheets of media at a time, you might need to change the separation pad. NOTE: Before you change the separation pad, clean the pickup roller. See Clean the pickup roller on page 63.
ENWW 4. Remove the separation pad. 5. Insert the new separation pad, and screw it into place.
6. 62 Reconnect the power cord, and then turn on the product.
Clean the product Clean the pickup roller If you want to clean the pickup roller before deciding to replace it, follow these instructions: 1. Unplug the power cord from the product and remove the pickup roller as described in Replace the pickup roller on page 57. 2. Dab a lint-free cloth in isopropyl alcohol, and scrub the roller. WARNING! Alcohol is flammable. Keep the alcohol and cloth away from an open flame.
Clean the paper path If you are experiencing toner specks or dots on the printouts, clean the paper path. This process uses a transparency to remove dust and toner from the paper path. Do not use bond or rough paper. NOTE: For best results use a sheet of transparency. If you do not have any transparencies, you can use copier-grade media (60 to 163 g/m2 (16 to 43 lb)) that has a smooth surface. 1. Make sure that the product is idle and the ready light is on. 2. Load media in the input tray. 3.
Clean the print-cartridge area You do not need to clean the print-cartridge area often. However, cleaning this area can improve the quality of the printed sheets. WARNING! Before changing the separation pad, turn the product off, disconnect the power cord from the wall outlet, and then wait for the product to cool. 1. Disconnect the power cord from the product. Open the print-cartridge door, and then remove the print cartridge. CAUTION: Do not touch the black-sponge transfer roller inside the product.
66 2. With a dry, lint-free cloth, wipe any residue from the paper-path area and the print-cartridge cavity. 3. Reinstall the print cartridge, and then close the print-cartridge door.
4. Disconnect the power cord. Clean the exterior Use a soft, damp, lint-free cloth to wipe dust, smudges, and stains off of the exterior of the device. Product updates Software and firmware updates and installation instructions for this product are available at www.hp.com/ support/ljp1100series. Click Downloads and drivers, click the operating system, and then select the download for the product.
68 Chapter 7 Manage and maintain the product ENWW
8 ENWW Solve problems ● Solve general problems ● Interpret control-panel light patterns ● Clear jams ● Solve paper-handling problems ● Solve image-quality problems ● Solve performance problems ● Solve connectivity problems ● Solve product software problems 69
Solve general problems If the product is not responding correctly, complete the steps in the following checklist, in order. If the product does not pass a step, follow the corresponding troubleshooting suggestions. If a step resolves the problem, you can stop without performing the other steps on the checklist. Troubleshooting checklist 1. 2. Make sure that the product is set up correctly. a. Press the power button to turn on the product or to deactivate the Auto-Off mode. b.
9. a. If the page does not print, verify that the input tray contains paper. b. If the page jams in the product, see Clear jams on page 75. Print a small document from a different program that has worked in the past. If this solution works, then the problem is with the program you are using. If this solution does not work (the document does not print), complete these steps: a. Try printing the job from another computer that has the product software installed. b. Check the USB cable connection.
Interpret control-panel light patterns Table 8-1 Status-light legend Symbol for "light off" Symbol for "light on" Symbol for "light blinking" Table 8-2 Control-panel light patterns 72 Light status State of the product Action All lights are off. The product is in Auto-Off mode or is turned off. Press the power button to deactivate the Auto-Off mode or to turn on the product.
Table 8-2 Control-panel light patterns (continued) Light status State of the product Action Ready light is blinking, and attention light is off. The product is receiving or processing data. No action is required. The product is receiving or processing a print job. Attention light is blinking, and ready light is off. The product has experienced an error that can be corrected at the product, such as a jam, an open door, the absence of a print cartridge, or the absence of paper in the proper tray.
Table 8-2 Control-panel light patterns (continued) Light status State of the product Action The wireless light is blinking. The product is attempting to locate a wireless network. No action is required. The wireless light is on. The product is connected to a wireless network. No action is required. The wireless light is off. The product is not connected to a network, and the wireless unit in the product might be turned off.
Clear jams When clearing jams, be careful not to tear jammed paper. If a small piece of paper remains in the product, it could cause additional jams. Common causes of jams ● The input tray is loaded incorrectly or is too full. NOTE: When you add new media, always remove all of the media from the input tray and straighten the entire stack. This helps prevent multiple feeds and reduces media jams. ● The media does not meet HP specifications.
Jam locations Jams can occur at the following locations in the product. 1 3 2 1 Internal areas 2 Input tray 3 Output bin NOTE: Jams can occur in more than one location. Clear jams from the input tray CAUTION: Do not use sharp objects, such as tweezers or needle-nose pliers, to remove jams. Damage caused by sharp objects will not be covered by the warranty. When removing jammed media, pull the jammed media straight away from the product.
2. ENWW Remove the media stack from the input tray.
3. With both hands, grasp the side of the jammed media that is most visible (this includes the middle), and carefully pull it free from the product. 4. Reinstall the print cartridge, and then close the print-cartridge door. Clear jams from the output areas CAUTION: Do not use sharp objects, such as tweezers or needle-nose pliers, to remove jams. Damage caused by sharp objects will not be covered by the warranty. 1. 78 Open the print-cartridge door, and then remove the print cartridge.
2. ENWW Keep the print cartridge door open, and then with both hands, grasp the side of the jammed media that is most visible (this includes the middle), and carefully pull it free from the product.
3. 80 Reinstall the print cartridge, and then close the print-cartridge door.
Clear jams from inside the product 1. Open the print-cartridge door, and then remove the print cartridge. CAUTION: To prevent damage, do not expose the print cartridge to light. Cover it with a piece of paper. 2. ENWW If you can see the jammed paper, carefully grasp the jammed paper, and slowly pull it out of the product.
3. Reinstall the print cartridge, and then close the print-cartridge door. Solve repeated jams ● Verify that the input tray is not overfilled. The input tray capacity varies depending on the type of print media that you are using. ● Verify that the media guides are properly adjusted. ● Check that the input tray is securely in place. ● Do not add print media into the input tray while the product is printing. ● Use only HP-recommended media types and sizes.
Solve paper-handling problems The following problems with media cause print-quality deviations, jamming, or damage to the product. Problem Cause Solution Poor print quality or toner adhesion The paper is too moist, too rough, too heavy or too smooth, or it is embossed or from a faulty paper lot. Try another kind of paper, between 100 and 250 Sheffield, with 4% to 6% moisture content. Dropouts, jamming, or curl The paper has been stored incorrectly. Store paper flat in its moisture-proof wrapping.
Solve image-quality problems You can prevent most print-quality problems by following these guidelines. ● Use paper that meets HP specifications. See Paper and print media on page 29. ● Clean the product as necessary. See Clean the product on page 63. Image defect examples This section provides information about identifying and correcting print defects. NOTE: If these steps do not correct the problem, contact an HP-authorized dealer or service representative.
Vertical lines ● Toner might be on the photosensitive drum. Print a few more pages to see if the problem might correct itself. ● The photosensitive drum inside the print cartridge has probably been scratched. Install a new genuine HP print cartridge. ● Change the media to a lighter basis weight. ● Check the product environment. Very dry (low humidity) conditions can increase the amount of background shading. ● The density setting might be too high. Adjust the density setting.
Vertical repetitive defects ● The print cartridge might be damaged. If a repetitive mark occurs at the same spot on the page, install a new genuine HP print cartridge. ● The internal parts might have toner on them. If the defects occur on the back of the page, the problem probably will correct itself after a few more printed pages. ● In the printer driver, make sure the appropriate media type is selected.
Wrinkles or creases ● Make sure that media is loaded properly. ● Check the media type and quality. ● Turn over the stack of media in the tray. Also, try rotating the media 180° in the input tray. ● For envelopes, this can be caused by air pockets inside the envelope. Remove the envelope, flatten the envelope, and then try printing again. ● If large amounts of toner have scattered around the characters, the transfer of toner to the media is not optimal.
Moisture NOTE: This product dissipates heat by using convective cooling. The heat and moisture generated by the printing process escape through vents in the product exterior or through the output bin area. Verify normal product operation The release of moisture is a result of normal product operation. However, HP recommends using the following steps to verify that the product is releasing steam and does not have a functional problem. 1. Turn the product off, and then on. 2.
ENWW 3. Click the Device settings tab, and then move the Print Density slider to the desired setting. 4. Click the Apply button to accept the setting, and then click the OK button to close the dialog box.
Solve performance problems Problem Cause Solution Pages print but are totally blank. The cartridge pull tab or the sealing tape might still be in the print cartridge. Verify that the cartridge pull tab and tape have been removed completely from the print cartridge. The document might contain blank pages. Check the document that you are printing to see if content appears on all of the pages. The product might be malfunctioning. To check the product, print a Configuration page.
Solve connectivity problems Solve direct-connect problems If you have connected the product directly to a computer, check the USB cable. ● Verify that the cable is connected to the computer and to the product. ● Verify that the cable is not longer than 2 m (6.56 ft). Replace the cable if necessary. ● Verify that the cable is working correctly by connecting it to another product. Replace the cable if necessary.
The product cannot connect to the wireless network. Cause Solution The product wireless settings and the network settings do not match. You might need to configure the product network settings manually. Verify that you know the following network settings: ● Communication mode ● Network name (SSID) ● Channel (ad-hoc networks only) ● Authentication type Use the Wireless Configuration utility to configure the product to print on wireless network.
Solve product software problems Solve common Windows problems Error message: "General Protection FaultException OE" "Spool32" "Illegal Operation" Cause Solution Close all software programs, restart Windows, and try again. Delete all temporary files from the Temp subdirectory. To find the Temp folder, complete the following steps: 1. Click the Start button, and then click the Run item. 2. In the Open box, type %temp%. 3. Click the OK button. A Windows Explorer window for the Temp folder opens.
The product name does not appear in the product list in the Printer Setup Utility or Print & Fax list. Cause Solution The product might not be ready. Make sure that the cables are connected correctly, the product is on, and is on. the ready light The wrong product name is being used. Print a configuration page to check the product name. Verify that the name on the configuration page matches the product name in the Printer Setup Utility or the Print & Fax list.
You are unable to print from a third-party USB card. Cause Solution This error occurs when the software for USB products is not installed. When adding a third-party USB card, you might need the Apple USB Adapter Card Support software. The most current version of this software is available from the Apple Web site. When connected with a USB cable, the product does not appear in the Printer Setup Utility or Print & Fax list after the driver is selected.
96 Chapter 8 Solve problems ENWW
A ENWW Supplies and accessories ● Order parts, accessories, and supplies ● Part numbers 97
Order parts, accessories, and supplies Order supplies and paper www.hp.com/go/suresupply Order genuine HP parts or accessories www.hp.com/buy/parts Order through service or support providers Contact an HP-authorized service or support provider. Part numbers The following list of accessories was current at the time of printing. Ordering information and availability of the accessories might change during the life of the product.
B ENWW Service and support ● HP limited warranty statement ● HP's Premium Protection Warranty: LaserJet toner cartridge limited warranty statement ● HP policy on non-HP supplies ● HP anticounterfeit Web site ● Data stored on the toner cartridge ● End User License Agreement ● Customer self-repair warranty service ● Customer support 99
HP limited warranty statement HP PRODUCT DURATION OF LIMITED WARRANTY HP LaserJet Professional P1100, P1100w except for P1109W One year from date of purchase HP LaserJet Professional P1109w Six months from date of purchase HP warrants to you, the end-user customer, that HP hardware and accessories will be free from defects in materials and workmanship after the date of purchase, for the period specified above.
UK, Ireland, and Malta The HP Limited Warranty is a commercial guarantee voluntarily provided by HP. The name and address of the HP entity responsible for the performance of the HP Limited Warranty in your country/region is as follows: UK: HP Inc UK Limited, Cain Road, Amen Corner, Bracknell, Berkshire, RG12 1HN Ireland: Hewlett-Packard Ireland Limited, Liffey Park Technology Campus, Barnhall Road, Leixlip, Co.Kildare Malta: Hewlett-Packard Europe B.V.
Rechte haben, hängt von zahlreichen Faktoren ab. Die Rechte des Kunden sind in keiner Weise durch die beschränkte HP Herstellergarantie eingeschränkt bzw. betroffen. Weitere Hinweise finden Sie auf der folgenden Website: Gewährleistungsansprüche für Verbraucher (www.hp.com/go/eu-legal) oder Sie können die Website des Europäischen Verbraucherzentrums (http://ec.europa.eu/consumers/ solving_consumer_disputes/non-judicial_redress/ecc-net/index_en.htm) besuchen.
Article L211-12 du Code de la Consommation: « L'action résultant du défaut de conformité se prescrit par deux ans à compter de la délivrance du bien ». Garantie des vices cachés Article 1641 du Code Civil : « Le vendeur est tenu de la garantie à raison des défauts cachés de la chose vendue qui la rendent impropre à l'usage auquel on la destine, ou qui diminuent tellement cet usage que l'acheteur ne l'aurait pas acquise, ou n'en aurait donné qu'un moindre prix, s'il les avait connus.
consumidor o puede visitar el sitio web de los Centros europeos de los consumidores (http://ec.europa.eu/ consumers/solving_consumer_disputes/non-judicial_redress/ecc-net/index_en.htm). Los clientes tienen derecho a elegir si reclaman un servicio acogiéndose a la Garantía limitada de HP o al vendedor de conformidad con la garantía legal de dos años. Denmark Den begrænsede HP-garanti er en garanti, der ydes frivilligt af HP.
Portugal A Garantia Limitada HP é uma garantia comercial fornecida voluntariamente pela HP. O nome e a morada da entidade HP responsável pela prestação da Garantia Limitada HP no seu país são os seguintes: Portugal: HPCP – Computing and Printing Portugal, Unipessoal, Lda., Edificio D.
jótállás alapján vagy a kétéves, jogszabályban foglalt eladói szavatosság, illetve, ha alkalmazandó, a jogszabályban foglalt kötelező eladói jótállás alapján érvényesítik. Czech Republic Omezená záruka HP je obchodní zárukou dobrovolně poskytovanou společností HP. Názvy a adresy společností skupiny HP, které odpovídají za plnění omezené záruky HP ve vaší zemi, jsou následující: Česká republika: HP Inc Czech Republic s. r. o.
Bulgaria Ограничената гаранция на HP представлява търговска гаранция, доброволно предоставяна от HP. Името и адресът на дружеството на HP за вашата страна, отговорно за предоставянето на гаранционната поддръжка в рамките на Ограничената гаранция на HP, са както следва: HP Inc Bulgaria EOOD (Ейч Пи Инк България ЕООД), гр. София 1766, район р-н Младост, бул.
het recht om te kiezen tussen enerzijds de Beperkte Garantie van HP of anderzijds het aanspreken van de verkoper in toepassing van de wettelijke garantie. Finland HP:n rajoitettu takuu on HP:n vapaaehtoisesti antama kaupallinen takuu.
HP ierobežotās garantijas priekšrocības tiek piedāvātas papildus jebkurām likumīgajām tiesībām uz pārdevēja un/vai rażotāju nodrošinātu divu gadu garantiju gadījumā, ja preces neatbilst pirkuma līgumam, tomēr šo tiesību saņemšanu var ietekmēt vairāki faktori. HP ierobežotā garantija nekādā veidā neierobežo un neietekmē patērētāju likumīgās tiesības. Lai iegūtu plašāku informāciju, izmantojiet šo saiti: Patērētāju likumīgā garantija (www.hp.
HP's Premium Protection Warranty: LaserJet toner cartridge limited warranty statement This HP product is warranted to be free from defects in materials and workmanship. This warranty does not apply to products that (a) have been refilled, refurbished, remanufactured or tampered with in any way, (b) experience problems resulting from misuse, improper storage, or operation outside of the published environmental specifications for the printer product or (c) exhibit wear from ordinary use.
HP policy on non-HP supplies HP cannot recommend the use of non-HP toner cartridges, either new or remanufactured. NOTE: For HP printer products, the use of a non-HP toner cartridge or a refilled toner cartridge does not affect either the warranty to the customer or any HP support contract with the customer.
HP anticounterfeit Web site Go to www.hp.com/go/anticounterfeit when you install an HP toner cartridge and the control-panel message indicates the cartridge is non-HP. HP will help determine if the cartridge is genuine and take steps to resolve the problem. Your toner cartridge might not be a genuine HP toner cartridge if you notice the following: ● The supplies status page indicates that a non-HP supply is installed. ● You are experiencing a high number of problems with the cartridge.
Data stored on the toner cartridge The HP toner cartridges used with this product contain a memory chip that assists in the operation of the product.
End User License Agreement READ CAREFULLY BEFORE USING THIS SOFTWARE EQUIPMENT: This End-User license Agreement ("EULA") is a legal agreement between (a) you (either an individual or a single entity) and (b) HP Inc. ("HP") that governs your use of any Software Product, installed on or made available by HP for use with your HP product ("HP Product"), that is not otherwise subject to a separate license agreement between you and HP or its suppliers.
purchased. The use of any Microsoft operating system software contained in such recovery solution shall be governed by the Microsoft License Agreement. 2. UPGRADES. To use a Software Product identified as an upgrade, you must first be licensed for the original Software Product identified by HP as eligible for the upgrade. After upgrading, you may no longer use the original Software Product that formed the basis for your upgrade eligibility.
described in this EULA and as further described in HP’s privacy policy: www8.hp.com/us/en/ privacy/privacy.html?jumpid=reg_r1002_usen_c-001_title_r0001 b. 9. Collection/Use by Third Parties. Certain software programs included in your HP Product are provided and separately licensed to you by third party providers (“Third Party Software”). Third Party Software may be installed and operational on your HP Product even if you choose not to activate/purchase such software.
13. CAPACITY AND AUTHORITY TO CONTRACT. You represent that you are of the legal age of majority in your state of residence and, if applicable, you are duly authorized by your employer to enter into this contract. 14. APPLICABLE LAW. This EULA is governed by the laws of the country in which the equipment was purchased. 15. ENTIRE AGREEMENT.
Customer self-repair warranty service HP products are designed with many Customer Self Repair (CSR) parts to minimize repair time and allow for greater flexibility in performing defective parts replacement. If during the diagnosis period, HP identifies that the repair can be accomplished by the use of a CSR part, HP will ship that part directly to you for replacement. There are two categories of CSR parts: 1) Parts for which customer self repair is mandatory.
Customer support Get telephone support for your country/region Have the product name, serial number, date of purchase, and problem description ready. ENWW Country/region phone numbers are on the flyer that was in the box with your product or at www.hp.com/support/. Get 24-hour Internet support, and download software utilities and drivers www.hp.com/support/ljp1100series Order additional HP service or maintenance agreements www.hp.com/go/carepack Register your product www.register.hp.
120 Appendix B Service and support ENWW
C ENWW Specifications ● Physical specifications ● Power consumption, electrical specifications, and acoustic emissions ● Environmental specifications 121
Physical specifications Table C-1 Physical specifications1 1 Specification HP LaserJet Professional P1100 Printer series Product weight 4.7 kg (10.4 lb) Product height 194 mm (7.6 in) Product depth 224 mm (8.8 in) Product width 347 mm (13.7 in) Values are based on preliminary data. See www.hp.com/support/ljp1100series. Power consumption, electrical specifications, and acoustic emissions See www.hp.com/go/ljp1100_regulatory for current information.
D ENWW Environmental product stewardship program ● Protecting the environment ● Ozone production ● Power consumption ● Toner consumption ● Paper use ● Plastics ● HP LaserJet print supplies ● Paper ● Material restrictions ● Disposal of waste equipment by users (EU and India) ● Electronic hardware recycling ● Brazil hardware recycling information ● Chemical substances ● Product Power Data per European Union Commission Regulation 1275/2008 ● Restriction on Hazardous Substances s
Protecting the environment HP is committed to providing quality products in an environmentally sound manner. This product has been designed with several attributes to minimize impacts on our environment.
Paper use This product’s duplex feature (manual or automatic) and N-up printing (multiple pages printed on one page) capability can reduce paper usage and the resulting demands on natural resources. Plastics Plastic parts over 25 grams are marked according to international standards that enhance the ability to identify plastics for recycling purposes at the end of the product’s life. HP LaserJet print supplies Original HP Supplies were designed with the environment in mind.
Electronic hardware recycling HP encourages customers to recycle used electronic hardware. For more information about recycling programs go to: www.hp.com/recycle. Brazil hardware recycling information Este produto eletrônico e seus componentes não devem ser descartados no lixo comum, pois embora estejam em conformidade com padrões mundiais de restrição a substâncias nocivas, podem conter, ainda que em quantidades mínimas, substâncias impactantes ao meio ambiente.
Restriction on Hazardous Substances statement (Ukraine) Обладнання відповідає вимогам Технічного регламенту щодо обмеження використання деяких небезпечних речовин в електричному та електронному обладнанні, затвердженого постановою Кабінету Міністрів України від 3 грудня 2008 № 1057 Substances Table (China) SEPA Ecolabel User Information (China) 中国环境标识认证产品用户说明 噪声大于 63.
The regulation of the implementation on China energy label for printer, fax, and copier Material Safety Data Sheet (MSDS) Material Safety Data Sheets (MSDS) for supplies containing chemical substances (for example, toner) can be obtained by accessing the HP Web site at www.hp.com/go/msds. EPEAT Many HP products are designed to meet EPEAT. EPEAT is a comprehensive environmental rating that helps identify greener electronics equipment. For more information on EPEAT go to www.epeat.net.
E ENWW Regulatory information ● Declaration of Conformity (HP LaserJet Professional P1102, P1102s, P1106, P1108, and P1109) ● Declaration of Conformity (HP LaserJet Pro P1102w and P1109w) ● Regulatory statements ● Additional statements for wireless products 129
Declaration of Conformity (HP LaserJet Professional P1102, P1102s, P1106, P1108, and P1109) Declaration of Conformity according to ISO/IEC 17050-1 and EN 17050-1 Manufacturer's Name: HP Inc. Manufacturer's Address: 11311 Chinden Boulevard DoC#: BOISB-0901-00-rel.12.
Shanghai, China Nov.1, 2015 For Regulatory Topics only, contact: European Contact HP Deutschland GmbH, HQ-TRE, 71025 Boeblingen, Germany USA Contact HP Inc., 1501 Page Mill Rd., Palo Alto, CA 94304, U.S.A.
Declaration of Conformity (HP LaserJet Pro P1102w and P1109w) Declaration of Conformity according to ISO/IEC 17050-1 and EN 17050-1 Manufacturer's Name: HP Inc. Manufacturer's Address: 11311 Chinden Boulevard DoC#: BOISB-0901-06-rel.9.
This Device complies with Part 15 of the FCC Rules. Operation is subject to the following two Conditions: (1) this device may not cause harmful interference, and (2) this device must accept any interference received, including interference that may cause undesired operation. 1. The product was tested in a typical configuration with HP Personal Computer Systems. 2. For regulatory purposes, this product is assigned a Regulatory model number.
Regulatory statements FCC regulations This equipment has been tested and found to comply with the limits for a Class B digital device, pursuant to Part 15 of the FCC rules. These limits are designed to provide reasonable protection against harmful interference in a residential installation. This equipment generates, uses, and can radiate radio frequency energy. If this equipment is not installed and used in accordance with the instructions, it may cause harmful interference to radio communications.
Power cord statement (Japan) Laser safety The Center for Devices and Radiological Health (CDRH) of the U.S. Food and Drug Administration has implemented regulations for laser products manufactured since August 1, 1976. Compliance is mandatory for products marketed in the United States. The device is certified as a “Class 1” laser product under the U.S. Department of Health and Human Services (DHHS) Radiation Performance Standard according to the Radiation Control for Health and Safety Act of 1968.
Tiedot laitteessa käytettävän laserdiodin säteilyominaisuuksista: Aallonpituus 775-795 nm Teho 5 m W Luokan 3B laser.
GS statement (Germany) Das Gerät ist nicht für die Benutzung im unmittelbaren Gesichtsfeld am Bildschirmarbeitsplatz vorgesehen. Um störende Reflexionen am Bildschirmarbeitsplatz zu vermeiden, darf dieses Produkt nicht im unmittelbaren Gesichtsfeld platziert werden. Das Gerät ist kein Bildschirmarbeitsplatz gemäß BildscharbV. Bei ungünstigen Lichtverhältnissen (z. B.
Additional statements for wireless products FCC compliance statement—United States Exposure to radio frequency radiation CAUTION: The radiated output power of this device is far below the FCC radio frequency exposure limits. Nevertheless, the device shall be used in such a manner that the potential for human contact during normal operation is minimized.
European Union regulatory notice The telecommunications functionality of this product may be used in the following EU and EFTA countries/ regions: Austria, Belgium, Bulgaria, Cyprus, Czech Republic, Denmark, Estonia, Finland, France, Germany, Greece, Hungary, Iceland, Ireland, Italy, Latvia, Liechtenstein, Lithuania, Luxembourg, Malta, Netherlands, Norway, Poland, Portugal, Romania, Slovak Republic, Slovenia, Spain, Sweden, Switzerland, and United Kingdom.
Vietnam Telecom wired/wireless marking for ICTQC Type approved products 140 Appendix E Regulatory information ENWW
Index A accessories ordering 97, 98 part numbers 98 acoustic specifications 122 address, printer Macintosh, troubleshooting 94 AirPrint 45 altitude specifications 122 anticounterfeit supplies 52, 112 B batteries included 125 bin, output features 3 jams, clearing 78 bins, output capacity 34 blank pages problem-solving 90 C cables USB, problem-solving 90 canceling printing 38 canceling a print request 38 cartridges non-HP 111 part numbers 98 recycling 52, 125 storage 52 warranty 110 cautions iii change picku
Finnish laser safety statement first page use different paper 20 fraud hotline 52 fraud Web site 112 135 G General Protection FaultException OE 93 H hardware recycling, Brazil 126 HP Cloud Print 43 HP Customer Care 119 HP Direct Print 44 HP fraud hotline 52 HP fraud Web site 112 humidity specifications 122 I Illegal Operation errors 93 improve print quality 84 information pages configuration page 48 demo page 48 supplies status page 48 Information tab (embedded Web server) 49 input tray capacity 34 featur
paper input tray features 3 paper input trays feeding problems, solving 83 paper jams.
vertical lines 85 vertical repetitive defects 86 wave 86 wireless problems 91 wrinkles 87 See also problem-solving special media guidelines 31 special paper guidelines 31 specifications device features 3 electrical and acoustic 122 environment 122 physical 122 Spool32 errors 93 status-light patterns 72 stopping a print request 38 storing print cartridges 52 product 122 supplies counterfeit 52, 112 non-HP 111 ordering 97, 98 part numbers 98 recycling 52, 125 supplies status page 48 support online 119 support