
HP Color LaserJet Pro M351/M451-Getting Started Guide


5
IMPORTANT:
Follow Steps 1 - 3 on the
printer hardware setup poster,
then continue with Step 4 on the
following page.
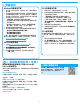
4. Select a connection method and prepare for software installation
Windows
1. For Windows 7 or lower, do not connect the USB cable befor
installing the software. The installation process prompts to
connect the cable at the appropriate time. If the cable is already
connected, restart the printer when installation prompts to
connect the cable.
2. Continue with “5. Locate or download the software installation
les.”
NOTE: During software installation, select the option to Directly
connect this computer using a USB cable.
Mac
1. Connect the USB cable between the computer and the printer
before installing the software.
2. Continue with “5. Locate or download the software installation
les.”
Built-in wireless network connection
(M451dw and M451nw wireless models only)
Connect using a USB cable
1. Insert the software CD into the computer, and follow the on-screen
instructions. When prompted, select the Connect through a
wireless network option. Connect the USB cable to the product
when prompted.
CAUTION: Do not connect the USB cable until the installation
program prompts you.
2. When the installation is complete, print a conguration page to
make sure that the product has a SSID name.
3. When installation is complete, disconnect the USB cable.
Connect using the control panel menus
1. On the front of the product, press the Wireless button. Look at
the control panel display to see if the Wireless Menu item has
opened. If it has not opened, complete these steps:
a. At the control panel, press the OK button to open the menus.
b. Open the following menus:
• Network Setup
• Wireless Menu
2. Select the WPS Setup item.
3. Use one of these methods to complete the setup:
• Pushbutton: Select the Pushbutton option and follow the
instructions on the control panel. Establishing the wireless
connection can take a few minutes.
• PIN: Select the Generate PIN option. The printer generates
a unique PIN, which you must type into the wireless router’s
setup screen. Establishing the wireless connection can take
a few minutes.
NOTE: If this method is not successful, try using the wireless
network using a USB cable method.
To print from a computer, continue with “5. Locate or download
thesoftwareinstallationles.” To print from a phone or tablet
only, continue with “7.Mobileandwirelessprinting(optional).”
ManuallyconguretheIPaddress
See the printer User Guide for information on how to manually
congure the IP address www.hp.com/support/LJColorM351 or
www.hp.com/support/LJColorM451.
Wired (Ethernet) network connection
Use a standard network cable.
1. Connect the network cable to the printer and to the network. Turn
the product on, and wait for 60 seconds before continuing. During
this time, the network recognizes the printer and assigns an IP
address or host name for the product.
To manually congure the IP address, see “Manually congure the
IP address.”
2. At the product control panel, press the OK button.
3. Press the right arrow4to highlight the Reports menu, and then
press the OK button.
4. Press the right arrow4to highlight the CongReport option, and
then press the OK button.
5. Find the IP address on the Self Test/Conguration page. Example
IP address: 192.168.0.1
6. Continue with “5. Locate or download the software installation
les.”
NOTE: During software installation, select the option to Connect
through a network.
USB connection directly between the
printer and the computer
Use an A-to-B type USB cable.