
Cisco Gigabit Ethernet Switch Module for HP BladeSystem p-Class Hardware Installation Guide


Cisco Gigabit Ethernet Switch Module for HP BladeSystem p-Class Hardware Installation Guide D-1
D
Configuring the Switch Using CLI
Overview
This chapter provides quick installation and setup procedures.
NOTE: For detailed switch installation instructions or information on connecting to the small form-factor
pluggable (SFP) modules, see Chapter 2, “Switch Installation.” For product overview information, see
Chapter 1, “Product Overview.”
These steps describe how to do a simple installation:
• Accessing the CLI Through the Console Port
• Connecting to the Console Port
• Starting the Terminal Emulation Software
• Entering the Initial Configuration Information
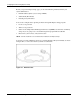
Accessing the CLI Through the Console Port
You can access the CLI on a configured or unconfigured switch by connecting the console
port of the switch to the serial port on your PC or workstation and accessing the switch
through a terminal emulation program such as HyperTerminal.
To access the switch through the console port, follow the steps in the sections listed below:
• “Connecting to the Console Port” section
• “Starting the Terminal Emulation Software” section
• “Entering the Initial Configuration Information” section
NOTE: You can use the mdix auto interface configuration command in the CLI to enable the automatic
medium-dependent interface crossover (Auto-MDIX) feature. When the Auto-MDIX feature is enabled,
the switch detects the required cable type for copper Ethernet connections and configures the
interfaces accordingly. Therefore, you can use either a crossover or a straight-through cable for
connections to a copper 10/100/1000BASE-T SFP module port on the switch, regardless of the type of
device on the other end of the connection.
The Auto-MDIX feature is enabled by default on switches running Cisco IOS Release 12.2(25)SE1 or
later. For configuration information for this feature, refer to the switch software configuration guide or
the switch command reference guide.