
Cisco Gigabit Ethernet Switch Module for HP BladeSystem p-Class Hardware Installation Guide


Configuring the Switch Using CLI
Starting the Terminal Emulation Software
Before you power on the switch, start the terminal emulation session so that you can see the
output display from the power-on self-test (POST). The terminal-emulation software—
frequently a PC application such as HyperTerminal or ProComm Plus—makes
communication between the switch and your PC or terminal possible.
1. Start the terminal-emulation program if you are using a PC or terminal.
2. Start a terminal-emulation session.
3. Configure the baud rate and character format of the PC or terminal to match these
console port default characteristics:
— 9600 baud
— 8 data bits
— 1 stop bit
— No parity
— None (flow control)
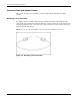
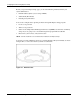
Power on the Switch
To power on the switch, insert the switch into the enclosure. As the switch powers on, it
begins POST, a series of tests that run automatically to ensure that the switch functions
properly. If POST fails, contact HP. Refer to the “Where to Go for Additional Help” section
in this guide for contact information.
If you started the terminal emulation program before you powered on your switch, the PC or
terminal displays the boot loader sequence. You need to press Enter to display the setup
program prompt.
Entering the Initial Configuration Information
To set up the initial configuration of the switch, you can complete the setup program, which
runs automatically (if the switch is not already configured) after the switch is powered up.
Also, initial configuration can be manually done from the switch CLI by typing commands, if
you do not want to use setup program. You must assign an IP address and other configuration
information necessary for the switch to communicate with the local routers and the Internet.
This information is also required if you plan to use the Device Manager or CiscoWorks to
configure and manage the switch.
Cisco Gigabit Ethernet Switch Module for HP BladeSystem p-Class Hardware Installation Guide D-3