OFFICEJET PRO 8600 Getting Started Guide Panduan Persiapan คูมือเริ่มตนใชงาน 使用入門指南
Copyright Information © 2011 Copyright Hewlett-Packard Development Company, L.P. Edition 1, 9/2011 Reproduction, adaptation or translation without prior written permission is prohibited, except as allowed under the copyright laws. The information contained herein is subject to change without notice. The only warranties for HP products and services are set forth in the express warranty statements accompanying such products and services.
Contents Use the printer.................................................................................................................................... 4 HP Digital Solutions.............................................................................................................5 Web Services.....................................................................................................................6 Update the printer.........................................................................
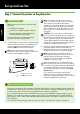
Use the printer To scan, copy, and send faxes, you can use the printer’s control panel. You can also use the control panel to change settings, print reports, or get help for the printer. Thank you for purchasing this printer! With this printer, you can print documents and photos, scan documents to a connected computer, make copies, and send and receive faxes. English Tip: You can also change the printer settings using the printer software or embedded web server (EWS).
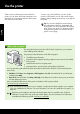
Use the printer HP Digital Solutions The printer includes a collection of digital solutions that can help you simplify and streamline your work. Learn more! English For more information about setting up and using these digital solutions, see the user guide. For information about finding the user guide, see “Where’s the user guide?” on page 4.
Use the printer • Appropriate privileges on the network. You must have write access to the folder. Finding email settings • A username and password to access the network folder (if necessary). For example, the Windows or Mac OS X username and password used to log onto the computer or the network.
Use the printer Set up Web Services You can set up Web Services when you install the HP printer software. 4. • Accept the Web Services Terms of Use. • Enable the printer to automatically check for Note: If you’ve already installed the HP printer software, see the user guide for setup instructions. and install product updates. • If your network uses proxy settings when Place the HP software CD into the computer, and then follow the onscreen instructions.
Use the printer HP ePrint guidelines • • • Maximum size of email and attachments: 5 MB --Microsoft Word, PowerPoint Maximum number of attachments: 10 --Image files, such as PNG, JPEG, TIFF, GIF, BMP Supported file types: Note: You might be able to use other types of files with HP ePrint. However, HP cannot guarantee that the printer will print other types of files because they have not been fully tested.
Set up and use fax This printer allows you to send and receive black-and-white and color faxes. Learn more! English For more information about fax features available with the printer, see the user guide. For information about finding the user guide, see “Where’s the user guide?” on page 4. Set up fax Check the “Finding fax setup information” box for your country/region. If your country/region is included in the list, visit the website for setup information.
Set up and use fax Step 1: Connect the printer to the phone line Note: If the phone cord that came with the printer is not long enough, purchase a coupler at an electronics store that carries phone accessories to extend the length. You also need another phone cord, which can be a standard phone cord that you might already have in your home or office. For more information, see the user guide.
Set up and use fax Connecting to a DSL/ADSL line If you subscribe to a DSL/ADSL service, follow these steps to connect the fax. 1. Connect the DSL/ADSL filter and telephone cord provided by your DSL/ADSL service provider between the telephone wall jack and the DSL/ADSL filter.
Set up and use fax Step 2: Test fax setup Test your fax setup to check the status of the printer and make sure it is set up properly for faxing. The fax test does the following: • Tests the fax hardware 1. From the printer’s control panel, touch right arrow and then touch Setup. 2. Touch Tools, and then touch Run Fax Test. The printer displays the status of the test on the display and prints a report. After the test is finished, the printer prints a report with the results of the test.
If you want to configure this setting… …do this: Distinctive Ring 1. 2. Change the answer ring pattern for distinctive ring Note: If you are using a distinctive ring service, you can use more than one telephone number on the same telephone line. You can change this setting to enable the printer to determine automatically which ring pattern it should use for fax calls only. Tip: You can also use the Ring Pattern Detection feature in the printer’s control panel to set distinctive ring.
Set up and use fax Use fax In this section, you will learn how to send and receive faxes. Send faxes Learn more! English You can send faxes in a variety of ways. Using the printer’s control panel, you can send black-and-white or color faxes. You can also send faxes manually from an attached phone, which allows you to speak with the recipient before sending the fax.
Set up and use fax Receive faxes You can receive faxes automatically or manually. Learn more! Note: If you receive a legal-size or larger fax and the printer is not currently set to use legal-size paper, the printer reduces the fax so that it fits on the paper that is loaded. If you have disabled the Automatic Reduction feature, the printer prints the fax on two pages.
Set up and use fax Reprint received faxes from memory If you turn on the Backup fax Reception, received faxes are stored in memory, whether the printer has an error condition or not. English Note: All faxes stored in memory are deleted from memory when you turn off the power. For more information about using this feature, see the user guide. For information about finding the user guide, see “Where’s the user guide?” on page 4. 1. and then touch Setup. 2. Touch right arrow 3.
Set up and use fax Fax and digital phone services Many telephone companies provide their customers with digital phone services, such as the following: Note: HP does not guarantee that the printer will be compatible with all digital service lines or providers, in all digital environments, or with all digital-to-analog converters. It is always recommended that you discuss with the telephone company directly for the correct setup options based on their line services provided.
Set up wireless (802.11) communication If the printer supports wireless (802.11) communication, complete the following steps in the order listed to establish wireless connection for the printer. Step 1: Install software for your printer English To set up wireless communication, run the installation program from the HP software CD provided with the printer. The installation program installs the software and creates a wireless connection.
Set up wireless (802.11) communication Step 2: Test the wireless connection For additional troubleshooting information, see “Wireless (802.11) setup problems” on page 23. To test the wireless connection and make sure it is working properly, complete the following steps: Make sure the printer is turned on and paper is loaded in the tray. 2. On the printer control panel, touch right arrow touch Setup, and then touch Network. 3. Touch Print Wireless Network Test. , English 1.
Solve setup problems If you need more help, see the user guide. For information about finding the user guide, see “Where’s the user guide?” on page 4. T he following sections provide help with problems you might have while setting up the printer. Problems setting up the printer English • Make sure you have removed all packing tape and material from outside and inside the printer. • • Make sure you use the SETUP cartridges that came with your printer when you first set up the printer.
Solve setup problems Problems installing the software Before installing software, make sure that all other programs are closed. • If you are using a computer running Windows, make sure that you are specifying the correct drive letter if the computer does not recognize the path to the CD drive that you type. • If the computer cannot recognize the HP software CD in the CD drive, inspect the HP software CD for damage. You can also download the HP software from the HP website (www.hp.com/go/customercare).
Solve setup problems The printer is having problems sending and receiving faxes up for digital phones. Connect the printer to an analog phone line and try sending or receiving a fax. • Make sure you use the phone cord or adapter that came with the printer. (If you do not use this phone cord or adapter, the display might always show Phone Off Hook.) English • Check the sound quality of the phone line by plugging a phone into the telephone wall jack and listening for static or other noise.
Solve setup problems • The printer might be dialing too fast or too soon. For example, if you need to access an outside line by dialing “9,” try inserting pauses as follows: 9-XXX-XXXX (where XXX-XXXX is the fax number you are sending to). To enter a pause, touch * and select a dash (-).
Solve setup problems Step 1: Make sure the wireless (802.11) light is turned on If the blue light near the printer’s wireless button is not lit, the wireless capabilities might not have been turned on. Note: If you are changing from a wired (Ethernet) to a wireless connection, disconnect the Ethernet cable. Connecting an Ethernet cable turns off the printer’s wireless capabilities. To turn on wireless, touch right arrow , touch Setup, and then touch Network.
Solve setup problems Step 5. Make sure your computer is not connected to your network over a Virtual Private Network (VPN) For more information, contact your network administrator or the person who set up the wireless network. To connect to the printer, disconnect from the VPN. Problems using Web Services • If you are having problems using Web Services, such as HP ePrint and Pinter Apps, check the following: • Make sure the printer is connected to the Internet using an Ethernet or wireless connection.
Use the embedded web server (EWS) For more information about the EWS, see the user guide. For information about finding the user guide, see “Where’s the user guide?” on page 4. When the printer is connected to a network, you can use the printer’s home page (embedded web server or EWS) to view status information, change settings, and manage it from your computer. No special software needs to be installed or configured on your computer.
HP limited warranty statement HP product Duration of limited warranty Software Media 90 days Printer 1 year Print or Ink cartridges Until the HP ink is depleted or the “end of warranty” date printed on the cartridge has been reached, whichever occurs first. This warranty does not cover HP ink products that have been refilled, remanufactured, refurbished, misused, or tampered with. Printheads (only applies to products with customer replaceable printheads) 1 year Accessories 90 days A.
Isi Menggunakan printer....................................................................................................................... 30 HP Digital Solutions........................................................................................................... 31 Layanan Web...................................................................................................................32 Memperbarui printer.......................................................................................
Menggunakan printer Untuk memindai, menyalin, dan mengirim faks, Anda dapat menggunakan panel kontrol printer. Anda juga dapat menggunakan panel kontrol untuk mengubah pengaturan, mencetak laporan, atau mendapatkan bantuan untuk printer. Terima kasih telah membeli printer ini! Dengan printer ini, Anda dapat mencetak dokumen dan foto, memindai dokumen ke komputer yang tersambung, membuat salinan, serta mengirim dan menerima faks.
Menggunakan printer HP Digital Solutions Printer mencakup sekumpulan solusi digital yang dapat membantu memudahkan dan menyempurnakan pekerjaan Anda. Selengkapnya! Untuk informasi lebih lanjut tentang cara mengkonfigurasi dan menggunakan solusi digital ini, lihat panduan pengguna. Untuk informasi tentang cara menemukan panduan pengguna, lihat “Di manakah panduan pengguna dapat ditemukan?” pada halaman 30.
Menggunakan printer • Alamat jaringan folder. Pada komputer yang menjalankan Windows, alamat jaringan biasanya tertulis dalam format: \\mypc\sharedfolder\ Mencari pengaturan email Jika Anda mengatur Scan to Email [Pindai ke Email] atau Fax to Email [Faks ke Email] pada komputer yang berbasis Windows, wizard pengaturan akan secara otomatis mendeteksi pengaturan email untuk aplikasi email berikut ini: • Nama komputer yang menjadi lokasi folder tersebut.
Menggunakan printer Mengkonfigurasi Layanan Web 4. Anda dapat mengatur Layanan Web sewaktu menginstal perangkat lunak printer HP. • Terima Persyaratan Penggunaan Layanan Web.. Catatan: Jika Anda telah menginstal perangkat lunak printer HP, lihat panduan pengguna untuk petunjuk pengaturan. • Membolehkan printer secara otomatis memeriksa dan menginstal pembaruan produk. • Jika jaringan menggunakan pengaturan proxy Masukkan CD perangkat lunak HP ke komputer, lalu ikuti petunjuk pada layar.
Menggunakan printer Petunjuk HP ePrint • • • Ukuran maksimum email dan lampiran: 5 MB --Microsoft Word, PowerPoint Jumlah maksimum lampiran: 10 --File gambar seperti PNG, JPEG, TIFF, GIF, BMP Jenis file yang didukung: Catatan: Anda mungkin dapat menggunakan jenis file lainnya dengan HP ePrint. Namun, HP tidak menjamin bahwa printer akan mencetak jenis file lainnya karena tidak diuji secara lengkap.
Mengkonfigurasi dan menggunakan faks Printer ini dapat digunakan untuk mengirim dan menerima faks hitam putih dan berwarna. Selengkapnya! Untuk informasi lebih lanjut tentang fitur faks yang diberikan bersama printer, lihat panduan pengguna. Untuk informasi tentang cara menemukan panduan pengguna, lihat “Di manakah panduan pengguna dapat ditemukan?” pada halaman 30. Mengkonfigurasi faks dalam daftar, ikuti petunjuk yang diberikan dalam panduan ini.
Mengkonfigurasi dan menggunakan faks Langkah 1: Sambungkan printer ke saluran telepon Catatan: Jika kabel telepon yang diberikan bersama printer tidak cukup panjang, beli coupler (penyambung) di toko elektronik yang menjual aksesori telepon untuk memperpanjang kabel. Anda juga memerlukan kabel telepon lain, dapat berupa kabel telepon standar yang mungkin telah Anda miliki di rumah atau kantor Anda. Untuk informasi lebih lanjut, lihat panduan pengguna.
Mengkonfigurasi dan menggunakan faks Menyambung ke saluran DSL/ADSL Jika Anda berlangganan layanan DSL/ADSL, ikuti langkah-langkah berikut untuk menyambungkan faks. 1. Sambungkan filter DSL/ADSL dan kabel telepon yang diberikan oleh penyedia layanan DSL/ADSL antara soket telepon dan filter DSL/ADSL. 1 2. Sambungkan kabel telepon yang diberikan bersama printer ke filter DSL/ADSL dan port 1-Line pada printer.
Mengkonfigurasi dan menggunakan faks Langkah 2: Menguji pengaturan faks Uji konfigurasi faks untuk mengetahui status printer dan memastikannya dikonfigurasi dengan benar untuk mengirim faks. Berikut adalah hal yang dilakukan pengujian faks: 1. Dari panel kontrol printer, sentuh tanda panah kanan , lalu sentuh Setup (Pengaturan). 2. Sentuh Tools [Alat Bantu], lalu sentuh Run Fax Test [Jalankan Pengujian Faks]. Printer akan menampilkan status pengujian pada tampilan dan mencetak laporan.
Mengkonfigurasi dan menggunakan faks Jika ingin mengkonfigurasi pengaturan… …lakukan langkah-langkah berikut: Distinctive Ring (Dering Berbeda) 1. 2. 3. 4. Tips: Anda juga dapat menggunakan fitur Ring Pattern 5. Detection [Deteksi Pola Dering] pada panel kontrol printer untuk mengatur dering yang berbeda.
Mengkonfigurasi dan menggunakan faks Menggunakan faks Pada bagian ini, Anda akan mempelajari tentang cara mengirim dan menerima faks. Mengirim faks Selengkapnya! Anda dapat mengirim faks dalam beberapa cara. Anda dapat mengirim faks hitam putih atau berwarna menggunakan panel kontrol faks. Faks juga dapat dikirim secara manual dari telepon yang tersambung, sehingga Anda dapat menginformasikan kepada penerima faks sebelum faks dikirim.
Mengkonfigurasi dan menggunakan faks Menerima faks Selengkapnya! Anda dapat menerima faks secara otomatis atau manual. Lihat panduan pengguna untuk informasi lebih lanjut tentang topik berikut: Jika Anda sedang menyalin dokumen saat faks diterima, faks tersebut akan disimpan dalam memori printer hingga penyalinan selesai. Akibatnya, jumlah halaman faks yang dapat disimpan dalam memori mungkin berkurang.
Mengkonfigurasi dan menggunakan faks Mencetak ulang faks yang diterima dari memori Jika Anda mengaktifkan Backup fax Reception (Penerimaan Faks Cadangan), faks yang diterima akan disimpan dalam memori saat printer dalam kondisi baik atau mengalami masalah. Catatan: Semua faks yang tersimpan di memori akan dihapus setelah Anda mematikan daya. Untuk informasi lebih lanjut tentang cara menggunakan fitur ini, lihat panduan pengguna.
Mengkonfigurasi dan menggunakan faks Layanan telepon digital dan faks Catatan: HP tidak menjamin bahwa printer akan kompatibel dengan semua jalur layanan digital atau penyedia, di semua lingkungan digital, atau dengan semua konverter digital ke analog. Sebaiknya Anda selalu menghubungi perusahaan telepon secara langsung untuk pilihan konfigurasi yang benar berdasarkan layanan saluran yang diberikan.
Mengkonfigurasi komunikasi nirkabel (802.11) Jika printer mendukung komunikasi (802.11) nirkabel, selesaikan langkah-langkah berikut dalam urutan yang tercantum agar dapat membuat sambungan untuk printer. Langkah 1: Instal perangkat lunak untuk printer Untuk mengatur komunikasi nirkabel, jalankan program penginstalan dari CD perangkat lunak HP yang diberikan bersama printer. Program penginstalan akan menginstal perangkat lunak dan membuat koneksi nirkabel.
Mengkonfigurasi komunikasi nirkabel (802.11) Langkah 2: Uji sambungan nirkabel Printer akan mencetak laporan hasil pengujian. Jika pengujian gagal, kaji laporan untuk mengetahui cara memperbaiki masalah yang ada lalu uji kembali. 1. Pastikan printer telah dihidupkan dan kertas telah dimasukkan ke dalam baki. 2. Pada panel kontrol printer, sentuh panah kanan , sentuh Setup (Pengaturan), lalu sentuh Network (Jaringan).
Mengatasi masalah konfigurasi Jika memerlukan bantuan lebih lanjut, lihat panduan pengguna. Untuk informasi tentang cara menemukan panduan pengguna, lihat “Di manakah panduan pengguna dapat ditemukan?” pada halaman 30. agian berikut berisi cara B mengatasi masalah yang dialami saat mengkonfigurasi printer. Masalah saat mengkonfigurasi printer • Pastikan Anda telah melepas semua materi dan pita kemasan dari bagian luar dan bagian dalam printer.
Mengatasi masalah konfigurasi Masalah saat menginstal perangkat lunak • Sebelum menginstal perangkat lunak, pastikan semua program lain ditutup. • Jika menggunakan komputer yang menjalankan Windows, pastikan Anda telah menetapkan huruf drive yang benar jika komputer tidak mengenali jalur ke drive CD yang dimasukkan. • CD perangkat lunak HP dari kerusakan. Anda juga dapat men-download perangkat lunak HP dari situs Web HP (www.hp.com/go/ customercare).
Mengatasi masalah konfigurasi Printer memiliki masalah pengiriman dan penerimaan faks • Pastikan Anda menggunakan kabel telepon dan adaptor yang diberikan bersama printer. (Jika Anda tidak menggunakan kabel telepon atau adaptor ini, layar mungkin akan terus menampilkan Phone Off Hook [Telepon Tidak Tersambung].) menerima faks. Untuk memeriksa apakah saluran telepon Anda digital, hubungkan telepon analog biasa ke saluran tersebut dan dengarkan nada pilih.
Mengatasi masalah konfigurasi • Printer mungkin memutar nomor terlalu cepat atau terlalu dini. Misalnya, jika Anda perlu mengakses jalur luar dengan memanggil “9,” coba masukkan jeda seperti berikut: 9-XXXXXXX (di mana XXX-XXXX adalah nomor faks tujuan Anda). Untuk memasukkan jeda, sentuh *, lalu pilih tanda hubung (-).
Mengatasi masalah konfigurasi Langkah 1: Pastikan lampu nirkabel (802.11) menyala. Jika lampu biru di sebelah tombol nirkabel printer tidak menyala, kemampuan nirkabel mungkin belum diaktifkan. Aktif) muncul dalam daftar, sentuh pilihan tersebut, lalu sentuh On (Aktif). Catatan: Jika Anda beralih dari sambungan berkabel (Ethernet) ke nirkabel, lepas kabel Ethernet. Menyambung kabel Ethernet akan menonaktifkan kemampuan nirkabel printer.
Mengatasi masalah konfigurasi Langkah 5. Pastikan komputer tidak tersambung ke jaringan Anda melalui VPN (Virtual Private Network) Tips: Untuk menggunakan printer sewaktu tersambung ke VPN, Anda dapat menyambungkan printer ke komputer menggunakan kabel USB. Printer menggunakan USB dan sambungan jaringan secara bersamaan. VPN (Virtual Private Network) adalah jaringan komputer yang menggunakan Internet untuk memberikan sambungan jauh yang aman pada jaringan organisasi.
Menggunakan EWS (server Web tertanam) Untuk informasi lebih lanjut tentang EWS, lihat panduan pengguna. Untuk informasi tentang cara menemukan panduan pengguna, lihat “Di manakah panduan pengguna dapat ditemukan?” pada halaman 30. Bila printer tersambung ke jaringan, Anda dapat menggunakan halaman muka printer (EWS atau server Web tertanam) untuk melihat informasi status, mengubah pengaturan, dan mengelolanya dari komputer.
Pernyataan jaminan terbatas HP Pernyataan jaminan terbatas Hewlett-Packard Bahasa Indonesia Print cartridge Kepala cetak (hanya berlaku untuk produk dengan kepala cetak yang dapat diganti oleh pelanggan) 53
สารบัญ การใชเครื่องพิมพ............................................................................................................................ 56 HP Digital Solutions...........................................................................................................57 บริการบนเว็บ.....................................................................................................................58 การอัพเดตเครื่องพิมพ............................................................................
การใชเครื่องพิมพ หากตองการสแกน ทำ�สำ�เนา และสงโทรสาร คุณสามารถ ใชแผงควบคุมของเครื่องพิมพได นอกจากนี้ คุณยัง สามารถใชแผงควบคุมเพื่อเปลี่ยนการตั้งคา พิมพรายงาน หรือดูวิธีใชของเครื่องพิมพได ขอขอบคุณที่เลือกใชเครื่องพิมพของเรา คุณสามารถใช เครื่องพิมพนี้พิมพเอกสารและภาพถาย สแกนเอกสาร ไปยังคอมพิวเตอรที่เชื่อมตอ ทำ�สำ�เนา ตลอดจนสงและ รับโทรสารไดอีกดวย ขอเสนอแนะ: คุณสามารถเปลี่ยนแปลงการตั้งคา เครื่องพิมพโดยใชซอฟตแวรของเครื่องพิมพหรือ เว็บเซิรฟเวอรแบบฝงตัว (EWS) ได สำ�หรับขอมูล
การใชเครื่องพิมพ HP Digital Solutions เครื่องพิมพประกอบดวยชุดดิจิตอลโซลูชันที่สามารถ ชวยใหงานของคุณสะดวกและงายดายขึ้น ขอมูลเพิ่มเติม! สำ�หรับขอมูลเพิ่มเติมเกี่ยวกับการตั้งคาและใชงาน ดิจิตอลโซลูชันเหลานี้ โปรดดูคูมือผูใช สำ�หรับขอมูล เกี่ยวกับการคนหาคูมือผูใช โปรดดู “คูมือผูใชอยูที่ใด” ในหน้า 56 HP Direct Digital Filing HP Direct Digital Filing นำ�เสนอความสามารถในการ สแกนทั่วไปในสำ�นักงานที่มีประสิทธิภาพ รวมทั้งความ สามารถพื้นฐานมากมายในการจัดการเอกสาร เพื่อผูใช ที่หลากหลายในเครือ
การใชเครื่องพิมพ • ชื่อของคอมพิวเตอรที่มีโฟลเดอรนั้นอยู หากตองการขอมูลเพิ่มเติมเกี่ยวกับการคนหาชื่อ ของคอมพิวเตอร โปรดดูเอกสารประกอบของระบบ ปฏิบัติการของคุณ • สิทธิ์ที่เหมาะสมบนเครือขาย คุณตองมีสิทธิ์ในการ ผานเขาไปยังโฟลเดอร • ชื่อผูใชและรหัสผานในการเขาไปยังโฟลเดอรบน เครือขาย (หากจำ�เปน) ตัวอยางเชน ชื่อผูใชและ รหัสผานของ Windows หรือ Mac OS X ที่ใช เพื่อล็อกออนสูคอมพิวเตอรหรือเครือขาย หมายเหตุ: HP Direct Digital Filing ไมรองรับ Active Directory การคนหาการตั้งคาอีเมล หากคุณก
การใชเครื่องพิมพ การตั้งคาบริการบนเว็บ คุณสามารถตั้งคาบริการบนเว็บไดเมื่อคุณติดตั้งซอฟตแวร ของเครื่องพิมพ HP แลว 4. • ยอมรับขอกำ�หนดการใชงานของบริการบนเว็บ • อนุญาตใหเครื่องพิมพตรวจหาและติดตั้งอัพเดต หมายเหตุ: ถาคุณไดติดตั้งซอฟตแวรของ เครื่องพิมพ HP แลว โปรดดูคูมือผูใชสำ�หรับ ขั้นตอนการติดตั้ง 1. 2.
การใชเครื่องพิมพ คำ�แนะนำ�ในการใช HP ePrint • • • ขนาดสูงสุดของอีเมลและสิ่งที่แนบ: 5 MB --Microsoft Word, PowerPoint จำ�นวนสูงสุดของสิ่งที่แนบ: 10 --ไฟลภาพ เชน PNG, JPEG, TIFF, GIF, BMP หมายเหตุ: คุณอาจจะสามารถใชไฟลประเภท อื่นๆ กับ HP ePrint ได อยางไรก็ตาม HP จะไม รับประกันวาเครื่องพิมพจะพิมพไฟลประเภทอื่นๆ ได เนื่องจากไมไดผานการทดสอบอยางสมบูรณ ประเภทไฟลที่สนับสนุน: --PDF --HTML --รูปแบบไฟลขอความมาตรฐาน การใชแอพพลิเคชันเครื่องพิมพ ขอมูลเพิ่มเติม! แตะแอพพลิเคชันบนหนาจอแผงคว
การตั้งคาและใชโทรสาร เครื่องพิมพนี้จะชวยใหคุณสามารถ สงและรับโทรสารแบบขาวดำ�และ แบบสีได ขอมูลเพิ่มเติม! หากตองการขอมูลเพิ่มเติมเกี่ยวกับคุณสมบัติโทรสาร ที่มีมากับเครื่องพิมพ โปรดดูคูมือผูใช สำ�หรับขอมูล เกี่ยวกับการคนหาคูมือผูใช โปรดดู “คูมือผูใชอยูที่ใด” ในหน้า 56 การติดตั้งโทรสาร ทำ�เครื่องหมายในชอง “คนหาขอมูลการติดตั้งโทรสาร (Finding fax setup information)” สำ�หรับประเทศ/พื้นที่ ของคุณ หากประเทศ/พื้นที่ของคุณอยูในรายการ ใหไปที่ เว็บไซตสำ�หรับขอมูลการติดตั้ง หากประเทศ/พื้นที
การตั้งคาและใชโทรสาร ขั้นตอนที่ 1: การเชื่อมตอเครื่องพิมพเขากับสายโทรศัพท หมายเหตุ: หากสายโทรศัพทซึ่งใหมาพรอมกับ เครื่องพิมพสั้นเกินไป คุณสามารถซื้อตลับแยกสาย ที่รานคาอิเล็กทรอนิกสซึ่งมีอุปกรณเสริมของ โทรศัพทสำ�หรับเพิ่มความยาว ทานตองใชสายไฟ สายอื่น ซึ่งเปนสายไฟแบบมาตรฐานซึ่งมีในบานหรือ สำ�นักงานของทาน สำ�หรับขอมูลเพิ่มเติม โปรดดูใน คูมือผูใช กอนเริ่มตน...
การตั้งคาและใชโทรสาร การเชื่อมตอสาย DSL/ADSL หากคุณสมัครใชบริการ DSL/ADSL ใหปฏิบัติตามขั้นตอนตอไปนี้เพื่อเชื่อมตอโทรสาร 1. เชื่อมตอตัวแยกสัญญาณ DSL/ADSL และสายโทรศัพทที่ไดรับ จากผูใหบริการ DSL/ADSL ของคุณระหวางชองเสียบสาย 1 โทรศัพทที่ผนังและตัวแยกสัญญาณ DSL/ADSL 2.
การตั้งคาและใชโทรสาร ขั้นตอนที่ 2: การทดสอบการตั้งคาโทรสาร ทดสอบการตั้งคาโทรสารของคุณเพื่อตรวจสอบสถานะ ของเครื่องพิมพวาไดรับการติดตั้งอยางเหมาะสมสำ�หรับ โทรสาร 1. บนแผงควบคุมของเครื่องพิมพ แตะลูกศรขวา แลวแตะ Setup (การตั้งคา) 2.
การตั้งคาและใชโทรสาร หากคุณตองการกำ�หนดการตั้งคานี้... …ใหดำ�เนินการดังนี้ Distinctive Ring (เสียงเรียกเขาเฉพาะ) 1. แตะลูกศรขวา 2. แตะ Fax Setup (การตั้งคาโทรสาร) แลวแตะ Advanced Fax Setup (การตั้งคาโทรสารขั้นสูง) 3. แตะ Distinctive Ring (เสียงเรียกเขาเฉพาะ) 4. จะปรากฏขอความระบุวา ไมควรเปลี่ยนการตั้งคานี้ เวนแตคุณจะมีหลายหมายเลขบนโทรศัพทสาย เดียวกัน แตะ Yes (ใช) เพื่อดำ�เนินการตอ 5.
การตั้งคาและใชโทรสาร การใชโทรสาร ในสวนนี้ คุณจะไดเรียนรูวิธีสงและรับโทรสาร สงโทรสาร ขอมูลเพิ่มเติม! คุณสามารถสงโทรสารไดหลายวิธี คุณสามารถสงโทรสาร ขาวดำ�หรือสีไดจากแผงควบคุมของเครื่องพิมพ นอกจากนี้ คุณยังสามารถสงโทรสารดวยตัวเองจากโทรศัพทที่ เชื่อมตออยู ซึ่งจะชวยใหคุณสามารถสนทนากับผูรับ กอนทำ�การสงโทรสารได ดูคูมือผูใชสำ�หรับขอมูลเพิ่มเติมเกี่ยวกับหัวขอ ตอไปนี้ • การสงโทรสารโดยใชปุมโทรศัพทที่หนาจอ • การสงโทรสารจากคอมพิวเตอร • การสงโทรสารจากหนวยความจำ� • การกำ�หนดเวลา
การตั้งคาและใชโทรสาร การรับโทรสาร คุณสามารถรับโทรสารโดยอัตโนมัติหรือดวยตนเองก็ได ขอมูลเพิ่มเติม! หมายเหตุ: ถาคุณรับโทรสารที่ใชกระดาษขนาด Legal หรือใหญกวา แตเครื่องพิมพไมไดตั้งคาใหใช กระดาษขนาด Legal ไว เครื่องพิมพจะลดขนาด โทรสารใหพอดีกับกระดาษที่บรรจุอยู หากคุณไมได เปดใชคุณสมบัติ Automatic Reduction (การยอ ขนาดอัตโนมัติ) เครื่องพิมพจะพิมพโทรสารเปน สองหนา ดูคูมือผูใชสำ�หรับขอมูลเพิ่มเติมเกี่ยวกับหัวขอ ตอไปนี้ • • • • • การพิมพโทรสารที่ไดรับจากหนวยความจำ�ซ้ำ� การขอรั
การตั้งคาและใชโทรสาร การพิมพโทรสารที่ไดรับจากหนวยความจำ�ซ้ำ� หากคุณเปดใชงาน Backup fax Reception (การรับ โทรสารสำ�รอง) โทรสารที่ไดรับจะเก็บไวในหนวยความจำ� ไมวาเครื่องพิมพจะเกิดขอผิดพลาดหรือไมก็ตาม หมายเหตุ: โทรสารทั้งหมดที่บันทึกไวในหนวย ความจำ�จะถูกลบออกไปหลังจากที่คุณปดเครื่อง หากตองการขอมูลเพิ่มเติมเกี่ยวกับคุณสมบัตินี้ โปรดดูที่คูมือผูใช สำ�หรับขอมูลเกี่ยวกับการคนหา คูมือผูใช โปรดดู “คูมือผูใชอยูที่ใด” ในหน้า 56 1. แลวแตะ Setup (ตั้งคา) 2. แตะลูกศรขวา 3.
การตั้งคาและใชโทรสาร โทรสารและบริการโทรศัพทดิจิตอล บริษัทโทรศัพทหลายแหงใหบริการโทรศัพทดิจิตอลแก ลูกคา เชน หมายเหตุ: HP ไมรับประกันวาเครื่องพิมพจะใชงาน รวมกับผูใหบริการหรือสายโทรศัพทระบบดิจิตอล ทั้งหมด ในสภาพแวดลอมที่ใชงานระบบดิจิตอล ทั้งหมด หรือตัวแปลงดิจิตอลเปนเปนอนาล็อก ทั้งหมด เราขอแนะนำ�ใหคุณสอบถามบริษัทโทรศัพท โดยตรงเกี่ยวกับตัวเลือกการตั้งคาที่ถูกตองตาม บริการสายโทรศัพทที่ให • DSL: บริการ Digital Subscriber Line (DSL) ผาน ทางผูใหบริการระบบโทรศัพทของคุณ (DSL อาจ เรียกว
ตั้งคาการสื่อสารไรสาย (802.11) หากเครื่องพิมพสนับสนุนการสื่อสาร ไรสาย (802.
ตั้งคาการสื่อสารไรสาย (802.11) ขั้นตอนที่ 2: ทดสอบการเชื่อมตอแบบไรสาย หากตองการทดสอบการเชื่อมตอไรสายและตรวจสอบ ใหแนใจวาการเชื่อมตอนั้นทำ�งานถูกตอง ใหปฏิบัติตาม ขั้นตอนดังนี้ เครื่องพิมพจะพิมพรายงานที่มีผลลัพธของการทดสอบ หากการทดสอบผิดพลาด ใหตรวจดูรายงานเพื่อดูขอมูล เกี่ยวกับวิธีแกไขปญหาแลวทำ�การทดสอบใหม 1. ตรวจสอบใหแนใจวาเครื่องพิมพเปดอยูและมีกระดาษ อยูในถาดปอนกระดาษ สำ�หรับขอมูลการแกไขปญหาเพิ่มเติม โปรดดู “ปญหาการ ตั้งคาระบบไรสาย (802.11)” ในหน้า 75 2.
การแกไขปญหาการติดตั้ง หากคุณตองการความชวยเหลือเพิ่มเติม โปรดดู ในคูมือผูใช สำ�หรับขอมูลเกี่ยวกับการคนหาคูมือ ผูใช โปรดดู “คูมือผูใชอยูที่ใด” ในหน้า 56 วนตอไปนี้มีวิธีการแกไขปญหา ส ที่คุณอาจพบในระหวางการติดตั้ง เครื่องพิมพ ปญหาในการติดตั้งเครื่องพิมพ ภาษาไทย • ตรวจสอบใหแนใจวาคุณไดดึงเทปปดผนึกและแกะ บรรจุภัณฑทั้งหมดออกจากดานนอกและขางใน เครื่องพิมพแลว • ตรวจสอบใหแนใจวาคุณไดเสียบสายไฟและ อะแดปเตอรไฟฟาแนนดีแลว และแหลงจายไฟ ทำ�งานอยางถูกตอง • ตรวจสอบใหแนใ
การแกไขปญหาการติดตั้ง ปญหาในการติดตั้งซอฟตแวร • กอนติดตั้งซอฟตแวร ตรวจสอบใหแนใจวาปด โปรแกรมอื่นๆ ทั้งหมดแลว • หากคุณใชคอมพิวเตอรที่ใชงาน Windows และ คอมพิวเตอรไมสามารถหาพาธไปยังไดรฟซีดีที่คุณ ระบุได ใหตรวจสอบใหแนใจวาคุณระบุอักษรไดรฟ ที่ถูกตองแลว • หากคอมพิวเตอรไมสามารถหาซีดีซอฟตแวร HP ในไดรฟซีดีได ใหตรวจสอบซีดีซอฟตแวร HP วา เสียหายหรือไม คุณสามารถดาวนโหลดซอฟตแวร ของ HP จากเว็บไซตของ HP (www.hp.
การแกไขปญหาการติดตั้ง เครื่องพิมพมีปญหาในการรับสงโทรสาร ภาษาไทย • โปรดตรวจสอบวาคุณใชสายโทรศัทพหรือ อะแดปเตอรที่ใหมาพรอมกับเครื่องพิมพ (หากคุณ ไมใชสายโทรศัพทหรืออะแดปเตอรนี้ หนาจอจะ ปรากฏขอความวา วางสายไมสนิท) • ตรวจสอบใหแนใจวาโทรศัพทที่ตอพวง (โทรศัพท ที่ใชสายโทรศัพทเดียวกัน แตไมเชื่อมตอกับ เครื่องพิมพ) หรืออุปกรณอื่นๆ ไมไดมีการใชงาน อยูหรือมีการวางสายสนิทดีแลว ตัวอยางเชน คุณ ไมสามารถใชเครื่องพิมพในการรับสงโทรสารได หากตอโทรศัพทพวงไว หรือกำ�ลังใชโมเด็ม dial
การแกไขปญหาการติดตั้ง • เครื่องพิมพอาจหมุนเบอรโทรเร็วหรือกระชั้นชิด จนเกินไป ตัวอยางเชน หากทานตองตอสายนอก ดวยการกด “9” นำ�หนา ใหลองแทรกการเวนระยะ ดังนี้: 9-XXX-XXXX (โดยที่ XXX-XXXX คือหมายเลข โทรสารที่ทานตองการสงโทรสารไปถึง) หาก ตองการเวนระยะ ใหแตะ * และเลือกเครื่องหมาย ขีดกลาง (-) • หากคุณมีปญหาในการสงโทรสารดวยตนเอง จากโทรศัพทของคุณที่เชื่อมตอโดยตรงเขากับ เครื่องพิมพ และหากคุณอยูในประเทศ/พื้นที่ตอไปนี้ คุณตองใชปุมกดบนโทรศัพทเพื่อสงโทรสาร อารเจนตินา ออสเตรเลีย บราซิล
การแกไขปญหาการติดตั้ง ขั้นตอนที่ 1: ตรวจสอบวาไฟไรสาย (802.
การแกไขปญหาการติดตั้ง ขั้นตอนที่ 5 ตรวจสอบใหแนใจวาคอมพิวเตอรของคุณไมได เชื่อมตอกับเครือขายของคุณผานเครือขาย VPN เครือขาย VPN คือเครือขายคอมพิวเตอรที่ใชงาน อินเทอรเน็ตในการใหการเชื่อมตอระยะไกลที่ปลอดภัย กับเครือขายขององคกร อยางไรก็ตาม บริการ VPN สวนใหญจะไมอนุญาตใหคุณเขาถึงอุปกรณภายใน (เชน เครื่องพิมพ) ที่อยูในเครือขายเฉพาะที่ขณะที่ คอมพิวเตอรของคุณเชื่อมตอกับ VPN หากตองการเชื่อมตอกับเครื่องพิมพ ใหยกเลิกการ เชื่อมตอกับ VPN ขอเสนอแนะ: หากตองการใชเครื่องพิมพขณะ ที่เช
การใชเว็บเซิรฟเวอรแบบฝงตัว (EWS) สำ�หรับขอมูลเพิ่มเติมเกี่ยวกับ EWS โปรดดูในคูมือผูใช สำ�หรับขอมูลเกี่ยวกับการคนหาคูมือผูใช โปรดดู “คูมือผูใชอยูที่ใด” ในหน้า 56 เมื่อเครื่องพิมพเชื่อมตอกับเครือขาย คุณสามารถใช หนาแรกของเครื่องพิมพ (Embedded Web Server (เว็บเซิรฟเวอรแบบฝงตัว) หรือ EWS) ดูขอมูลสถานะ เปลี่ยนการตั้งคา และจัดการกับเครื่องพิมพจาก คอมพิวเตอรของคุณได โดยไมจำ�เปนตองติดตั้ง ซอฟตแวรเพิ่มเติมหรือกำ�หนดคาใดๆ บนคอมพิวเตอร ของคุณ หมายเหตุ: คุณสามารถเปดและใชงาน EWS ไ
ประกาศเกี่ยวกับการรับประกันอยางจำ�กัดของ HP ผลิตภัณฑของ HP ระยะเวลารับประกัน ซอฟตแวร 90 วัน ตลับหมึก จนกวาหมึกของ HP จะหมด หรือพนจากวันที่ของการรับประกันซึ่งพิมพอยูบนตลับหมึก ขึ้นอยูกับวาขอใดจะเกิดขึ้นกอนการรับประกันนี้ไมครอบคลุมถึงผลิตภัณฑเกี่ยวกับหมึกของ HP ที่มีการเติมหมึก ผลิตซ้ำ ปรับปรุงสภาพ ใชงานผิดประเภท หรือมีการดัดแปลงแกไข อุปกรณเสริม 90 วัน หัวพิมพ (ใชไดเฉพาะผลิตภัณฑที่มีหัวพิมพซึ่ง ลูกคาสามารถเปลี่ยนได) 1 ป ฮารดแวรสวนเสริมของเครื่องพิมพ 1 ป (โปรดดูรายละเอ
目錄 使用印表機 ..................................................................................................................................... 82 HP 數位解決方案 .............................................................................................................83 Web 服務 .......................................................................................................................84 更新印表機 .............................................................................................................
使用印表機 若要進行掃描、複印和傳送傳真,您可以使用本印表 機的控制台。您也可使用印表機控制台面板來變更設 定、列印報告或取得印表機的說明。 感謝您購買本印表機! 利用本印表機,您可以列印 文件和相片、掃描文件至連接的電腦、進行複印,以 及收發傳真。 提示:您也可以使用印表機軟體或內嵌式 Web 伺服器 (EWS) 來變更印表機設定。如需這些工 具的詳細資訊,請參閱使用者指南。如需尋找使 用者指南的詳細資訊,請參閱本頁的「使用者指 南在哪裡?」。 使用者指南在哪裡? 本印表機專用的使用者指南(亦稱為「說明」)已於安裝 HP 軟體時存放在您 的電腦中。 本節大綱如下: • • • • 疑難排解 有關支援列印耗材和配件(若印表機適用)的詳細資訊 詳細的印表機使用方式 重大的聲明、環境及法規資料 您可以從 HP 列印軟體 (Microsoft® Windows®) 或從「說明」功能表 (Mac OS X) 開啟本指南: 繁 體 中 文 • Windows:按一下開始,選取程式集或所有程式,選取 HP,選取 HP 印表機的資料夾,然後選取 說明。 • Mac OS X:從 Finder 按一下說
使用印表機 HP 數位解決方案 印表機隨附多種可簡化作業的數位解決方案。 其他資訊! 如需設定與使用這些數位解決方案的詳細資 訊,請參閱使用者指南。如需尋找使用者指南 的詳細資訊,請參閱第 82 頁的「使用者指南在哪 裡?」。 HP 直接數位存檔 HP 直接數位存檔,能為網路上的多位使用者,提 供強大的一般性辦公掃描以及多樣化的文件管理功 能。HP 直接數位存檔功能,讓您可直接碰觸印表機 控制台上的按鈕,將掃描文件直接送到網路上電腦的 資料夾,或以電子郵件附件方式共享,完全不需使用 任何其他掃描軟體。 這些掃描的文件可送到共用的網路資料夾加以存取, 或傳到一個或多個電子郵件位址進行分享。除為個別 掃描終點配置個別的掃描設定外,也使各掃描工作有 最佳的設定。 HP 數位傳真 永不再迷失重要的傳真於成堆的亂紙之間! HP 數位傳真可讓您將收到的黑白傳真,儲存在網路 電腦資料夾以便儲存和共用,或讓您透過電子郵件 轉寄傳真,即使遠離辦公室也能隨時隨地接收重要 的傳真。 您也可關閉各傳真列印—不但節省耗材和金錢,還能 減少耗紙和垃圾。 需求 設定 HP 數位解決方案前,請確認準備好下列各項: 掃描到網路資
使用印表機 備註:HP 直接數位存檔不支援 Active Directory。 尋找電子郵件設定 掃描到電子郵件、傳真到電子郵件 在執行 Windows 的電腦上設定「掃描到電子郵 件」或「傳真到電子郵件」時,設定精靈會自 動偵測下列電子郵件應用程式的電子郵件設定: 備註:只有 HP Officejet Pro 8600 Plus 和 HP Officejet Pro 8600 Premium 支援這些功能。 • 有效的電子郵件位址 • Microsoft Outlook 2003 至 2007 (Windows XP、Windows Vista 及 Windows 7) • 外寄 SMTP 伺服器資訊 • Outlook Express (Windows XP) • 有效的網際網路的連線 • Windows Mail (Windows Vista) • Mozilla Thunderbird(Windows XP、 Windows Vista 及 Windows 7) • Qualcomm Eudora(7.
使用印表機 設定 Web 服務 您可以在安裝 HP 印表機軟體時設定 Web 服務。 4. • 接受 Web 服務使用條款。 • 允許印表機自動檢查有無產品更新並加以 備註:如果您已經安裝了 HP 印表機軟體,請 參閱使用者指南中的設定說明。 1. 將 HP 軟體 CD 放入電腦,然後再依照螢幕上的 指示進行。 備註:安裝中防火牆軟體顯示出任何訊息 時,選擇訊息中的「永遠許可/允許」選 項。選擇本選項讓您在電腦上順利完成安 裝作業。 2. 安裝。 • 如果您的網路在連線至網際網路時有使用 Proxy 設定,請輸入這些設定。 5.
使用印表機 HP ePrint 指導方針 • • • 電子郵件及附件的大小上限:5 MB - Microsoft Word、PowerPoint 附件的數目上限:10 - 影像檔,例如 PNG、JPEG、TIFF、GIF、BMP 支援的檔案類型: 備註:您也可以使用其他類型的檔案搭配 HP ePrint。但因未經全面測試,HP 無法保證印表 機能夠列印其他類型的檔案。 - PDF - HTML - 標準文字檔案格式 使用印表機應用程式 其他資訊! 碰觸印表機控制台顯示器上的「Apps」,然後碰觸您 要使用的印表機應用程式。 您可以使用 ePrintCenter 來管理印表機應用程 式。您可以加入、配置或移除印表機應用程 式,並設定各應用程式出現在印表機顯示幕上 的順序。 備註:若要從 ePrintCenter 管理印表機應用 程式,請至 ePrintCenter 建立帳戶後再加入 您的印表機。 如需詳細資訊,請瀏覽 www.eprintcenter.com。 移除 Web 服務 若要移除 Web 服務,請完成下列步驟: 繁 體 中 文 1. 碰觸印表機控制台顯示器上的 2.
設定與使用傳真 本印表機可讓您收發黑白及彩色 傳真。 其他資訊! 如需印表機提供的傳真功能詳細資訊,請參閱使 用者指南。如需尋找使用者指南的詳細資訊,請 參閱第 82 頁的「使用者指南在哪裡?」。 設定傳真 選取您所在國家/地區的「尋找傳真設定資訊」核取 方塊。如果有列出您所在的國家/地區,請瀏覽網站 上的設定資訊。如果未列出您所在的國家/地區,請 按照本指南的指示進行。 尋找傳真設定資訊 如果您位於下列國家/地區,請瀏覽適當的網站以取得有關設定傳真的資訊。 奧地利 比利時 荷蘭文 法文 丹麥 芬蘭 法國 德國 愛爾蘭 義大利 挪威 荷蘭 葡萄牙 西班牙 瑞典 瑞士 法文 德文 英國 www.hp.com/at/faxconfig www.hp.be/nl/faxconfig www.hp.be/fr/faxconfig www.hp.dk/faxconfig www.hp.fi/faxconfig www.hp.com/fr/faxconfig www.hp.com/de/faxconfig www.hp.com/ie/faxconfig www.hp.com/it/faxconfig www.
設定與使用傳真 步驟 1:將印表機連接至電話線路 開始前... 備註:如果印表機隨附的電話線不夠長,請在販 售電話配件的電子材料商店購買耦合器來延長電 話線。您還需要另一條住家或辦公室常見的標準 電話線。如需詳細資訊,請參閱使用者指南。 開始進行之前,請確定已完成下列各項動作: • • • 已安裝墨水匣 已準備好電話線和轉接器(如果印表機已 隨附) 如需詳細資訊,請參閱印表機包裝中隨附的安 裝簡冊。 1. 注意:如果您不是使用印表機隨附的電話線,就 可能無法順利傳真。由於您在住家或辦公室使用 的電話線未必和印表機隨附的電話線一樣,HP 建議您應使用印表機隨附的電話線。 已將 A4 或 Letter 尺寸的紙張載入紙匣 2.
設定與使用傳真 連接到 DSL/ADSL 線路 如果使用 DSL/ADSL 服務,請按照以下這些步驟來連接傳真。 1. 在牆上電話插座和 DSL/ADSL 過濾器之間連接 DSL/ADSL 服務提供者所提供的 DSL/ADSL 過濾器和電話線。 1 2.
設定與使用傳真 步驟 2:測試傳真設定 請測試傳真設定以檢查印表機的狀態,確認其設定正 確可進行傳真。 1. 從印表機的控制台處,碰觸向右箭頭 觸設定。 傳真測試會執行下列作業: 2.
設定與使用傳真 如果要配置此設定... 方法如下: 區別鈴聲 1. 2. 3. 4. 變更區別鈴聲的接聽鈴聲模式 備註:如果有使用區別鈴聲服務,您可以在相 同的電話線上使用一個以上的電話號碼。您可 以變更此設定,讓印表機自動判斷僅應由傳真 呼叫所使用的鈴聲模式。 提示:您也可以使用印表機控制台中的「響鈴 模式偵測」功能來設定區別鈴聲。使用這項功 能,印表機會辨別並記錄來電的響鈴模式,然 後根據這通電話,自動判斷由電話公司為傳真 來電指定的區別響鈴模式。 5.
設定與使用傳真 使用傳真 本節將說明如何傳送和接收傳真。 傳送傳真 其他資訊! 您可用多種方法傳送傳真。您可用印表機的控制台來 傳送黑白或彩色傳真。您亦可用連上的電話手動發送 傳真,這可讓您在傳送傳真之前與接收方通話。 如需下列主題的詳細資訊,請參閱使用者指南: • • • • • • 您也可以透過傳真來傳送電腦上的文件,而不需先列 印文件。 使用監視器撥號傳送傳真 從電腦傳送傳真 從記憶體傳送傳真 排程稍後傳送的傳真 將傳真傳給多位收件者 以錯誤修正模式傳送傳真 如需尋找使用者指南的詳細資訊,請參閱 第 82 頁的「使用者指南在哪裡?」。 傳送標準傳真 1. 將您要傳真的文件載入印表機中。 4. 您可以從自動文件進紙器 (ADF) 或從掃描器平板玻璃 進行傳真。 2. 碰觸傳真。 3. 使用數字鍵盤輸入傳真號碼。 碰觸開始/黑白或開始/彩色。 提示:若收件者告知您所傳送的傳真品質 有問題,您可以嘗試變更傳真的解析度或 對比。 提示:若要在您輸入的傳真號碼中加入暫 停,請重複碰觸 *,直到破折號 (-) 出現在顯 示器上。 從電話分機發傳真 繁 體 中 文 1.
設定與使用傳真 接收傳真 其他資訊! 您可以自動或手動接收傳真。 備註:如果您接收到的是 Legal 尺寸或更大張的 傳真,而印表機目前未設定使用 Legal 尺寸的紙 張,則印表機將自動縮小傳真以符合放入的紙 張。停用「自動縮小」功能時,印表機會以雙面 列印傳真。 如需下列主題的詳細資訊,請參閱使用者指南: • • • • • • 影印文件中收到傳真時,傳真會儲存在印表機的記憶 體,直到影印結束。因此可能會減少記憶體中可儲存 的傳真頁數。 從記憶體重新列印接收到的傳真 輪詢以接收傳真 轉送傳真至另一個號碼 設定接收傳真的紙張大小 設定自動縮小來電傳真 拒收垃圾傳真號碼 如需尋找使用者指南的詳細資訊,請參閱第 82 頁 的「使用者指南在哪裡?」。 自動接收傳真 傳真和語音信箱服務 若您從印表機的控制台開啟自動接收選項 (預設值), 印表機會在經過接聽鈴聲次數設定的鈴響聲過後自動 接聽來電並接收傳真。如需配置此設定的詳細資訊, 請參閱第 90 頁的「步驟 3:配置傳真設定」。 如果您在用來傳真的同一個電話線路上使用語 音信箱服務,將無法自動接收傳真。反之,您 必須確定已關閉「自動接收」設定,
設定與使用傳真 從記憶體重新列印接收到的傳真 一旦備份傳真接收已開啟,無論印表機是否處於錯誤 狀況都會將收到的傳真儲存在記憶體。 備註:儲存於記憶體的全部傳真會在關機後刪 除。如需使用此功能的詳細資訊,請參閱使用者 指南。如需尋找使用者指南的詳細資訊,請參閱 第 82 頁的「使用者指南在哪裡?」。 1. 確定已在主要進紙匣內放入紙張。 2. 碰觸向右箭頭 3. 碰觸工具或傳真工具,然後碰觸重印記憶體中的 傳真。系統將以收傳真的相反順序來列印傳真, 也就是最後收到的傳真先列印,其餘依此類推。 4. 若要停止重新列印記憶體中的傳真,請碰觸 (取消)。 ,然後碰觸設定。 使用報告和日誌 您可以列印多種不同類型的傳真報告: • • • • 這些報告會提供實用的印表機系統相關資訊。 傳真確認頁 備註:您也可以從印表機的控制台顯示器檢視撥 號記錄。若要檢視撥號記錄,請碰觸「傳真」, 然後碰觸 (撥號記錄)。不過,您無法列印 這份清單。 傳真日誌 傳真傳送報告上的影像 其他報告 列印報告 1. 碰觸向右箭頭 2. 碰觸傳真設定,再碰觸向下箭頭 傳真報告。 ,然後碰觸設定。 3.
設定與使用傳真 傳真及數位電話服務 許多電話公司都為客戶提供數位電話服務,例如: 備註:HP 不保證印表機可在所有數位環境中, 與所有數位服務線路或提供者相容,或與所有 數位對類比轉換器相容。建議您務必根據電話 公司所提供的線路服務,直接與其討論正確的 設定選項。 • DSL:使用電話公司的 DSL 服務。(在您所在 的國家/地區,DSL 可能稱為 ADSL)。 • PBX:專用分機交換 (PBX) 電話系統。 • ISDN:整體服務數位網路 (ISDN) 系統。 • FoIP:低費率的電話服務,讓您可以透過網際 網路,以印表機傳送和接收傳真。此方法叫做 「網際網路傳真通訊協定」(FoIP)。如需詳細資 訊,請參閱使用者指南。 HP 印表機是專為使用傳統式類比電話服務所設計。 如果是在數位電話環境中(例如 DSL/ADSL、PBX 或 ISDN),可能會需要在設定印表機進行傳真時,使 用數位對類比過濾器或轉換器。 繁 體 中 文 95
設定無線 (802.11) 通訊 若印表機支援無線 (802.11) 通 訊,請依序完成下列步驟來建立 印表機的無線連線。 步驟 1:安裝印表機的軟體 若要設定無線通訊,請執行印表機隨附 HP 軟體 CD 上的安裝程式。安裝程式安裝軟體同時建立無 線連結。 備註:在您設定無線通訊之前,請先確認已設定 好印表機硬體。如需詳細資訊,請參閱印表機隨 附的設定簡明手冊,或是印表機控制台畫面上的 說明。 2. 遵循適用於您作業系統的說明。 • Windows:在收到提示時,按一下 Network (Ethernet/Wireless)(網路(Ethernet/無 線)),然後按照螢幕上的說明進行。 • Mac OS X:按兩下軟體 CD 上的 HP Installer 圖示,再按螢幕上的指示進行。 3. 在收到提示時,輸入無線網路名稱和密碼。 遵循適用於您作業系統的說明。 1.
設定無線 (802.11) 通訊 步驟 2:測試無線連線 若要測試無線連線並確定其已正常運作,請完成下列 步驟: 1. 檢查印表機是否已開機且已將紙張裝入紙匣。 2. 在印表機控制台上,依序碰觸向右箭頭 定,然後碰觸網路。 3. 碰觸列印無線網路測試。 、設 印表機會列印有測試結果的報告。測試失敗時,請檢 視報告中有關如何修正問題的資訊。 如需進一步的疑難排解資訊,請參閱第101頁的「無線 (802.11) 設定問題」。 變更連線類型 如果您已安裝 HP 軟體,您可以視需求隨時變更至不 同的連線。 備註:如果自有線 (Ethernet) 改為無線連線,請 拔除 Ethernet 纜線。連上 Ethernet 纜線後,便會 關閉印表機的無線功能。 遵循適用於您作業系統的說明。 Windows Mac OS X 1. 在印表機控制台上,依序碰觸向右箭頭 設定,然後碰觸網路。 、 1. 在印表機控制台上,依序碰觸向右箭頭 設定,然後碰觸網路。 2. 碰觸還原網路預設值,然後碰觸是以確認。 2. 碰觸還原網路預設值,然後碰觸是以確認。 3.
解決設定問題 如需更進一步的說明,請參閱使用者指 南。如需尋找使用者指南的詳細資訊, 請參閱第 82 頁的「使用者指南在哪 裡?」。 以下各節可協助您解決安裝印表 機會遇到的問題。 設定印表機的問題 • 請檢查並確認印表機內外的各項包裝膠帶及包裝 物均已去除。 • 確定在初次設定印表機時使用印表機隨附的「設 定」墨水匣。 • 確定印表機已放入未使用過的 A4 或 Letter 尺寸 (8.
解決設定問題 安裝軟體時的問題 • • • 安裝軟體前,請先關閉任何其他程式。 • 若您使用執行 Windows 的電腦,當電腦無法識 別您所輸入的光碟機路徑時,請務必確認您已指 定正確的 CD 光碟機代碼。 如果您的電腦是執行 Windows 而且使用 USB 纜 線連接,請確認 Windows 裝置管理員中是否已 停用 USB 驅動程式。 如果電腦無法識別 CD 光碟機中的 HP 軟體 CD,請檢查 HP 軟體 CD 是否已損壞。您也可以 從 HP 網站 (www.hp.
解決設定問題 印表機無法傳送和接收傳真 • 確定使用的是印表機隨附的電話線或轉換器 (如 果使用的不是隨附的電話線或轉換器,顯示幕 可能會一直顯示「電話聽筒未掛上」)。 • 請檢查同一條線路上但未連結印表機的電話或 其他設備,未在使用中且未將聽筒拿起。例 如,如果電話分機聽筒未掛上,或者正在使用 電腦撥號數據機傳送電子郵件或上網,您就無 法使用印表機進行傳真。 • 使用 DSL/ADSL 服務時,請加裝 DSL/ADSL 過 濾器, 否則將無法順利傳真。 • 使用 PBX 或 ISDN 轉換器/終端配接卡時,請確 定印表機已連上正確的連接埠,而且終端配接 卡已設定成所在國家/地區適用的正確切換類 型。 • 使用 Fax over IP 服務時,請嘗試使用較低的連 線速度。問題仍無法解決時,請洽 IP 傳真服務 的支援人員。 • 電話分歧器可能使傳真發生問題。請改將印表 機直接插入市話接口。 • 請將電話線的一端插入市話接口,另一端插入 印表機背面標示為 1-LINE 的連接埠。 • 嘗試將正常的電話直接連至牆上電話插座,並 檢查撥號音。若未聽見撥號音,請洽電話公司 派員檢查線路。 • 請將印表機連上類比電
解決設定問題 印表機無法傳送傳真但可以接收傳真 • 可能是印表機撥號太快或太早。例如,撥外線 前若要先撥 9 時,請按下列方式插入暫停: 9-XXX-XXXX(XXX-XXXX 代表您要撥打的傳真號 碼)。若要輸入暫停,請碰觸 *,然後選取破 折號 (-)。 • 用直接連上印表機的電話手動傳送傳真時如果 發生問題,而且您位於下列國家/地區,則務 必使用電話的鍵盤傳送傳真: 阿根廷 澳大利亞 巴西 加拿大 智利 中國 哥倫比亞 希臘 印度 印尼 愛爾蘭 日本 韓國 拉丁美洲 馬來西亞 墨西哥 菲律賓 波蘭 葡萄牙 俄羅斯 沙烏地阿拉伯 新加坡 西班牙 台灣 泰國 美國 委內瑞拉 越南 無線 (802.11) 設定問題 南的詳細資訊,請參閱第 82 頁的「使用者指南在 哪裡?」)。或者,造訪 HP 無線列印中心 (www.hp.
解決設定問題 步驟 1. 請確定無線 (802.11) 指示燈已開啟。 備註:如果自有線 (Ethernet) 改為無線連線,請 拔除 Ethernet 纜線。連上 Ethernet 纜線後,便會 關閉印表機的無線功能。 如果印表機無線按鈕旁的藍燈未亮起,表示無線功能 可能尚未開啟。 若要開啟無線功能,依序碰觸向右箭頭 、設定,然 後碰觸網路。如果清單中有無線:關閉選項,碰觸此 選項,然後碰觸開啟。 步驟 2. 檢查電腦是否已連上網路 如果在指定無線網路路由器後未變更預設的無線網路 名稱,您可能會不小心連接到附近的無線網路,而不 是連線到自己的網路。如需詳細資訊,請參閱路由器 或無線存取點 (WAP) 所隨附的手冊。 步驟 3. 重新啟動無線網路組件 關閉路由器和印表機,然後再依下列順序重新開啟: 先路由器再印表機。如果仍無法連接,請依序將路由 器、印表機及電腦關機後再按下列順序開機:先路由 器,其次印表機,最後是電腦。有時候關閉後再開啟 電源,就可以解決網路通訊問題。 步驟 4.
解決設定問題 步驟 5.
使用內嵌式 Web 伺服器 (EWS) 當印表機連線至網路時,您可以使用印表機的首頁 (內嵌式 Web 伺服器或 EWS),檢視狀態資訊、變 更設定、並從電腦管理印表機。無需在電腦上安裝或 設定特別的軟體。 備註:您可在未連上網際網路的情形下使用 EWS,不過此時有某些功能無法使用。 如需 EWS 的詳細資訊,請參閱使用者指南。如需尋 找使用者指南的詳細資訊,請參閱第 82 頁的「使用者 指南在哪裡?」。 開啟 EWS 1. 2. 取得印表機的 IP 位址。IP 位址會在「網路配置 頁」上顯示。 a. 將紙張放入紙匣。 b.
HP 有限保證聲明 惠普科技有限保固聲明 ЕОᐝ!)่ዋϡٺЕОᐝΞֻ͗މആೱ۞ய*ݡ 繁 體 中 文 105
© 2011 Hewlett-Packard Development Company, L.P. Printed in China Imprimé en Chine www.hp.