OFFICEJET PRO 8500A Getting Started Guide A910
Copyright Information © 2010 Copyright Hewlett-Packard Development Company, L.P. Edition 1, 3/2010 Reproduction, adaptation or translation without prior written permission is prohibited, except as allowed under the copyright laws. The information contained herein is subject to change without notice. The only warranties for HP products and services are set forth in the express warranty statements accompanying such products and services.
Use the printer......................................................................................................... 2 HP Digital Solutions............................................................................................. 3 Internet features.................................................................................................. 5 Set up and use fax................................................................................................... 7 Set up fax.........................
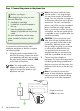
1. Use the printer Thank you for purchasing this printer. With this printer, you can print documents and photos, scan documents to a connected computer, make copies, and send and receive faxes. To scan, copy, and send faxes, you can use the printer’s control panel. You can also use the control panel to change settings, print reports, or get help for the printer.
HP Digital Solutions HP Direct Digital Filing HP Direct Digital Filing provides robust, general-office scanning—as well as basic, versatile, document-management capabilities—for multiple users over a network.
Requirements Before you set up the digital solutions, make sure you have the following: For Scan to Network Folder, Fax to Network Folder • Appropriate privileges on the network. You must have write access to the folder. • The name of the computer where the folder is located. For information about finding the computer name, see the documentation for your operating system. • The network address for the folder. On computer running Windows, network addresses are usually written in this format: \\mypc\sha
The printer offers innovative, Web-enabled solutions that can help you quickly access the Internet, obtain documents, and print them faster and with less hassle—and all without using a computer. In addition, you can use a Web service (Marketsplash by HP) to create and print professional-quality marketing materials. Note: In addition to these solutions, you can send print jobs to the printer remotely from mobile devices.
Marketsplash by HP Grow your business using online HP tools and services to create and print professional marketing materials. With Marketsplash, you can do the following: • • Quickly and easily create amazing, professional-quality brochures, flyers, business cards, and more. Choose from thousands of customizable templates created by award-winning business graphic designers. A variety of print options allow you to get exactly what you need, when you need it.
2. Set up and use fax English T his printer allows you to send and receive black-andwhite and color faxes. Set up fax Before using the fax feature, follow these steps to connect your printer successfully. Tip: You can use the Fax Setup Wizard (Windows) or HP Utility (Mac OS X) to set up the fax. For more information about fax features available with the printer, see the user guide (which is available on your computer after you install the software).
Step 1: Connect the printer to the phone line Note: If the phone cord that came with the printer is not long enough, you can use a coupler to extend the length. You can purchase a coupler at an electronics store that carries phone accessories. You also need another phone cord, which can be a standard phone cord that you might already have in your home or office. For more information, see the user guide (which is available on your computer after you install the software).
Many phone companies offer a distinctive ring feature that allows you to have several phone numbers on one phone line. When you subscribe to this service, each number is assigned a different ring pattern. You can set up the printer to answer incoming calls that have a specific ring pattern. If you connect the printer to a line with distinctive ring, have your telephone company assign one ring pattern to voice calls and another ring pattern to fax calls.
Connecting additional equipment Remove the white plug from the port labeled 2-EXT on the back of the printer, and then connect a phone to this port. If you are connecting additional equipment, such as a dial-up computer modem or a telephone, you will need to purchase a parallel splitter. A parallel splitter has one RJ-11 port on the front and two RJ-11 ports on the back.
Test your fax setup to check the status of the printer and make sure it is set up properly for faxing. The fax test does the following: 1. From the printer’s control panel, touch right arrow and then touch Setup. 2. Touch Tools, and then touch Run Fax Test. The printer displays the status of the test on the display and prints a report. After the test is finished, the printer prints a report with the results of the test.
If you want to configure this setting… …do this: Auto Answer Set the answer mode to On if you want the printer to automatically receive incoming faxes. The printer will answer calls after the number of rings specified in the Rings to Answer setting. 1. Rings to Answer (Optional) Set the number of rings to answer Note: If an answering machine is connected to the printer, the rings to answer for the printer must be set to a higher number than the answering machine. 2. 3. 1. 2. 3. 4. 5.
…do this: Fax Speed Set the fax speed used to communicate between the printer and other fax machines when sending and receiving faxes. Note: If you experience problems sending and receiving faxes, try using a lower fax speed. 1. Fax Error Correction Mode If the printer detects an error signal during the transmission and the error-correction setting is turned on, the printer can request that a portion of the fax be resent. Note: If you have problems sending and receiving faxes, turn off error correction.
Use fax In this section, you will learn how to send and receive faxes. Learn more! See the user guide for more information about the following topics: • Send a fax using monitor dialing • Send a fax from a computer • Send a fax from memory • Schedule a fax to send later • Send a fax to multiple recipients • Send a fax in Error Correction Mode The user guide is available on your computer after you install the software. Send a fax You can send faxes in a variety of ways.
Send a standard fax Load the document you want to fax in the printer. 3. You can fax either from the automatic document feeder (ADF) or from the scanner glass. Enter the fax number by using the keypad. T ip: To add a pause in the fax number you are entering, touch * repeatedly, until a dash (-) appears on the display. 4. Touch Start Black or Start Color. T ip: If the recipient reports issues with the quality of the fax you sent, you can try changing the resolution or contrast or your fax. 2.
Receive faxes You can receive faxes automatically or manually. Note: If you receive a legal-size or larger fax and the printer is not currently set to use legal-size paper, the printer reduces the fax so that it fits on the paper that is loaded. If you have disabled the Automatic Reduction feature, the printer prints the fax on two pages. If you are copying a document when a fax arrives, the fax is stored in the printer’s memory until the copying finishes.
When you are on the phone, the person you are speaking with can send you a fax while you are still connected (called “manual faxing”). You can receive faxes manually from a phone that is connected to the printer (through the 2-EXT port) or a phone that is on the same phone line (but not directly connected to the printer). 1. Make sure the printer is turned on and you have paper loaded in the main tray. 2. Remove any originals from the document feeder tray. 3.
Working with reports and logs You can print sevral different types of fax reports: • • • • These reports provide useful system information about the printer. Fax Confirmation page Note: You can also view the call history on the printer’s control panel display. To view the call history, touch Fax, and (Call History). However, then touch this list cannot be printed. Fax Log Image on Fax Send Report Other reports To print a report 1. Touch right arrow Setup. , and then touch 2.
Many telephone companies provide their customers with digital phone services, such as the following: • DSL: A Digital subscriber line (DSL) service through your telephone company. (DSL might be called ADSL in your country/region.) • PBX: A private branch exchange (PBX) phone system • ISDN: An integrated services digital network (ISDN) system. • FoIP: A low-cost phone service that allows you to send and receive faxes with your printer by using the Internet.
3. Set up wireless (802.11) communication ou can connect it wireless to Y an existing wireless (802.11) network. To connect the printer, complete the following steps in the order listed. Note: Before you set up wireless communication, make sure the printer hardware is set up. For more information, see the setup poster that came with the printer.
Connecting without a wireless router English If you do not have a wireless router (such as a Linksys wireless router or Apple AirPort Base Station), you can still connect the printer to your computer using a wireless connection (known as a “computer-to-computer” or an “ad hoc“ wireless connection). For more information, see the user guide. Step 1: Connect the printer to your wireless network 1. On the printer’s control panel, touch right arrow , and then select Network. 2.
Mac OS 1. Place the HP software CD into the computer. 2. Double-click the HP Installer icon on the software CD, and then follow the onscreen instructions. 1. Touch right arrow Network. 2. Touch Wireless, and then touch Wireless Network Test. Step 3: Test the wireless connection Print the wireless test page for information about the printer’s wireless connection. The wireless test page provides information about the printer’s status, MAC address, and IP address.
Change the connection method Note: If you are changing to a wireless connection, make sure that an Ethernet cable is not connected to the printer. Connecting an Ethernet cable turns off the printer’s wireless capabilities. Follow the instructions for your operating system. Windows 1. On the computer desktop, click Start, select Programs or All Programs, click HP, select your printer name, and then click Connect a New Printer. 2. Follow the onscreen instructions.
4. Solve setup problems T he following sections provide help with problems you might have while setting up the printer. If you need more help, see the user guide (which is available on your computer after you install the software). Problems setting up the printer • Make sure that all packing tape and material have been removed from outside and inside the printer. • Make sure that the printer is loaded with plain, white, unused A4- or Letter-size (8.5x11 inch) paper.
This section contains information about solving problems you might have when setting up fax for the printer. Note: If the printer is not set up properly for faxing, you might experience problems when sending faxes, receiving faxes, or both. If you are having faxing problems, you can print a fax test report to check the status of the printer. The test will fail if the printer is not set up properly for faxing. Perform this test after you have completed setting up the printer for faxing.
The printer is having problems sending and receiving faxes • Make sure you use the phone cord or adapter that came with the printer. (If you do not use this phone cord or adapter, the display might always show Phone Off Hook.) • Other equipment that uses the same phone line as the printer might be in use. Make sure extension phones (phones on the same phone line, but not connected to the printer) or other equipment is not in use or off the hook.
The printer can send faxes but cannot receive faxes If you are not using a distinctive ring service, check to make sure that the Distinctive Ring feature on the printer is set to All Rings. • If Auto Answer is set to Off, or if you subscribe to a voicemail service on the same phone line that you will use for faxing, you can only receive faxes manually.
The printer cannot send faxes but can receive faxes • 28 The printer might be dialing too fast or too soon. For example, if you need to access an outside line by dialing “9,” try inserting pauses as follows: 9-XXX-XXXX (where XXX-XXXX is the fax number you are sending to). To enter a pause, touch * and select a dash (-).
Wireless (802.11) setup problems Follow these suggestions in the order listed. Note: If you are still encountering problems, see the problem-solving information in the user guide (which is available on your computer after you install the software).
Step 2. Check the wireless signal strength If the strength of the signal for your wireless network or computer is weak or if there is interference on the wireless network, the printer might not be able to detect the signal. To determine the strength of the wireless signal, run the Wireless Network Test from the printer’s control panel. (For more information, see “Step 4. Run the Wireless Network Test” on page 30).
When the printer is connected to a network, you can use the “embedded Web server” (“EWS”) to view status information and configure network settings from your computer web browser. No special software needs to be installed or configured on your computer. Note: You can open and use the EWS without being connected to the Internet, though some features will not be available. English 5.
Hewlett-Packard limited warranty statement HP product Duration of limited warranty Software Media 90 days Printer 1 year Print or Ink cartridges Until the HP ink is depleted or the “end of warranty” date printed on the cartridge has been reached, whichever occurs first. This warranty does not cover HP ink products that have been refilled, remanufactured, refurbished, misused, or tampered with.
فهرس استخدم الطابعة 2........................................................................................................................... ( HP Digital Solutionsحلول HPالرقمية)3............................................................................... مميزات اإلنترنت 5................................................................................................................... إعداد و استخدام الفاكس 7.......................................................................
.1استخدم الطابعة شكرا لشرائك هذه الطابعة .مع هذه الطابعة ،يمكنك طباعة ً المستندات و الصور ،مسح المستندات ضوئياً إلى جهاز كمبيوتر متصل ،عمل نُسخ ،و إرسال و استقبال الفاكسات. للمسح الضوئي ،النسخ ،وإرسال الفاكسات ،يمكنك استخدام لوحة التحكم الخاصة بالطابعة .كما يمكنك أيضاً استخدام لوحة تحكم الطابعة لتغيير اإلعدادات ،طباعة التقارير ،أو الحصول على المساعدة فيما يتعلق بالطابعة .
( HP Digital Solutionsحلول HPالرقمية) تتضمن الطابعة مجموعة من الحلول الرقمية التي يمكن أن تساعد في تبسيط األعمال وتنظيمها. لمعرفة المزيد! للمزيد من المعلومات حول إعداد و استخدام هذه الحلول الرقمية ،أنظر دليل المستخدم( .يتوفر دليل المستخدم على جهاز الكمبيوتر الخاص بك بعدما تقوم بتثبيت البرنامج).
المتطلبات قبل إعداد الحلول الرقمية ،تأكد من توفر الوظائف التالية: المسح إلى مجلد الشبكة ،إرسال الفاكس إلى مجلد الشبكة •الصالحيات المناسبة على الشبكة .يجب أن يكون لديك حق الكتابة إلى المجلد. •اسم الكمبيوتر الذي يوجد به المجلد .للحصول على المزيد من المعلومات حول العثور على اسم الكمبيوتر ،راجع الوثائق المرفقة مع نظام التشغيل. •.The network address for the folder في أجهزة الكمبيوتر التي تستخدم أنظمة تشغيل ،Windowsتتم كتابة عناوين الشبكة عاد ًة بهذا التنسيق\\myp
مميزات اإلنترنت ً حلوال مبتكرة تدعم الويب يمكنها مساعدتك تقدم الطابعة في سرعة الوصول لإلنترنت ،والحصول على المستندات، وطباعتها بشكل أسرع وأقل مشاكل ،وبدون كمبيوتر على اإلطالق .كذلك؛ يمكن استخدام خدمة الويب ( )Marketsplash by HPإلنشاء المواد التسويقية بجودة احترافية وطباعتها. مالحظة :باإلضافة لتلك الحلول؛ يمكن إرسال مهام الطباعة إلى الطابعة عن بعد من أجهزة نقالة .
خدمة Marketsplash by HP زد أعمالك باستخدام أدوات HPوخدماتها على اإلنترنت إلنشاء المواد التسويقية بجودة احترافية وطباعتها .مع Marketsplash؛ يمكنك القيام بما يلي: •عمل منشورات دعائية ونشرات إعالنية وبطاقات أعمال مذهلة بجودة احترافية بسرعة وسهولة. اختر من آالف النماذج القابلة للتعديل والتي صنعها مصممو رسوميات أعمال حاصلون على جوائز. •يتيح تنوع خيارات الطباعة الحصول على ما تريد بالضبط وقتما تريد .وللحصول على نتائج فورية عالية الجودة؛ اطبع على طابعتك .
.2إعداد و استخدام الفاكس تتيح لك هذه الطابعة إمكانية إرسال و استقبال الفاكسات األبيض-و-األسود و األلوان. إعداد الفاكس قبل استخدام ميزة الفاكس ،اتبع الخطوات التالية لتوصيل الطابعة بنجاح. تلميح :يمكنك استخدام Fax Setup Wizard (معالج إعداد الفاكس) (نظام Windows) أو HP Utility (أداة ( )HPنظام )Mac OS Xإلعداد الفاكس. للحصول على مزيد من المعلومات حول ميزات الفاكس المتاحة مع الطابعة ،انظر دليل المستخدم (ذلك المتاح على الكمبيوتر بعد تثبيت البرنامج).
الخطوة :1قم بتوصيل الطابعة بخط الهاتف مالحظة :إذا كان طول سلك الهاتف المزود مع الطابعة غير كاف ،فيمكنك استخدام وصلة لزيادة الطول. يمكنك شراء وصلة من مستودعات األدوات الكهربائية التي تحتفظ بملحقات الهاتف .كما تحتاج إلى سلك هاتف آخر ،سلك هاتف عادي قد يكون عندك من قبل في المنزل أو في المكتب .للحصول على مزيد من المعلومات ،انظر دليل المستخدم (ذلك المتاح على الكمبيوتر بعد تثبيت برنامج الجهاز). قبل البدء...
ما هي خدمة الرنين المميز؟ توفر العديد من شركات الهواتف ميزة الرنين المميز التي تسمح لك بعدة أرقام هاتف على خط هاتف واحد .عندما تشترك في هذه الخدمة ،يُخصص لكل رقم نموذج رنين مختلف .يمكنك إعداد الطابعة للرد على المكالمات الواردة التي لها نموذج رنين محدد. إذا قمت بتوصيل الطابعة بخط به ميزة الرنين المميز ،فاطلب من شركة الهواتف تعيين نموذج رنين واحد لكل المكالمات الصوتية ونموذج رنين آخر لمكالمات الفاكس .تُوصي HPلك أن تطلب رنتين أو ثالث رنات لرقم الفاكس.
توصيل معدات إضافية قم بإزالة القابس األبيض من المنفذ 2-EXTالمكتوب عليه في الجزء الخلفي من الطابعة ،ثم قم بتوصيل الهاتف بهذا المنفذ. في حالة توصيل معدات إضافية مثل مودم الطلب الهاتفي للكمبيوتر أو هاتف ،فستحتاج إلى شراء وحدة تقسيم متوازية. يتضمن المقسم المتوازي منفذ RJ-11واحد في الجهة األمامية ومنفذا RJ-11في الجهة الخلفية .ال تستخدم وحدة التقسيم لهاتف ثنائي الخطوط وال وحدة تقسيم تسلسلية وال وحدة تقسيم متوازية بها منفذا Rفي المقدمة ومقبس في الخلف.
الخطوة Test fax setup :2 قم باختبار إعداد الفاكس لفحص حالة الطابعة وللتأكد من صحة إعداده من أجل الفاكس. .1 من لوحة التحكم الخاصة بالطابعة ،المس السهم األيمن ثم المس .Setup يقوم اختبار الفاكس بإجراء ما يلي: • فحص أجهزة الفاكس • التحقق من توصيل سلك الهاتف الصحيح بالطابعة • التحقق من توصيل سلك الهاتف بالمنفذ الصحيح • البحث عن نغمة طلب الرقم • البحث عن خط هاتف نشط • اختبار حالة توصيل خط الهاتف الخاص بك .2 المس ،Toolsو بعد ذلك المس.
إذا أردت تهيئة هذا اإلعداد... ...قم بعمل هذا: ( Auto Answerالرد التلقائي) قم بضبط وضع الرد على Onإذا أردت أن تقوم الطابعة بالرد على المكالمات الواردة واستقبال الفاكسات .ستقوم الطابعة بالرد تلقائياً على المكالمات الواردة بعد عدد الرنات التي قمت بضبطها في إعداد Rings to Answer (الرنات قبل الرد). .1 .2 المس السهم األيمن و بعد ذلك المس .Setup المس ،Fax Setupو بعد ذلك المس .Basic Fax Setup المس ،Auto Answerو بعد ذلك المس .ON .1 .
إذا أردت تهيئة هذا اإلعداد... سرعة الفاكس قم بضبط سرعة الفاكس المستخدمة لالتصال بين الطابعة وآالت الفاكس األخرى عند إرسال الفاكسات واستقبالها. مالحظة :عند التعرض إلى مشاكل عند إرسال الفاكسات واستقبالها ،قم بتجربة سرعة فاكس أقل. ...قم بعمل هذا: .1 .2 المس السهم األيمن و بعد ذلك المس .Setup المس ،Fax Setupو بعد ذلك المس .Advanced Fax Setup المس السهم األسفل ،و بعد ذلك المس .Fax Speed المس الختيار ،Fast ،Mediumأو .Slow .1 .
استخدام الفاكس في هذا القسم ،سوف تتعلم كيفية إرسال الفاكسات واستقبالها. لمعرفة المزيد! انظر دليل المستخدم لمزيد من المعلومات فيما يخص المواضيع التالية: •إرسال فاكس باستخدام الطلب المراقب •إرسال فاكس من الكمبيوتر •إرسال فاكس من الذاكرة •جدولة فاكس ليتم إرساله في وقت الحق •إرسال فاكس إلى مستلمين متعددين •إرسال فاكس في Error Correction Mode (وضع تصحيح األخطاء) دليل المستخدم متاح على الكمبيوتر بعد تثبيت البرنامج.
إرسال فاكس قياسي .1 قم بتحميل المستند الذي ترغب في إرساله بالفاكس ،في الطابعة. .3 أدخل رقم الفاكس باستخدام لوحة المفاتيح. تلميح :إلضافة فاصلة زمنية في رقم الفاكس الذي تدخله ،المس * بشكل متكرر ،حتى تظهر شرطة ( )-على الشاشة. يمكنك إرسال الفاكس من وحدة التلقيم اآللي للوثائق ADF أو من زجاج الماسحة. .4 المس Start Blackأو .
استقبال الفاكسات تتمكن الطابعة من استقبال الفاكسات آليًا أو يدويًا. مالحظة:عند استقبال فاكس بحجم Legalوعدم ضبط الطابعة حاليًا إلى استخدام ورق بحجم ،Legal فستقوم الطابعة بتصغير حجم الفاكس بحيث يتالءم مع حجم الورق الذي تم تحميله .عند تعطيل ميزة ( Automatic Reductionالتقليل التلقائي) ،تقوم الطابعة بطباعة الفاكس على صفحتين. إذا كنت تنسخ مستن ًدا عند وصول الفاكس ،يتم حفظ الفاكس في ذاكرة الطابعة إلى أن ينتهي النسخ .
استقبال فاكس يدويًا عندما تكون على الهاتف ،يمكن للشخص الذي تتحدث معه أن يرسل فاكس لك وأنت ما زلت متصل به (معروف بالفاكس اليدوي). .4 إذا كنت حالياً على الهاتف مع المُرسل ،فاطلب منه الضغط على الزر ( Startابدأ) في جهاز الفاكس الخاص به. يمكنك استقبال الفاكسات يدويًا من هاتف متصل مباشر ًة بالطابعة (عبر منفذ )2-EXTأو من هاتف على نفس خط ً متصال مباشر ًة بالطابعة). الهاتف (ولكن ليس .
التعامل مع السجالت والتقارير توفر هذه التقارير معلومات مفيدة تتعلق بالنظام بالنسبة للطابعة. يمكنك طباعة أنواع متعددة من الفاكسات: • • • • صفحة ( Fax Confirmationتأكيد الفاكس) مالحظة:يمكن ً أيضا عرض سجل المكالمات من شاشة لوحة التحكم بالطابعة .لعرض سجل المكالمات، (سجل المكالمات). المس ،Faxو بعد ذلك المس مع ذلك ،ال يمكن طباعة هذه القائمة. سجل الفاكس ( Image on Fax Send Reportصورة على تقرير إرسال الفاكس) تقارير أخرى لطباعة تقرير .
الفاكس وخدمات الهاتف الرقمية كثير من الشركات تمد عمالءها بخدمات الهاتف الرقمية، مثل: • :DSLخدمة الخط المشترك الرقمي ( )DSLمن خالل شركة الهواتف الخاصة بك( .قد يسمى DSL بـ ADSLفي بلدك/منطقتك). • :PBXنظام هاتف تبادل فرعي خاص PBX • :ISDNنظام شبكة الخدمات الرقمية المتكاملة (.)ISDN • :FoIPخدمة هاتف ذات تكلفة منخفضة تتيح لك إرسال الفاكسات واستالمها بواسطة الطابعة الخاصة بك عن طريق استخدام اإلنترنت .
.3إعداد اتصال ( )802.11الالسلكي يمكنك توصيلها بشبكة اتصال السلكية ( )802.11قائمة .لتوصيل الطابعة، استكمل الخطوات التالية بالترتيب المذكور. مالحظة :قبل إعداد االتصال الالسلكي ،تأكد من إعداد جهاز الطابعة.للمزيد من المعلومات ،راجع التعليمات على ملصق اإلعداد المزود مع الطابعة.
التوصيل بدون موجه السلكي إذا لم يكن لديك موجه السلكي (مثل موجه Linksysالالسلكي أو محطة ،)Apple AirPort Base Station فيمكنك توصيل الطابعة مباشرة بالكمبيوتر باستخدام االتصال الالسلكي (المعروف المعروف باتصال "computer- "to-computerأو " "ad hocالالسلكي). ولمزيد من المعلومات ،انظر دليل المستخدم. الخطوة :1توصيل الطابعة بالشبكة الالسلكية الخاصة بك .1 من لوحة التحكم الخاصة بالطابعة ،المس السهم األيمن ،و اختر .Network .
Mac OS .1 أدخل قرص برامج HP المضغوط إلى جهاز الكمبيوتر. .2 مزدوجا فوق رمز أداة تثبيت HPبقرص نقرا انقر ً ً CDالخاص بالبرنامج ثم اتبع التعليمات التي تظهر على الشاشة. الخطوة :3اختبار االتصال الالسلكي عربي 22 اطبع صفحة االختبار الالسلكية لمعلومات عن اتصال الطابعة الالسلكي.توفر صفحة المعلومات الالسلكية معلومات عن حالة الطابعة وعنوان MAC وعنوان الـ IP .في حالة اتصال الطابعة بشبكة ،يعرض صفحة االختبار تفاصيل عن إعدادات الشبكة.
تغيير وسيلة االتصال في حالة تثبيتك برامج HP وتوصيلك الطابعة مستخدمًا كابل ً اتصاال السلكيًا؛ فيمكنك التبديل إلى USB أو إثرنت أو اتصال مختلف متى ما أردت ذلك. مالحظة:في حالة التبديل إلى اتصال السلكي؛ فتأكد من عدم توصيل كابل إثرنت بالطابعة.يؤدي توصيل كابل Ethernet إلى إيقاف تشغيل القدرات الالسلكية للطابعة. اتبع اإلرشادات الخاصة بنظام التشغيل المثبت لديك. Windows .
.4حل مشاكل اإلعداد توفر األقسام التالية المساعدة الخاصة بالمشكالت التي يمكن أن تواجهك أثناء إعداد الطابعة. إذا أردت المزيد من المساعدة ،انظر دليل المستخدم (ذلك المتاح على الكمبيوتر بعد تثبيت البرنامج). مشكالت إعداد الطابعة عربي • تحقق من أنه قد تمت إزالة كافة أشرطة ومواد التعبئة من خارج الطابعة ومن داخلها. • تأكد من تحميل الطابعة بورق أبيض عادي غير مستخدم بحجم A4أو 11 x 8،5( Letterبوصة) .
مشكالت إعداد الفاكس يتضمن هذا القسم معلومات حول حل المشكالت التي قد تواجهك عند إعداد الفاكس للطابعة. مالحظة :إذا لم تكن الطابعة معدة بشكل صحيح إلرسال الفاكس ،فقد تتعرض إلى مشاكل عند إرسال الفاكسات ،استقبال الفاكسات ،أو كليهما. عند التعرض إلى مشاكل تتعلق بإرسال الفاكسات واستقبالها، فيمكنك طباعة تقرير اختبار للفاكس لفحص حالة الطابعة. سيفشل االختبار عند عدم إعداد الطابعة بالطريقة الصحيحة إلرسال الفاكسات واستقبالها .
هناك مشكلة في الطابعة تتعلق بعملية إرسال واستالم الفاكسات عربي 26 •تأكد من استخدام سلك الهاتف أو المهايئ المزود مع الطابعة( .إذا لم تستخدم سلك الهاتف هذا أو المهايئ، قد تعرض الشاشة دائماً Phone Off Hook (السماعة ليست في مكانها)). •األجهزة األخرى ،التي تستخدم نفس خط الهاتف مع الطابعة قد تكون قيد االستخدام .تأكد من عدم استخدام سماعات الهواتف الفرعية (هواتف توجد على نفس خط الهاتف ولكنها غير متصلة بالطابعة) أو أجهزة أخرى أو ليست في مكانها .
ال تستطيع الطابعة إرسال فاكسات ولكن تستطيع استقبالها •عند عدم استخدام خدمة الرنين المميز ،تأكد من ضبط ميزة الرنين المميز في الطابعة على All Rings (كل النغمات). •في حالة ضبط ( Auto Answerالرد التلقائي) على ( Offإيقاف) ،أو إذا كنت مشترك بخدمة البريد الصوتي على نفس رقم الهاتف الذي تستخدمه للفاكس ،يمكنك استقبال الفكسات يدوياً فقط. •إذا كان لديك مودم كمبيوتر باتصال هاتفي على نفس خط الهاتف مع الطابعة ،فتأكد من عدم ضبط البرنامج المزود مع المودم إلى استقبال الفاكسات تلقائياً.
ال تستطيع الطابعة إرسال فاكسات ولكن تستطيع استقبالها •قد تكون الطابعة تطلب الرقم بصورة سريعة أو مبكرة للغاية .على سبيل المثال ،إذا أردت الوصول لخط خارجي عن طريق االتصال برقم" ،"9حاول وضع وقفات كالتالي( 9-XXX-XXXX :حيث XXX-XXXXهو رقم الفاكس الذي ترسل له). إلدخال فاصلة المس * واختر شرطة ( .
مشكالت اإلعداد الالسلكية ()802.11 يزودك هذا القسم بمعلومات حول حل المشكالت التي قد تواجهك عند توصيل الطابعة بالشبكة الالسلكية الخاصة بك. اتبع هذه المقترحات بالترتيب المذكور. مالحظة :إذا الزلت تواجه مشكالت ،انظر معلومات حل المشكالت في دليل المستخدم (ذلك المتاح على الكمبيوتر بعد تثبيت البرنامج). بعد حل المشكالت...
الخطوة .2فحص قوة اإلشارة الالسلكية إذا كانت قوة اإلشارة للشبكة الالسلكية أو الكمبيوتر ضعيفة ً تداخال على الشبكة الالسلكية ،فقد ال تتمكن أو إذا كان هناك الطابعة من اكتشاف اإلشارة. لتحديد قوة اإلشارة الالسلكية ،قم بإجراء اختبار الشبكة الالسلكية من لوحة تحكم الطابعة( .للمزيد من المعلومات، راجع "الخطوة .4تشغيل اختبار الشبكة الالسلكية" على الصفحة .)30 إذا أشار اختبار الشبكة الالسلكية أن اإلشارة ضعيفة؛ جرب تقريب الطابعة من الموجه.
.5استخدام ملقم الويب المضمن ()EWS عندما تتصل الطابعة بإحدى شبكات االتصال ،يمكنك استخدام صفحة "( "embedded Web serverملقم الويب المضمن أو " )"EWSفي عرض معلومات الحالة وتهيئة إعدادات الشبكة من المتصفح بجهاز الكمبيوتر الخاص بك .ال تحتاج لتثبيت أو تهيئة أي برامج خاصة على جهاز الكمبيوتر الخاص بك. مالحظة :ويمكنك فتح و استخدام ملقم الويب المضمن EWSواستخدامه دون وجود اتصال باإلنترنت، ولكن لن تتوفر بعض الوظائف.
بيان الضمان المحدود لشركة Hewlett-Packard عربي 32 بيان الضمان المحدود لشركة Hewlett-Packard
© 2010 Hewlett-Packard Development Company, L.P. www.hp.