HP CM8060/CM8050 Color MFP with Edgeline Technology User Guide
HP CM8060/CM8050 Color MFP with Edgeline Technology User Guide
Copyright and License Trademark Credits Safety information © 2008 Copyright Hewlett-Packard Development Company, L.P. Windows® is a U.S. registered trademark of Microsoft Corporation. Always follow basic safety precautions when using the device to reduce risk of injury from fire or electric shock. Reproduction, adaptation, or translation without prior written permission is prohibited, except as allowed under the copyright laws. Observe all warnings and instructions marked on the device.
Table of contents 1 Device basics Conventions used in this guide ............................................................................................................ 2 Product walkaround .............................................................................................................................. 3 Front view ............................................................................................................................ 3 Back view (right side) ..........................
Copy from the glass ........................................................................................................... 29 Adjust the copy settings ..................................................................................................... 31 Use the job-build feature .................................................................................................... 33 Fax .....................................................................................................................
Use watermarks ................................................................................................ 56 Resize documents ............................................................................................. 56 Set a custom paper size .................................................................................... 57 Print using different paper ................................................................................. 57 Insert blank or preprinted sheets ........................
Clean the white-vinyl backing ............................................................................................ 74 4 Solve problems System administrator .......................................................................................................................... 76 Problem-solving checklists ................................................................................................................. 77 Problems with all jobs .......................................................
1 Device basics This chapter contains information about the following topics: ● Conventions used in this guide ● Product walkaround ● Turn the device on and off ● Use the control panel ● Supported paper ● Load trays ● Load special types of paper WARNING! To avoid injury, do not touch moving parts. Do not reach into the device except to clear jams, to replace ink cartridges, or to add or remove paper.
Conventions used in this guide Throughout this guide, several tips, notes, cautions, and warnings alert you about important information. TIP: Tips provide helpful hints or shortcuts. NOTE: Notes provide important information to explain a concept or to complete a task. CAUTION: Cautions indicate procedures that you should follow to avoid losing data or damaging the device.
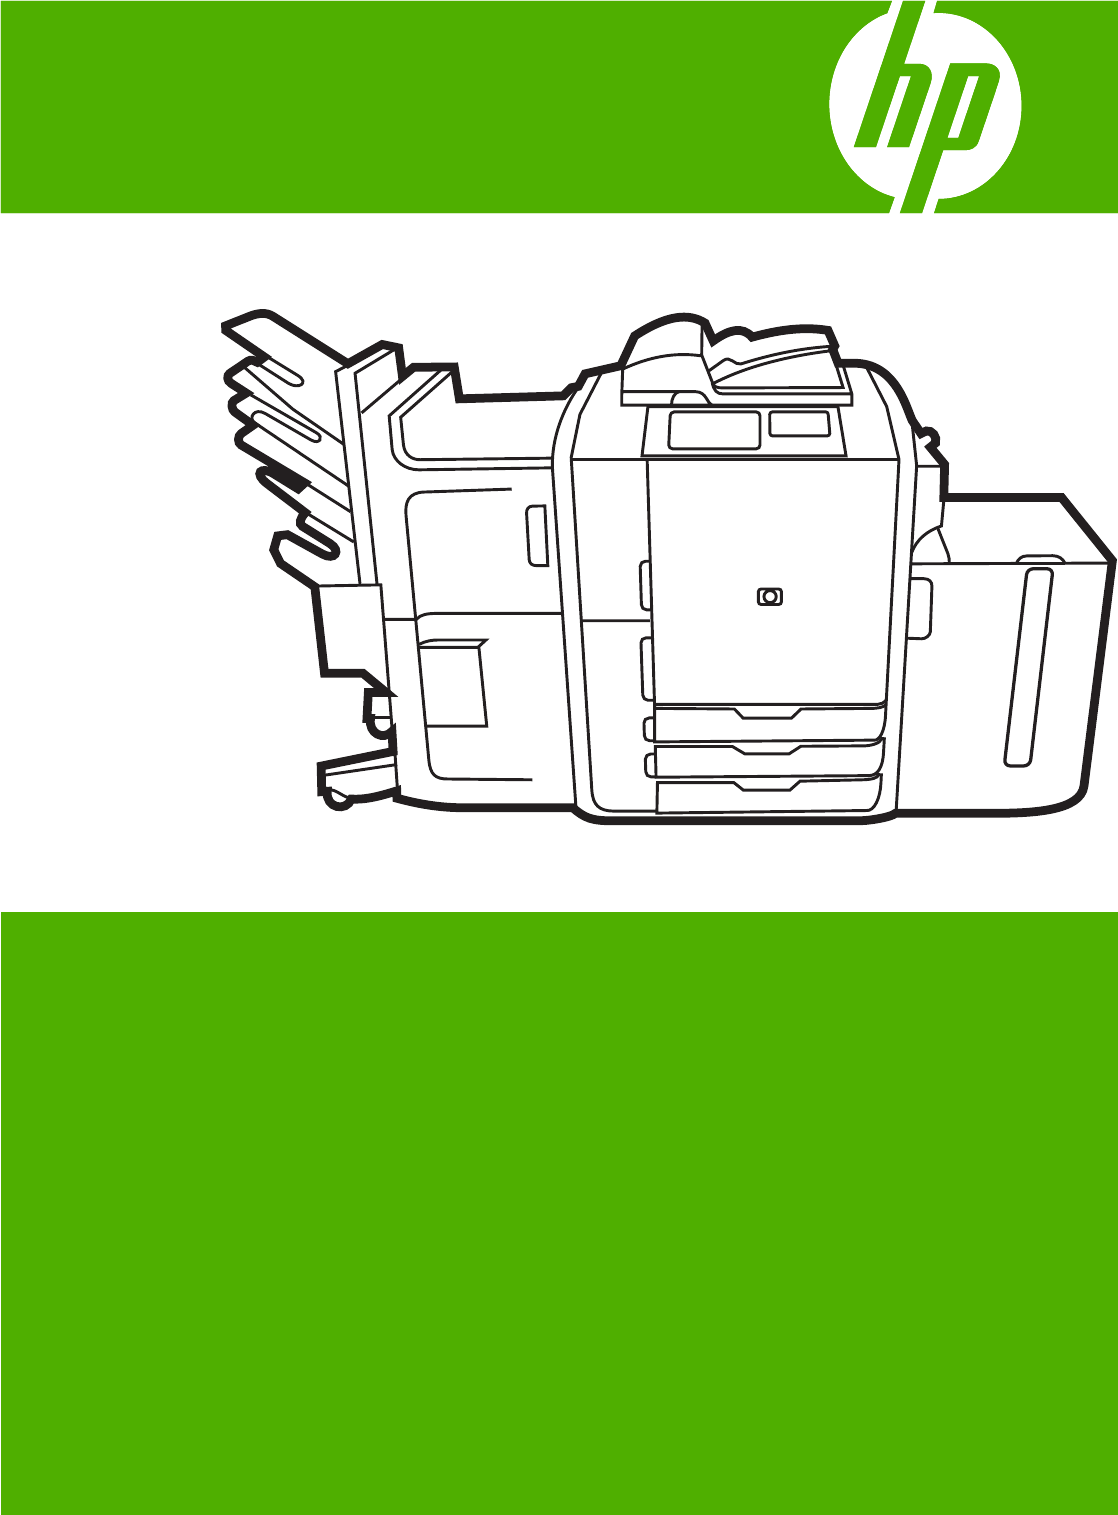
Product walkaround Before using the device, familiarize yourself with its major components.
Back view (right side) 1 Master power switch 2 Power connection WARNING! Do not use the master power switch or unplug the device unless you have already turned the device off by using the on/off button on the control panel. If you use the master power switch to turn off the device, wait for the amber LED to turn dark before you turn the switch on again. Back view (left side) The following figure shows the interface ports for the device.
1 Boot Codes LCD monitor (for service use only) 2 Host USB (for connecting an accessory to the device) 3 Fax (RJ-11) (covered with label) 4 Embedded LAN (RJ-45) (no telecommunication connections) 5 CAN Interface (Finisher) 6 Engine Interface (PCI Express) 7 Scanner Interface 8 EIO Slot 9 FIH (Foreign Interface Harness) 10 Device USB (for connecting the device to a computer) 11 Status LEDs for (service use only) 12 Engine Power Control (Serial) Single output bin 1 ENWW Single outpu
Optional finishers By default, when an optional finisher is installed, all copy jobs are sent to Output Bin 1, print jobs are sent to Output Bin 2, and fax jobs are sent to Output Bin 3. The system administrator can change these default settings.
Optional HP Multifunction Finisher ENWW 1 Output Bin 1 (Copy jobs) 2 Output Bin 2 (Print jobs) 3 Output Bin 3 (Fax jobs) 4 Output Bin 4 5 Output Bin 5 (all stapled jobs are delivered to Output Bin 5) 6 Stapler 2 7 Stapler 1 Product walkaround 7
Turn the device on and off To turn the device on and off, press the on/off button on the device control panel. WARNING! Do not use the master power switch or unplug the device unless you have already turned the device off by using the on/off button on the control panel.
Use the control panel The control panel has a full-color VGA touchscreen that provides easy access to all device functions. Use the buttons and numeric keypad to control jobs and the device status. The LED lights indicate overall device status. Control-panel layout 1 On/off button Turn the device on and off. 2 Touchscreen Select and use all device features. 3 Numeric keypad Specify the quantity for copies and other numeric information.
Home screen The Home screen provides access to the device features, and it indicates the current status of the device. NOTE: Depending on how the system administrator has configured the device, the features that appear on the Home screen can vary. To use some features, you might need to sign in. 2 1 4 3 HP CM8060 Color MFP with Edgeline Technology 5 8 6 7 1 Device status line Provides information about the overall device status.
6 Sign In or Sign Out You might be required to sign in to use features for which the system administrator has controlled access. These features have a lock symbol ( ) next to them. Depending on your permissions, if you have signed in, you still might not have access to some features. NOTE: The lock symbol appears after you have signed in. The device administrator can access all of the device features, except the Service menu.
Buttons on the touchscreen Various buttons can appear on the touchscreen. Home button. Touch this button to go to the Home screen from any other screen. Start button. Touch this button to begin the action for the feature that you are using. NOTE: The name of this button changes for each feature. For example, in the Copy feature, the button is named Start Copy. Information button. This button appears when two or more settings are in conflict. Touch the button to learn how to resolve the conflict.
Supported paper The device produces high-quality documents in the fastest possible time when you follow these guidelines: ● The device is designed to work with a broad range of plain papers for general-office use. For optimum performance, use paper from the list of recommended papers. ● Always configure the tray for the correct paper type, and select the correct type from the printer driver.
Table 1-1 Supported brands of paper for this device (continued) HP-brand tested and qualified papers HP-brand supported papers (not optimized for this device) Tested non-HP papers Speciality paper Outside North America HP Office Paper - Prepunched Clairealfa White HP Labels IP Rey Office IP Duo Colourcopy Mondi IQ Economy M-Real Data Copy Portucel Navigator Universal Stora-Enso Multicopy UPM Office copy/print Xerox Premier Reflex Pure White Guidelines for using specialty papers Table 1-2 Guidelines
Table 1-3 Recommended papers for document types Document type Recommended paper Type of finish General office copying and printing HP Office Matte HP Office LG (long grain) Color document HP Bright White Matte Photographs, images, business plans, brochures, sales flyers, catalogs, covers, postcards, signs, maps, restaurant menus HP Edgeline Glossy, 180 g/m2 Glossy Correspondence HP Office Matte HP Office LG (long grain) Letterhead HP Bright White Matte Report HP Premium Presentation Matte
Supported paper types for each tray When you select a paper type, you are instructing the device to use a group of predefined settings to create the best possible print quality for that type of paper. CAUTION: Selecting a paper type that does not match the type of paper that is loaded in the tray can damage the device.
Table 1-4 Supported paper types for each tray (continued) Paper type that is listed in the printer driver or on the control panel Description Tray 1 Trays 2, 3, and 4 Tray 5 Bond Fine, uncoated paper that is less than 150 g/m2 (40 lb bond) X X X Recycled Plain, uncoated paper that is less than 150 g/m2 (40 lb bond) X X X Supported paper sizes for each tray Standard paper sizes are marked in the trays. To use a custom paper size, use Tray 1.
Table 1-5 Supported paper sizes for each tray (continued) Size Dimensions A5 148 x 210 mm Tray 1 Trays 2, 3, and 4 X X Tray 5 5.83 x 8.27 inches RA3 305 x 430 mm X 12.01 x 16.93 inches RA4 215 x 305 mm X 8.46 x 12.01 inches SRA4 225 x 320 mm X 8.86 x 12.6 inches B4 (JIS) 257 x 364 mm X X X X 10.12 x 14.33 inches B5 (JIS) 182 x 257 mm 7.17 x 10.12 inches B6 (JIS) 128 x 182 mm X 5.04 x 7.17 inches 8K 273 x 394 mm X 10.75 x 15.5 inches 16K 197 x 273 mm X 7.75 x 10.
Capacity of each tray and bin To avoid jams and print-quality problems, load the trays with the correct amount of paper. Load complete reams at one time. Remove paper from the output bins when they are full. Table 1-6 Capacity of each tray and bin Tray or bin Capacity Weight Scanner glass One sheet of paper, up to 305 x 445 mm (12 x 17.1 inches) Any weight of paper Maximum scanning area is 297 x 433 mm (11.7 x 17.0 inches) Objects, such as books, up to 50 mm (1.
Load trays Labels on each tray indicate the correct way to load paper. Each time you load paper into a tray, the device prompts you to configure the tray for the paper size and type. Always set the paper size and type to get the best performance from the device. Load Tray 1 (manual feed tray) Load standard or custom-sized paper into this tray. It holds up to 80 sheets of 75 g/m2 (20 lb bond) paper. Also use this tray for heavier paper, such as cardstock, HP Edgeline Glossy, or brochure papers. 20 1.
● Load letterhead or preprinted paper with the printed side face-down and the top edge to the right. NOTE: For duplex printing, load letterhead or preprinted paper with the printed side facingup and the top edge feeding first. ● Load prepunched paper with the side that has holes toward the front of the device. ● Load labels with the front side facing down. ● When loading HP Edgeline Glossy paper, fan the paper stack to separate the sheets before placing them in the tray.
If you are loading a custom paper size, touch Custom. Type the dimensions of the paper, and then touch OK to return to the Modify Tray screen. e. Touch OK to save the settings. Load Trays 2, 3, and 4 Trays 2, 3, and 4 hold many standard sizes and types of paper. Each tray holds up to 500 sheets of 75 g/m2 (20 lb bond) paper. 1. Open Tray 2, 3, or 4. 2. Load the paper, whole reams at a time. Always place the long edge along the front side of the tray.
ENWW 4. Slide the tray into the device. 5. Configure the tray for the type of paper by responding to the pop-up message that appears on the touchscreen when you close the tray. Or, follow these steps: a. From the Home screen, touch Supplies Status. b. Touch the Trays tab. c. If the type that is listed for the tray is not correct, touch the name of the tray, and then touch Modify. d. Select the correct paper type, and then touch OK.
Load Tray 5 This tray is preconfigured to hold up to 4,000 sheets (8 reams) of either Letter-size or A4-size paper. You cannot change this size setting. 1. Open the Tray 5 top door, and load the paper. Load whole reams at a time. The tray lowers itself as you load more paper. ● Load letterhead or preprinted paper with the printed side face-down and the top edge to the right. NOTE: For duplex printing, load letterhead or preprinted paper with the printed side facingup and the top edge feeding first. ● 2.
Load special types of paper The following table provides guidelines for loading special types of paper. Use the correct paper-type setting in the printer driver to obtain the best print quality. NOTE: list. In the Windows printer driver, adjust the paper type on the Paper tab in the Type is drop-down In the Macintosh printer driver, adjust the paper type on the Finishing tab of the Finishing pop-up menu. Select the Media Type drop-down list.
26 Chapter 1 Device basics ENWW
2 Use the device This chapter contains information about the following topics: ENWW ● Copy ● Fax ● Send to e-mail ● Send to a network folder ● Job Storage ● Check job status and use the job queue ● Print from a Windows computer ● Print from a Macintosh computer 27
Copy You can scan original documents by using the document feeder or the scanner glass. The device has several options available for customizing copied output. Copy from the document feeder The document feeder holds a maximum of 100 sheets of paper. 1. Place the original document face-up in the document feeder, with the top edge of the document toward the rear of the document feeder or feeding first into the input slot. For two-sided originals, place the first side of the original face-up. NOTE: loaded.
Copy mixed-size originals You can copy original documents that are printed on different sizes of paper as long as the sheets of paper have one common dimension, and that dimension is not greater than 297 mm (11.7 inches). For example, you could combine Letter and Legal sizes, or you could combine A4 and A5 sizes. 1. Arrange the sheets in the original document so they all have the same width. 2. Place the sheets face-up into the document feeder, and adjust the paper-width guides against the document. 3.
30 4. Select the size you wish to scan, and then touch OK. This turns off automatic size detection. 5.
Adjust the copy settings The device offers several features so you can optimize copied output. These features are all available on the Copy screen. The Copy screen consists of several pages. From the first page, touch More Options to go to the next page. Then touch the up or down arrow buttons to scroll to other pages. For details about how to use an option, touch the option, and then touch the help ( ) button in the upperright corner of the screen.
Table 2-1 Options for copy jobs (continued) 32 Option name Description Color Balance Use this feature to adjust colors individually to change the color balance in the copies. For example, increasing the amount of cyan makes copies more blue and less red. One/Two Color Use this feature to convert all the colors in a document to shades of a single color, or shades of a single color plus black. For example, you could convert all colors to varying shades of blue.
Use the job-build feature Use the Job Build option to divide a complex job into smaller segments. This is useful when you are scanning an original document that has more pages than the document feeder can hold or when you want to combine pages that have different sizes into one job. You can use either the glass or the document feeder to scan the original documents. NOTE: 1. The Job Build option is available for the Copy, E-mail, and Network Folder features.
Fax If an optional fax accessory is installed in the device and it is connected to an analog phone line, you can use the device to send and receive faxes. NOTE: If the system administrator has set up a LAN fax service or an Internet fax service, you can use the device to send faxes, but not to receive faxes. Configure the fax options for each job The device offers several features so you can optimize each fax. These features are all available on the Fax screen. The Fax screen consists of two pages.
Send faxes 1. Place the original document face-down on the glass or face-up in the document feeder. 2. From the Home screen, touch Fax to open the fax feature. 3. You can send a fax to a single recipient or to multiple recipients. Specify the fax numbers by using one or both of these methods: Type the fax number manually From the Fax screen, touch the box below Fax Number: to open the virtual keypad. Type the fax number. Touch Pause to indicate a required pause.
Cancel faxes You can cancel outgoing faxes that are currently scanning or that are waiting in the job queue. You can also cancel incoming faxes. Cancel a fax while it is scanning Cancel an outgoing fax Cancel an incoming fax 1. Press Stop. The Job Status screen opens, and a message appears that confirms the job has been canceled. 2. Touch OK to continue. 1. From the Home screen, touch Job Status. 2.
8. If the billing code feature is enabled, and the system administrator has made it editable, type the billing code under Billing Information in the Send Fax dialog box. You can change the billing code for any individual fax job. 9. To send the fax with the default settings, click Send. NOTE: Click the Setup tab in the Send Fax dialog box to view the sender, fax quality, notification information, and preview settings. You can change this information for any individual fax job. Click Send to send the fax.
10. To send the fax with the default settings, click Send. NOTE: Click the Setup tab in the Send Fax dialog box to view the sender, fax quality, notification information, and preview settings. You can change this information for any individual fax job. Click Send to send the fax. 11. If you selected Show Preview Before Sending Fax on the Setup tab, a preview of the fax job appears. Review the fax for accuracy, and then click Preview and Send to send the fax.
6. In the Phone Book dialog box, select the name for each fax recipient and click To to add the recipient to the Fax Recipients field. 7. After you have added all of the fax recipients to the Fax Recipients field, click OK. 8. Under Include With Fax in the Send Fax dialog box, clear Cover Page (Single recipient only) if it is selected. 9. If the billing code feature is enabled, type the billing code under Billing Information in the Send Fax dialog box.
Remove names from the phone book To remove names from the phone book, do the following: 1. Under Fax To in the Send Fax dialog box, click the book icon. 2. In the Phone Book dialog box, select the name that you want to delete and then click Delete. 3. Click OK when you are finished removing names from the phone book. Edit names in the phone book To edit names in the phone book, do the following: 40 1. Under Fax To in the Send Fax dialog box, click the book icon. 2.
Send to e-mail If the device is connected to a network server that has a valid simple mail transfer protocol (SMTP) address and has Internet access, you can use the device to scan a document and send it as an e-mail attachment. Send a scanned file as an e-mail attachment 1. Place the original document face-down on the glass or face-up in the document feeder. 2. From the Home screen, touch E-mail to open the e-mail feature. 3.
Use the e-mail address book Use the e-mail address book to store information for e-mail recipients. To open the address book, touch the address book button ( ) on the main e-mail screen. The button is available for the From:, To:, CC:, and BCC: fields. To get more information about any address, select the address in the list on the left side of the screen and touch Details. You can add entries to the address book that is stored on the device. You can also edit or delete certain entries.
Configure the e-mail options for each job The device offers several features for optimizing e-mail attachments. These features are all available on the E-mail screen. The E-mail screen consists of two pages. From the first page, touch More Options to go to the next page. For details about how to use an option, touch the option, and then touch the help ( ) button in the upperright corner of the screen. The following table provides an overview of the e-mail options.
Send to a network folder If the device is connected to a network, and if the system administrator has enabled this feature, you can scan a document and save it as a file in a folder on the network. Send a scanned file to a network folder NOTE: Depending on how the system administrator has configured the device, you might need to sign in to the device to use this feature. 1. Place the original document face-down on the glass or face-up in the document feeder. 2.
Set the folder options The device offers several features for optimizing files that are stored in network folders. These features are all available on the Network Folder screen. The Network Folder screen consists of two pages. From the first page, touch More Options to go to the next page. For details about how to use an option, touch the option, and then touch the help ( ) button in the upper right corner of the screen.
Job Storage You can store jobs on the device so you can print them at any time. You can share stored jobs with other users, or you can make them private. Store jobs at the device 1. Place the original document face-down on the glass or face-up in the document feeder. 2. From the Home screen, touch Job Storage to open the Job Storage feature. Select the Create tab. 3. Specify the name for the stored job in one of these ways: ● Select an existing folder from the list. Touch New Job and type a job name.
Store jobs from a computer In addition to scanning a document at the device control panel and storing it, you can also send a job from a computer and store it on the device. Use the printer driver to do this. When you store a job from a computer, you have several options for types of jobs to store. Table 2-6 Types of stored jobs Job-storage option Description Proof and Hold The job is sent to the device for short-term storage.
Table 2-7 Options for stored jobs (continued) 48 Option name Description Content Orientation Use this feature to specify the way the content of the original page is placed on the page: portrait or landscape. Output Bin Use this feature to select an output bin for the copies. If the optional HP Multifunction Finisher is attached, stapled copies are always delivered to Output Bin 5. Pages per Sheet Use this feature to copy multiple pages onto one sheet of paper.
Retrieve stored jobs At the device, you can retrieve and print jobs that are stored on the device, whether they were scanned at the device or sent from a computer. NOTE: in. Depending on how the system administrator has configured the device, you might need to sign You cannot retrieve or print a stored job if you do not have permission to print in color. The device provides an alert in this situation. 1. From the Home screen, touch Job Storage to open the Job Storage feature. Select the Retrieve tab. 2.
Check job status and use the job queue To check the status of individual jobs, use the Job Status feature on the device control panel. Also use this feature to pause all jobs, remove jobs from the queue, or to promote a job so it is processed sooner. Open the job queue 1. From the Home screen, scroll to and touch Job Status. The job queue opens. 2. The Active tab shows jobs that are currently processing. From the drop-down menu, select a job category, and then select the name of the job.
Process multiple job types The device processes multiple jobs simultaneously whenever it can. This is possible because the scanner, the print engine, and the digital send features can function at the same time for separate jobs. For example, the device can be receiving a fax, sending a fax, or sending out a digital send job while scanning a copy job and while printing a job from a remote user. It can also allow some types of jobs to interrupt jobs in process depending on settings and on priority.
Promote and interrupt jobs in the queue When the device is processing multiple jobs, in most cases it prioritizes them according to the order in which it receives them. However, some types of jobs automatically take priority over others. You can also promote a job in the queue so it is processed as soon as possible, or you can interrupt a job that is in progress so a new job is processed immediately.
Job interruption The device can interrupt a job that is currently printing at these boundaries: ● After a complete page, but in the middle of a multiple-page job. If the current job is being printed on both sides, the interruption occurs after both sides have printed. NOTE: If the current job requires stapling, the new job interrupts the current job after a complete set of pages. ● After a complete set of pages for jobs that have multiple copies.
Print from a Windows computer The device comes with printer drivers that the computer uses to communicate with the device. Printer drivers provide access to device features, such as printing on custom-sized paper, resizing documents, and inserting watermarks. The printer drivers include online Help that has instructions for common printing tasks and also describes the buttons, checkboxes, and drop-down lists that are in the printer driver.
Set the color quality 1. On the File menu in the software program, click Print. 2. Select the driver, and then click Properties or Preferences. 3. Click the Paper/Quality tab. 4. In the area for Print Quality for the Color Quality, select either Professional or General Office. Store jobs Use the Job Storage printer-driver tab to store print jobs on the device. You can then print the job at any time from the device control panel.
5. In the Printing Shortcuts box, type a name for the custom printing shortcut. 6. Click OK. Use printing shortcuts 1. On the File menu in the software program, click Print. 2. Select the driver, and then click Properties or Preferences. 3. Click the Printing Shortcuts tab. 4. Select the printing shortcut that you want to use from the Printing Shortcuts list. 5. Click OK.
3. On the Effects tab, click Print Document On. 4. Select the paper size to print on. 5. To print the document without scaling it to fit, make sure that the Scale to Fit option is not selected. 6. Click OK. Set a custom paper size 1. On the File menu in the software program, click Print. 2. Select the driver, and then click Properties or Preferences. 3. On the Paper/Quality tab, click Custom. 4. On the Custom Paper Size window, type the name of the custom paper size. 5.
6. Select the settings that you want to use to add blank or preprinted sheets. 7. Click OK to return to the Paper/Quality tab. 8. Click OK. Chapter page layout Follow these instructions to set the layout of chapters in the print job. 1. On the File menu in the software program, click Print. 2. Select the driver, and then click Properties or Preferences. 3. Click the Paper/Quality tab. 4. In the Page exceptions list box, click Chapter page layout. 5. Click Settings. 6.
1. Long-edge landscape Every other printed image is oriented upside-down. Facing pages are read continuously from top to bottom. 2. Short-edge landscape Every printed image is oriented right-side-up. Facing pages are read from top to bottom. 3. Long-edge portrait This is the default setting, and the most common layout used. Every printed image is oriented right-side-up. Facing pages are read from top to bottom. 4. Short-edge portrait Every other printed image is oriented upside-down.
5. In the drop-down box for Booklet Layout, select either Left Edge Binding or Right Edge Binding. The Pages per Sheet setting automatically changes to 2 pages per sheet. 6. Click OK. Shift images on the page You can adjust the placement of the image on the page toward any edge. 1. On the File menu in the software program, click Print. 2. Select the driver, and then click Properties or Preferences. 3. Click the Output tab. 4. Click Image shift settings....
Set the stapling options Configure the driver to recognize the finisher If the HP Multifunction Finisher is installed, but the stapling options do not appear in the printer driver, you need to configure the driver to recognize the finisher. 1. Click Start, click Settings, and then click Printers or Printers and Faxes. 2. Right-click the driver icon, and then select Properties. 3. Click the Device Settings tab. (The Device Settings tab is not available from within software programs.) 4.
Print from a Macintosh computer The device comes with printer drivers that the computer uses to communicate with the device. Printer drivers provide access to device features, such as printing on custom-sized paper, resizing documents, and inserting watermarks. The printer drivers include online Help that has instructions for common printing tasks and also describes the buttons, checkboxes, and drop-down lists that are in the printer driver.
Set the color quality 1. On the File menu, click Print. 2. Open the Color/Quality Options menu, and select the Basic tab. 3. To print in color, select Color Print. Next to Color Quality, select either Professional or General Office. Store jobs You can store jobs on the device so you can print them at any time. You can share stored jobs with other users, or you can make them private. 1. On the File menu, click Print. 2. Open the Job Storage menu. 3.
5. Next to Text, select one of the standard messages, or select Custom and type a new message in the box. 6. Select options for the remaining settings. NOTE: Transparent watermarks are not available for all applications. Resize documents You can scale a document to fit on a different size of paper. 1. On the File menu, click Print. 2. Open the Paper Handling menu. 3. In the area for Destination Paper Size, select Scale to fit paper size, and then select the size from the drop-down list. 4.
3. Open the Layout pop-up menu. 4. Next to Two-Sided, select either Long-Edge Binding or Short-Edge Binding. NOTE: For OS X v10.5, a default binding value may appear if you had checked Two-Sided first. Print multiple pages on one sheet of paper You can print more than one page on a single sheet of paper. This feature provides a cost-effective way to print draft pages. 1. On the File menu, click Print. 2. Click the Layout pop-up menu. 3.
Shift images on the page You can adjust the placement of the image on the page toward any edge. 1. On the File menu, click Print. 2. Open the Finishing menu. 3. On the Image Shift tab, select the appropriate settings. ● You can adjust the front and back sides independently by specifying measurements for Front Side Shift and Back Side Shift. ● You can adjust the front and back sides by the same amount, but in opposite directions. This is useful for creating a wider margin along the binding edge.
3 Maintain the device This chapter contains information about the following topics: ENWW ● Replace ink cartridges ● Replace staple cartridges ● Clean the device 67
Replace ink cartridges The device uses four color ink cartridges and one bonding agent cartridge. The bonding agent adheres the ink to the paper and improves the durability of the printed output. A message appears on the control panel whenever a cartridge needs to be replaced. The control-panel message tells you which cartridge needs to be replaced. An ink cartridge expires twelve months after the date of installation if it is installed prior to the install-by date shown on the ink cartridge package.
2. Push the cartridge back and then up to release it, then pull the cartridge straight out. 3. Push the new cartridge straight in until it locks into place. 4. Please return your genuine HP supplies for recycling to Hewlett-Packard. For more information, please visit us at www.hp.com/go/recycle. NOTE: On the Supplies Status Page, the HP logo only appears in front of the supply name when genuine HP supplies are used.
Replace staple cartridges NOTE: The HP Multifunction Finisher is an optional accessory. Other finishers do not have staplers. A message appears on the control panel whenever a staple cartridge needs to be replaced. The optional HP Multifunction Finisher has two staplers. Stapler 1 is on the right, closest to the device. Stapler 2 is to the left and above Stapler 1. The control-panel message indicates which stapler is empty.
ENWW 3. To remove the staple cartridge from the cassette, push in at the arrow on each side and then pull up to release the cartridge. 4. Insert the new staple cartridge into the staple cassette. Push the cartridge straight down until it snaps into place. 5. Push the staple cassette straight into the slot.
72 6. Rotate the green lever up until it snaps into place. 7. Close the stapler door.
Clean the device The device does not need to be cleaned often. However, if dirt is visible on the flatbed glass or on the white-vinyl backing, or if streaks or spots appear in copies, clean the flatbed glass and the white-vinyl backing. Clean the outside of the device and the touchscreen periodically to avoid getting dirt on the flatbed glass and the white-vinyl backing. Use the following information to clean the device.
Clean the flatbed glass Clean the flatbed glass only if dirt is visible or if streaks or spots appear in copies. Gently wipe the glass with a lint-free cloth dampened with water. If water does not work, use a cloth dampened with isopropyl alcohol. Do not pour or spray the cleaner directly onto the glass. Do not press hard on the glass. Clean the glass scanner strip The small glass strip that is to the left of the flatbed glass has a special coating. Use only gentle pressure when cleaning this glass strip.
4 Solve problems This chapter contains information about the following topics: ENWW ● System administrator ● Problem-solving checklists ● Control-panel messages ● Clear jams 75
System administrator The system administrator is a person in your organization who is responsible for configuring and maintaining the device. This person has access to more in-depth information about solving problems. You should be able to resolve basic problems without the help of the system administrator. If you discover a problem that you cannot resolve, contact the system administrator for help.
Problem-solving checklists If the device is not responding correctly, complete the steps in the following checklists. If you discover a problem that you cannot resolve, contact the system administrator for help. Problems with all jobs 1. Make sure at least one status light on the control panel is lit. If no lights are on, complete these steps: a. Press the on/off button on the control panel. b. Check the master power switch at the right-rear corner of the device. Make sure it is in the on position. c.
3. 78 At the computer, check to see if the print queue is stopped, paused, or set to print offline. ● Windows: Click Start, click Settings, and then click Printers or Printers and Faxes. Doubleclick HP CM8060 Color MFP with Edgeline Technology. ● Macintosh: Open Print Center, or Setup Utilities, or Print and Fax under System Preferences, and double-click the line for the HP CM8060 Color MFP with Edgeline Technology. 4. Try printing a document from a different software program.
Control-panel messages The status line on the touchscreen alerts you of potential problems with the device. Errors: If the device has an error, a message appears that describes the error. The message also has instructions for solving the problem. The error button ( ) remains on the status line until the error is resolved. Warnings: The warning button ( ) appears when the device has a problem but can continue functioning. Touch the warning button to see a message that describes the problem.
Clear jams If a jam occurs, a message appears on the control panel to describe where the jam is located. The message also contains instructions for finding the jam, including a short video that shows which components to move and which doors to open. Precautions for clearing jams WARNING! To avoid injury, do not touch moving parts. Do not reach into the device except to clear jams, to replace ink cartridges, or to add or remove paper.
Prevent jams Follow these guidelines to prevent jams. ● When loading paper into the trays, always make sure the tray is configured for the correct type of paper. ● Load full reams of paper into Trays 2, 3, 4, and 5. Do not divide the reams into smaller sections when loading paper. ● Use only the types of paper that the device supports. See Copy on page 28. ● When using the document feeder, remove staples, paper clips, adhesive papers, and any other objects that are attached to the original document.
82 Chapter 4 Solve problems ENWW
A Regulatory statements This appendix contains information about the following topics: ENWW ● FCC regulations ● Declaration of conformity ● Hewlett-Packard limited warranty statement 83
FCC regulations This equipment has been tested and found to comply with the limits for a Class A digital device, pursuant to Part 15 of the FCC rules. These limits are designed to provide reasonable protection against harmful interference in a residential installation. This equipment generates, uses, and can radiate radio frequency energy, and if not installed and used in accordance with the instruction manual, may cause harmful interference to radio communications.
Declaration of conformity Declaration of Conformity according to ISO/IEC Guide 22 and EN 45014 Manufacturer’s Name: Manufacturer's Address: Hewlett-Packard Company 60 Alexandria Terrace, #07-01 The Comtech Singapore, 118502, declares, that the product Product Name: HP CM8060/CM8050 MFP Regulatory Model: Product Options: VCVRA-0609 All conforms to the following Product Specifications: SAFETY: IEC 60950-1:2001 / EN60950-1: 2001 IEC 60825-1:1993 +A1+A2 / EN 60825-1:1994 +A1 +A2 (Class 1 for LEDs) EMC:
Hewlett-Packard limited warranty statement HP PRODUCT DURATION OF LIMITED WARRANTY HP CM8050/CM8060 Color MFP with Edgeline Technology 90 days (parts only) HP warrants to the initial purchaser that HP hardware and accessories will be free from defects in materials and workmanship after the date of purchase, for the period specified above.
THE WARRANTY TERMS CONTAINED IN THIS STATEMENT, EXCEPT TO THE EXTENT LAWFULLY PERMITTED, DO NOT EXCLUDE, RESTRICT OR MODIFY AND ARE IN ADDITION TO THE MANDATORY STATUTORY RIGHTS APPLICABLE TO THE SALE OF THIS PRODUCT TO YOU.
88 Appendix A Regulatory statements ENWW
Index A address book e-mail 42 administrator, system 76 attachments, e-mail options 43 send 41 Attention light 9 B back view (left side) 4 back view (right side) 4 Bin 1 paper sizes supported 19 Bin 2 paper sizes supported 19 Bin 3 paper sizes supported 19 Bin 4 paper sizes supported 19 Bin 5 paper sizes supported 19 bins, output capacities 19 optional finishers 6 select from Macintosh 62 select from Windows 54 single, locate 5 blank pages, insert from Windows 57 booklet settings Macintosh 65 Windows 59 Bo
doors jams, clear 80 locate 3 double-sided printing Macintosh 64 Windows 58 duplex Macintosh 64 Windows 58 E e-mail address book 42 Job Build option 33 multitask jobs 51 options 43 send attachments 41 EIO slot locate 5 embedded LAN 5 engine interface 5 Engine Power Control 5 enlarging documents 56 envelopes, not supported 14 Error button 12 error messages 79 F fax cancel 36 multitask jobs 51 options 34 output bin, default 6 phone book, edit 39 receive 35 send 35 send to multiple recipients 37 send to single
presets (saved settings) 63 select tray from 62 Services tab 66 shift images 66 tray, select 62 watermarks 63 manual feed tray capacity 19 load labels, letterhead, or prepunched 25 load paper 20 locate 3 paper sizes supported 17 paper types supported 16 select from Macintosh 62 select from Windows 54 manuals, paper for 15 map, paper for 15 margins, shift Macintosh 66 Windows 60 master power switch locate 4 problem-solve 77 turn device on/off 8 media blank or preprinted, insert from Windows 57 brands recomme
sizes supported 17 specialty 14 types supported 16 paper sizes supported, bins 19 password 11 pause Interrupt button, locate 9 jobs 50 PCI Express interface 5 phone book, fax add names 39 edit names 40 remove names 40 send using 38 special characters 38 phone line port, locate 5 photograph, paper for 15 photos, Windows quality settings 60 postcard, paper for 15 power master switch 4 on/off button, locate 3 problem-solve 77 Sleep button 9 turn device on/off 8 preprinted paper insert pages from Windows 57 loa
staple cartridges, replace 70 staple options Macintosh 66 Windows 61 Start button control panel 9 touchscreen 12 status control panel messages 79 Home screen 10 job 50 lights 9 Macintosh services tab 66 Windows services tab 61 status LEDs locate 5 Stop button cancel faxes 36 locate 9 storage, job Macintosh settings 63 options 47 retrieve jobs 49 store jobs 46 store jobs from a computer 47 Windows driver settings 55 supply-status, Services tab Macintosh 66 Windows 61 system administrator 76 T time 11 tips 2
94 Index ENWW
© 2008 Hewlett-Packard Development Company, L.P. www.hp.