
DisplayMaker Legacy X-12+ - User Manual


Head Height Calibration 4-27
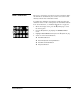
22. Adjust the width of the prime bars, and press B.
The printer prints the prime bars, and prompts you to evalu-
ate the pattern.
23. Evaluate the prime bars.
◆ If the prime bars look good, press B.
◆ If the prime bars reveal an excessive number of jet-outs,
press n (Cancel) to exit the Auto Carriage Height pro-
cess and clean the printheads. Then run Auto Carriage
Height again.
If you press B, the printer begins the automatic head height
procedure. When it finishes, the control panel displays this
message:
The head height is calibrated.
24. Press B to park the carriage and return to the Calibrations
menu.
Manual Carriage Height This procedure calibrates the head height relative to the platen,
and levels the carriage, using paper shims and your input. Once
calibrated, the printer raises the carriage to the appropriate
height relative to the media.
1. Verify that the appropriate Head Height setting is selected.
The options under Configure Printer - Printer Settings -
Head Height determine whether the head height will be set
to the Normal (0.050 inches/1.27 mm) or Custom height rel-
ative to the media. Use Normal unless you need to raise the
head height to avoid printhead strikes against the media.
2. On the menu, select Service Printer.
The Service Printer menu appears.
3. On the Service Printer menu, select Calibrations.
The Calibrations menu appears.
4. On the Calibrations menu, select Head Height.
The head height menu appears.
5. Select Manual Carriage Height.
A message appears that describes this function.
6. Press B to continue.