
DisplayMaker Legacy X-12+ - User Manual


Creating a Custom Color Map 3-11
Creating a Custom
Color Map
You can create a custom ink set that uses colors of your choos-
ing, in the positions where you want to place them.
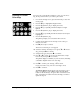
1. From the Front Page screen, press the Menu key to enter the
menu system.
2. Press the pkey to highlight Configure Printer.
3. Press the E (Menu In) key to display the menu.
4. Press the p key repeatedly until Printer Options is high-
lighted.
5. Press the E (Menu In) key to display the menu.
6. Press the p key repeatedly until Create Custom Colormaps is
highlighted.
7. Press the E (Menu In) key.
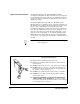
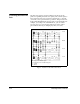
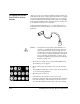
The printer prompts you to insert the ink reservoirs.
8. Load the ink modules into the ink trays in the order you
intend to use them.
9. Press B (Proceed) to continue.
The choices for heads per color appear.
10. Select the number of heads per color (press p or C if neces-
sary), then press B to continue.
11. Select the ink type, then press B to continue.
12. Press p or C to select one of the User Defined color maps
from the list, then press B to continue.
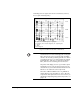
The printer displays a summary of your selections, including
a schematic diagram of the new color map.
13. Press B to confirm your settings, or n to cancel.
If you pressed Proceed, your new color map is saved.
14. Press B to continue.
The Printer Options menu appears. The new ink set (color
map) you defined is now available under the Print Mode
button on the Front Page. To replace this user-defined color
map, repeat this procedure and select the map you want to
replace in step 12.