
Maintenance and Service Guide
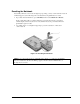
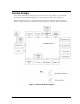
Table Of Contents
- Contents
- Introduction
- Product Information
- Removal and Replacement
- Disassembly Flowchart
- Removing the Battery
- Removing an SDRAM Module
- Removing the Wireless LAN Mini PCI Card
- Removing the Hard Disk Drive
- Recovering the Factory Software
- Replacing Small Parts
- Removing the Keyboard Cover
- Removing the Speaker Assembly
- Removing the Keyboard
- Removing the Switchboard PCA
- Removing the CD/DVD Drive
- Removing the Display Assembly
- Removing the Top Case
- Removing the Floppy Drive
- Removing the Infrared (I/R) PCA
- Removing the Audio PCA
- Removing the Heat Sink (with Fan)
- Removing the CPU Module
- Removing the RJ11/1394 Connector Module
- Removing the Motherboard
- Replacing Components on a Bottom Case
- Repairing the BIOS IC
- Removing Other Components
- Troubleshooting and Diagnostics
- Replaceable Parts
- Reference Information
Service Manual Product Information 1-17
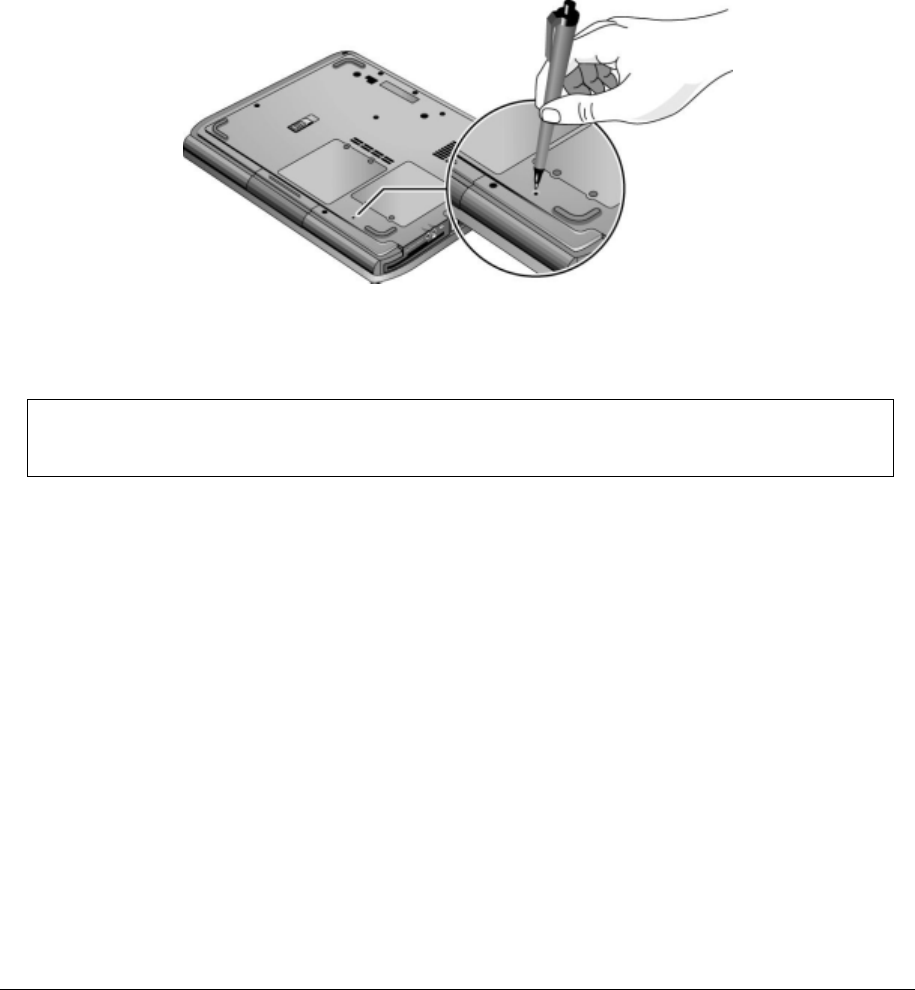
Resetting the Notebook
Occasionally, Windows or the notebook might stop responding, so that you cannot turn the notebook
off. If this happens, try the following in the order listed. Press the power button to restart.
• If possible, shut down Windows: press
ctrl+alt+del, and then select Shut Down > Restart.
If the system will not allow a software shutdown, press and hold down the power button
until the display shuts down (about 4 seconds) and then release the power button. Press the
power button again to restart.
• Use a ballpoint pen or a straightened paper clip to press the reset button on the bottom
of the notebook.
Figure 1-7. Resetting the Notebook
NOTE: To boot from a CD, insert a bootable CD (such as the Recovery CDs) into the CD/DVD
drive, then restart. Press esc when the HP logo appears, and then select the CD/DVD drive as
the temporary boot device.