Maintenance and Service Guide
Table Of Contents
- Contents
- Introduction
- Product Information
- Removal and Replacement
- Disassembly Flowchart
- Removing the Battery
- Removing an SDRAM Module
- Removing the Wireless LAN Mini PCI Card
- Removing the Hard Disk Drive
- Recovering the Factory Software
- Replacing Small Parts
- Removing the Keyboard Cover
- Removing the Speaker Assembly
- Removing the Keyboard
- Removing the Switchboard PCA
- Removing the CD/DVD Drive
- Removing the Display Assembly
- Removing the Top Case
- Removing the Floppy Drive
- Removing the Infrared (I/R) PCA
- Removing the Audio PCA
- Removing the Heat Sink (with Fan)
- Removing the CPU Module
- Removing the RJ11/1394 Connector Module
- Removing the Motherboard
- Replacing Components on a Bottom Case
- Repairing the BIOS IC
- Removing Other Components
- Troubleshooting and Diagnostics
- Replaceable Parts
- Reference Information

2-18 Removal and Replacement Service Manual
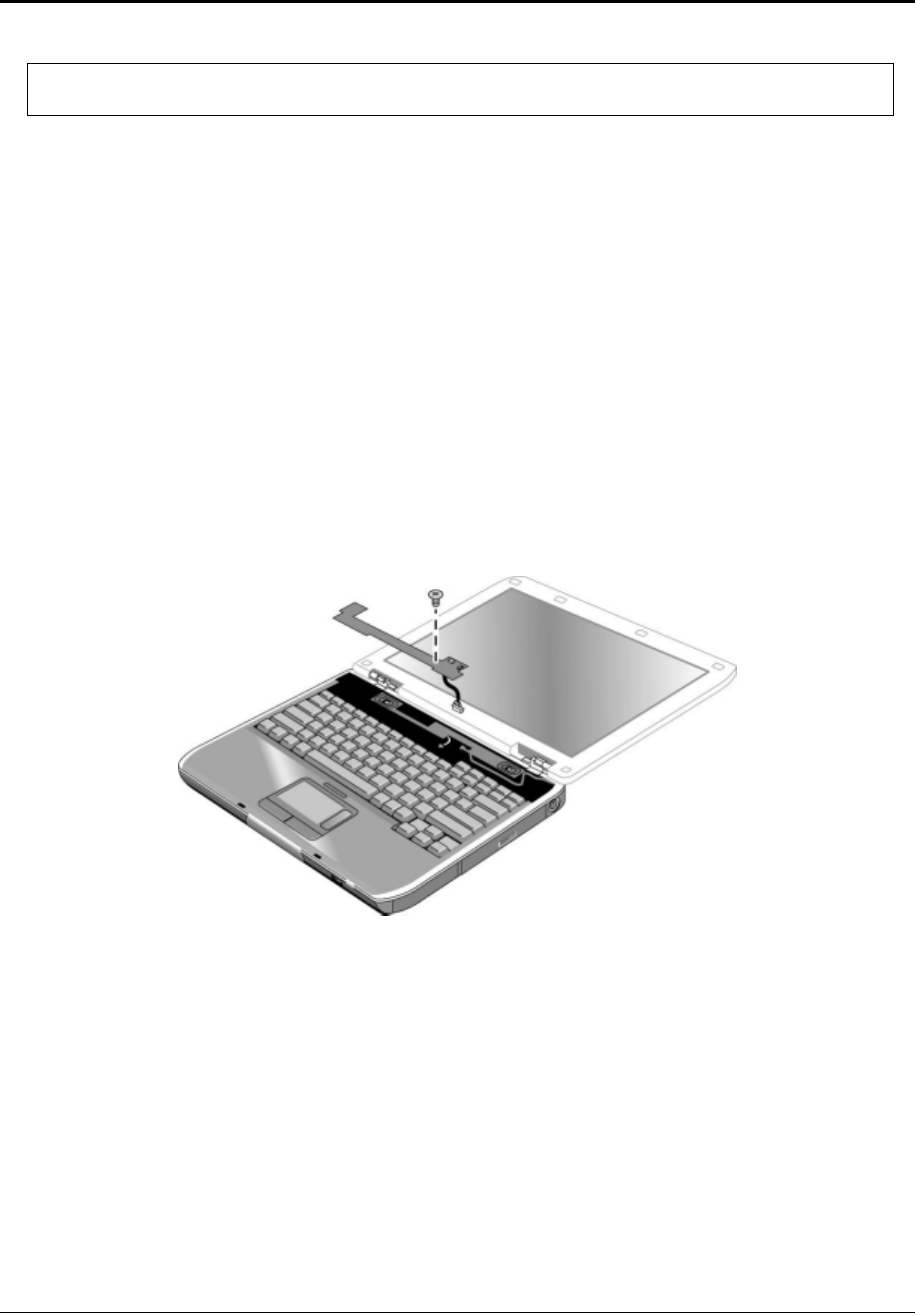
Removing the Switchboard PCA
NOTE: This section applies only to HP Pavilion 4x00, HP Compaq nx9005 and nx9000,
Compaq Evo Notebook N1050v and N1010v, and Compaq Presario 2100 and 1100 models.
Required Equipment
1 Phillips screwdriver
Removal Procedure
1. Unplug the AC adapter, if present, and then remove the battery.
2. Remove the keyboard cover (page 2-13).
3. Disconnect both the 2-wire and 4-wire cables that connect the switchboard PCA to the top
case and speaker assembly, respectively.
4. Remove the M2.5×4.0mm screw that secures the keyboard, and then switchboard PCA to
the top case (page 2-16).
5. Gently lift up on the keyboard, carefully remove the switchboard PCA from the top case,
and then disconnect the underside motherboard cable.
Figure 2-13. Removing the Switchboard PCA
HP Pavilion 4x00, HP Compaq nx9005 and nx9000,
Compaq Evo Notebook N1050v and N1010v,
and Compaq Presario 2100 and 1100 Models


