
Maintenance and Service Guide


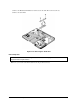

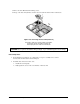


Table Of Contents
- Contents
- Introduction
- Product Information
- Removal and Replacement
- Disassembly Flowchart
- Removing the Battery
- Removing an SDRAM Module
- Removing the Wireless LAN Mini PCI Card
- Removing the Hard Disk Drive
- Recovering the Factory Software
- Replacing Small Parts
- Removing the Keyboard Cover
- Removing the Speaker Assembly
- Removing the Keyboard
- Removing the Switchboard PCA
- Removing the CD/DVD Drive
- Removing the Display Assembly
- Removing the Top Case
- Removing the Floppy Drive
- Removing the Infrared (I/R) PCA
- Removing the Audio PCA
- Removing the Heat Sink (with Fan)
- Removing the CPU Module
- Removing the RJ11/1394 Connector Module
- Removing the Motherboard
- Replacing Components on a Bottom Case
- Repairing the BIOS IC
- Removing Other Components
- Troubleshooting and Diagnostics
- Replaceable Parts
- Reference Information
2-38 Removal and Replacement Service Manual
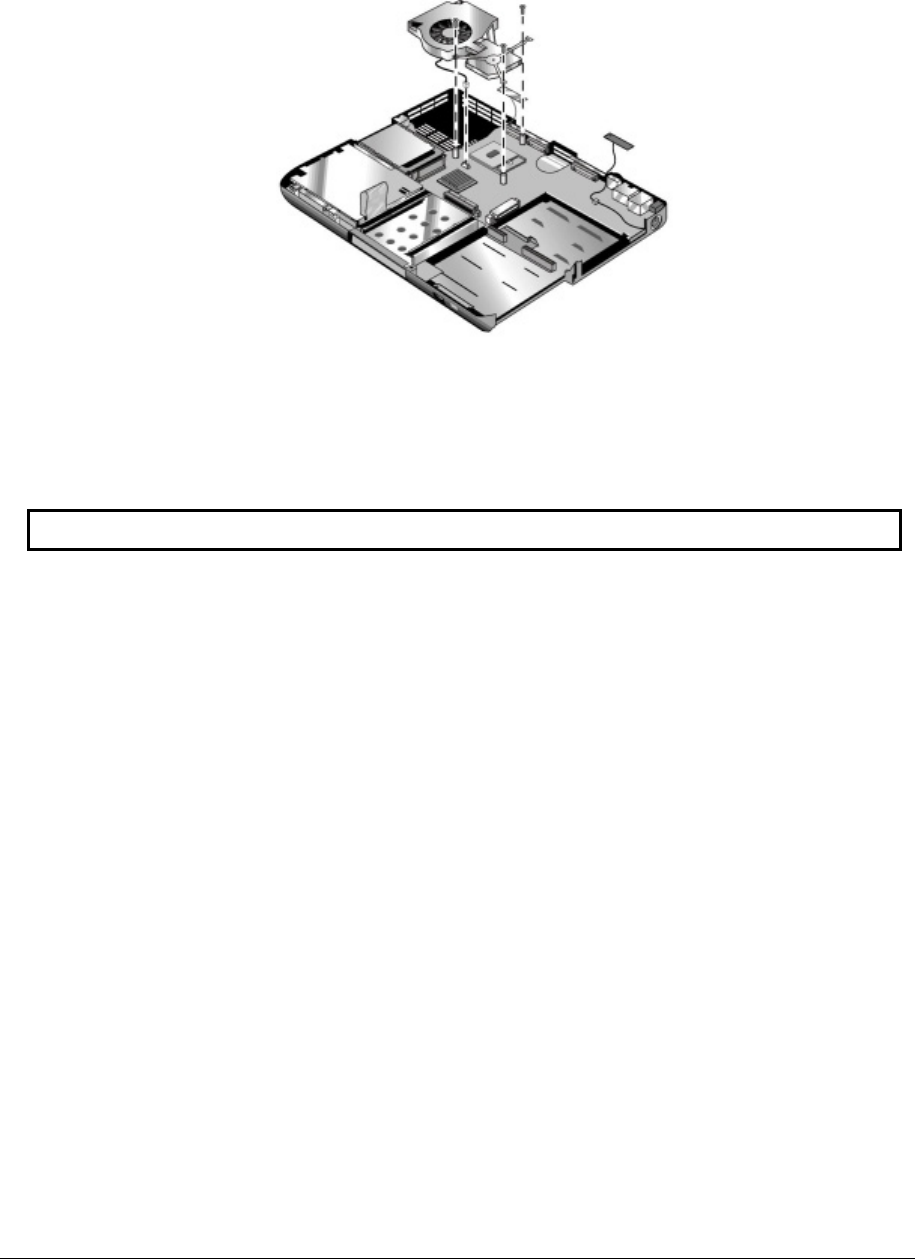
3. Remove the three M2.5×4.0mm retaining screws.
4. Lift up on the heat sink (with fan), and then disconnect the fan cable from the motherboard.
Figure 2-26. Removing the Heat Sink (with Fan)
HP Pavilion 4x00, HP Compaq nx9005 and nx9000,
Compaq Evo Notebook N1050v and N1010v,
and Compaq Presario 2100 and 1100 Models
CAUTION: Do not spin the fan blades with your finger or you could damage the fan’s bearings.
Reassembly Notes
• If the thermal pad is damaged, use a sharp knife or scraper to carefully remove it from
the heat sink, and then attach a new thermal pad.
• Install the heat sink screws in this order:
1. Install all 3 screws lightly.
2. Fully tighten the screws in the order marked on the heat sink.