
Maintenance and Service Guide

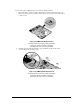
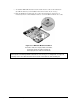


Table Of Contents
- Contents
- Introduction
- Product Information
- Removal and Replacement
- Disassembly Flowchart
- Removing the Battery
- Removing an SDRAM Module
- Removing the Wireless LAN Mini PCI Card
- Removing the Hard Disk Drive
- Recovering the Factory Software
- Replacing Small Parts
- Removing the Keyboard Cover
- Removing the Speaker Assembly
- Removing the Keyboard
- Removing the Switchboard PCA
- Removing the CD/DVD Drive
- Removing the Display Assembly
- Removing the Top Case
- Removing the Floppy Drive
- Removing the Infrared (I/R) PCA
- Removing the Audio PCA
- Removing the Heat Sink (with Fan)
- Removing the CPU Module
- Removing the RJ11/1394 Connector Module
- Removing the Motherboard
- Replacing Components on a Bottom Case
- Repairing the BIOS IC
- Removing Other Components
- Troubleshooting and Diagnostics
- Replaceable Parts
- Reference Information
2-46 Removal and Replacement Service Manual
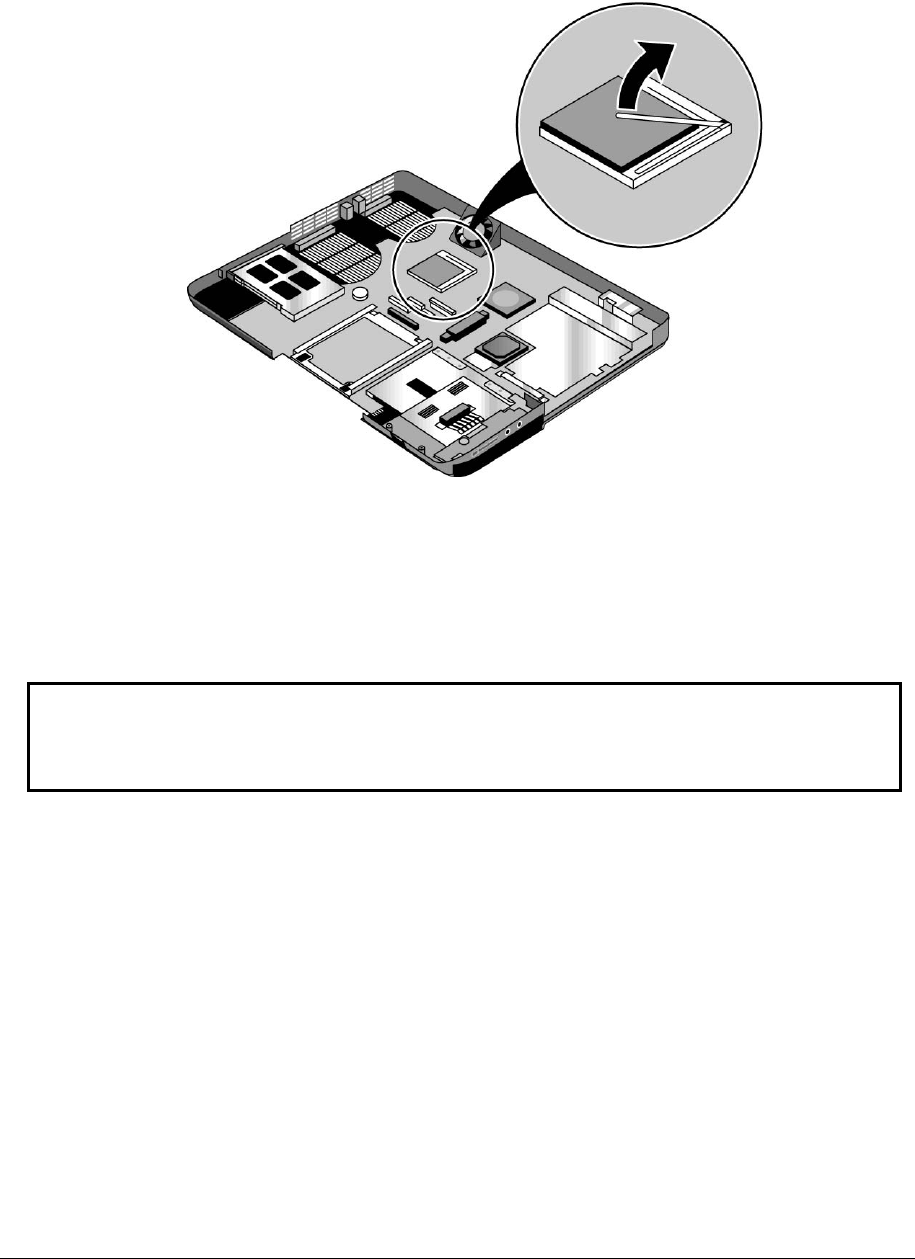
3. Slide the front tip of the locking arm slightly to the right, and then swing it up and back.
4. Carefully lift the CPU module off of its socket on the motherboard.
Figure 2-32. Removing the CPU Module
HP Pavilion ze5x00,
HP nx9010 and HPnx9008, and
Compaq Presario 2500 Models
Reassembly Notes
CAUTION: Each time you install a new CPU module, you must also replace the heat sink’s
thermal
pad to maintain optimum heat transfer. Use a sharp knife or scraper to carefully remove the old
thermal pad from the heat sink, and then attach the new thermal pad.
• The CPU module is keyed for installation, and can be inserted only one way.
• Carefully insert the CPU module into the motherboard, and then swing the locking arm forward
and down. Make sure the clip on the right side of the CPU module socket secures the locking arm.
• Be sure to replace the thermal pad on the heat sink, as described in the Caution above.