
HP EliteBook 725 G2 Notebook PC Maintenance and Service Guide
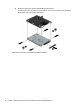

Solid-state drive
Description Spare part number
512-GB, SATA-3, TLC, solid-state drive 828873-001
256-GB, SATA-3, SED, Opal 2, solid-state drive 765614-001
256-GB, SATA-3, Opal 2, locked, solid-state drive 827868-001
256-GB, SATA-3, TLC, solid-state drive 800167-001
240-GB, SATA-3, solid-state drive 765612-001
180-GB, SATA-3, SED, Opal 2, solid-state drive 795139-001
180-GB, SATA-3, SED, Opal 1, solid-state drive 765611-001
180-GB, SATA-3, solid-state drive 765610-001
128-GB, SATA-3, solid-state drive 765610-001
128-GB, SATA-3, TLC, solid-state drive 800166-001
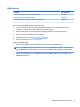
Before removing the solid-state drive, follow these steps:
1. Turn off the computer. If you are unsure whether the computer is off or in Hibernation, turn the
computer on, and then shut it down through the operating system.
2. Disconnect the power from the computer by unplugging the power cord from the computer.
3. Disconnect all external devices from the computer.
4. Remove the service cover (see Service cover on page 38).
5. Remove the battery (see Battery on page 40).
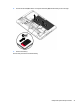
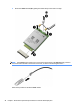
Remove the solid-state drive:
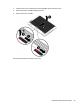
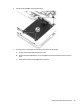
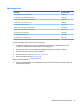
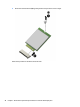
1. Remove the Phillips PM2.0×2.5 screw (1) that secures the solid-state drive to the system board. (The
solid-state drive tilts up.)
Component replacement procedures 47