
Administrator's Guide


NOTE: Use the drive labels provided with the replacement rear power UID button assembly
when removing the drives to ensure you replace the drives in the correct order.
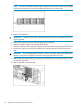
4. Remove all hard drives.
IMPORTANT: Install the hard drives in the same slots from which you removed them or the
system might fail.
5. Push the drive drawer back into the messaging system enclosure.
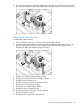
6. Label each blade and then remove both server blades.
7. Label the cables and then unplug all cables from the back of the messaging system enclosure.
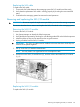
8. Unscrew the retaining screws from the bezel ears, and then remove the enclosure from the
rack.
WARNING! The messaging system enclosure is heavy, even after removing the hard drives.
Always use at least two people to remove the messaging system from the rack.
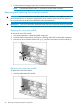
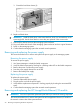
9. Remove the top back panel by pressing the panel release button and lifting the latch to slide
the top back panel off.
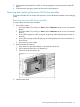
10. Remove the hard drive fan module.
88 Removing and replacing hardware components