
Hardware Reference Guide - HP Compaq Business PC dc5100 Small Form Factor Model


Hardware Reference Guide www.hp.com 2-25
Hardware Upgrades
✎
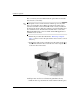
When replacing the hard drive, transfer the four screws from the old
drive to the new one. The screws take the place of drive rails. You will
need a Torx T-15 screwdriver to remove and re-install the guide
screws. HP has provided four extra 6-32 standard guide screws on the
front of the chassis, under the computer cover. The 6-32 standard
guide screws are silver.
✎
If you replaced the primary hard drive, insert the Restore Plus! CD
to restore the operating system, software drivers, and any software
applications that were preinstalled on the computer. Follow the
instructions in the guide included with the Restore Plus! CD. When
the restore process has completed, reinstall any personal files that you
backed up before replacing the hard drive.
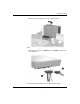
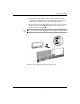
Installing a Drive into the 3.5-inch Drive Bay
Depending on the computer configuration, the 3.5-inch drive bay on
the front of the computer may be configured with a diskette drive or it
may be an empty drive bay. The type of bezel covering the drive bay
will vary depending on the original computer configuration.
If the computer was not configured with the optional diskette drive,
you can install a 3.5-inch device, such as a diskette drive or hard
drive, into the drive bay at any time.
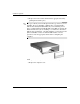
✎
The type of bezel you need will depend on the type of device you plan
to install. If you are installing a diskette drive, you must install a
diskette drive bezel (PN 360189-001). If you are installing a hard
drive, you must install a bezel blank (PN 358797-001). If you are
installing a 3.5-inch device other than a diskette drive or hard drive,
you must install the 3.5-inch device bezel (PN 358796-001). Contact
an authorized HP reseller or service provider to order the appropriate
bezel when reconfiguring the computer.