Installation Guide hp StorageWorks Interface Manager and Command View TL Product Version: 1.5 Third Edition (March 2005) Part Number: 341430-003 This user guide provides instructions for the installation and use of the HP StorageWorks Interface Manager in an HP StorageWorks ESL9000 Series Tape Library. This guide also provides instruction for installing and configuring Command View TL software.
© 2005 Hewlett-Packard Development Company, L.P. Hewlett-Packard Company makes no warranty of any kind with regard to this material, including, but not limited to, the implied warranties of merchantability and fitness for a particular purpose. Hewlett-Packard shall not be liable for errors contained herein or for incidental or consequential damages in connection with the furnishing, performance, or use of this material. This document contains proprietary information, which is protected by copyright.
Contents Contents About this Guide. . . . . . . . . . . . . . . . . . . . . . . . . . . . . . . . . . . . . . . . . . . . . . . . . . . .7 Overview. . . . . . . . . . . . . . . . . . . . . . . . . . . . . . . . . . . . . . . . . . . . . . . . . . . . . . . . . . . . . . . . . . 8 Intended Audience . . . . . . . . . . . . . . . . . . . . . . . . . . . . . . . . . . . . . . . . . . . . . . . . . . . . . . . 8 Related Documentation . . . . . . . . . . . . . . . . . . . . . . . . . . . . . . . . . . . . . . .
Contents Installing the Interface Manager Card into the Expansion Cage . . . . . . . . . . . . . . . . . . . . . . Upgrading from previous Fibre Channel Interface Controllers . . . . . . . . . . . . . . . . . . . . Installing the Interface Manager Card . . . . . . . . . . . . . . . . . . . . . . . . . . . . . . . . . . . . . . . Connecting the Cables . . . . . . . . . . . . . . . . . . . . . . . . . . . . . . . . . . . . . . . . . . . . . . . . . . . . . .
Contents Modifications . . . . . . . . . . . . . . . . . . . . . . . . . . . . . . . . . . . . . . . . . . . . . . . . . . . . . . . . . . Network and Serial Cables. . . . . . . . . . . . . . . . . . . . . . . . . . . . . . . . . . . . . . . . . . . . . . . . IEC EMC Statement (Worldwide) . . . . . . . . . . . . . . . . . . . . . . . . . . . . . . . . . . . . . . . . . . Specification ATI Classe A (France) . . . . . . . . . . . . . . . . . . . . . . . . . . . . . . . . . . . . . . . .
Contents 19 20 21 22 23 24 25 26 27 28 29 30 31 32 33 34 35 36 37 Inserting the controller . . . . . . . . . . . . . . . . . . . . . . . . . . . . . . . . . . . . . . . . . . . . . . . . . . . Locking the controller in place . . . . . . . . . . . . . . . . . . . . . . . . . . . . . . . . . . . . . . . . . . . . Installing filler panels in unused slots . . . . . . . . . . . . . . . . . . . . . . . . . . . . . . . . . . . . . . . Securing the interface controllers to the cage . . . . . . . . . . . . . . . .
About This Guide About this Guide This user guide provides information to help you: ■ Understand the functionality the Interface Manager card About thisofGuide ■ Install the Interface Manager card ■ Install and configure Command View TL ■ Configure and use the Interface Manager card “About this Guide” topics include: ■ Overview ■ Conventions ■ Getting Help Interface Manager and Command View TL Installation Guide 7
About this Guide Overview This section covers the following topics: ■ Intended Audience ■ Related Documentation Intended Audience This book is intended for use by system administrators and IT personnel responsible for operating and maintaining an HP StorageWorks ESL9000 Series Tape Library.
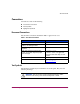
About this Guide Conventions Conventions consist of the following: ■ Document Conventions ■ Text Symbols ■ Equipment Symbols Document Conventions The document conventions included in Table 1 apply in most cases.
About this Guide Caution: Text set off in this manner indicates that failure to follow directions could result in damage to equipment or data. Note: Text set off in this manner presents commentary, sidelights, or interesting points of information. Equipment Symbols The following equipment symbols may be found on hardware for which this guide pertains. They have the following meanings.
About this Guide Power supplies or systems marked with these symbols indicate the presence of multiple sources of power. WARNING: To reduce the risk of personal injury from electrical shock, remove all power cords to completely disconnect power from the power supplies and systems. Any product or assembly marked with these symbols indicates that the component exceeds the recommended weight for one individual to handle safely.
About this Guide HP Technical Support Telephone numbers for worldwide technical support are listed on the following HP website: http://www.hp.com/support/. From this website, select the country of origin. Note: For continuous quality improvement, calls may be recorded or monitored.
Introduction 1 Functional Overview The HP StorageWorks Interface Manager for ESL tape libraries is a management card designed to consolidate and simplify the management of multiple HP StorageWorks e2400-160 Fibre Channel (FC) interface controllers—also known as FC-to-SCSI routers—installed in an HP StorageWorks ESL9000 Series Tape Library.
Introduction Architectural Concepts The Interface Manager card and the FC interface controllers that it manages are installed in the expansion cage of the ESL Series library. The Interface Manager card has six Ethernet ports as follows: ■ Four Ethernet ports communicate directly with the FC interface controllers over a private dedicated IP LAN. ■ One Ethernet port connects to the LAN. The Interface Manager card communicates with the management station over the LAN.
Introduction Figure 1 illustrates the high-level architecture of the Interface Manager card as it relates to other library components.
Introduction At a higher level, multiple libraries, each containing an Interface Manager card, can be connected to a single management station. Each Interface Manager card can communicate with only one management station, but the management station can communicate with multiple Interface Manager cards. Figure 2 illustrates this concept.
Introduction External Features Overview Figure 3 and Table 2 identify the I/O components of the Interface Manager card: 9 8 1 7 2 3 4 5 6 Figure 3: Interface Manager faceplate Table 2: Interface Manager I/O components Item Description 1 Cascade in back-end Ethernet port (reserved for future functionality) 2 Private Ethernet ports to FC interface controllers 3 Front-end Ethernet port (to LAN) 4 Serial port 5 Auxiliary RJ-11 serial connector (not used) 6 Board status LEDs 7 Reset but
Introduction Prerequisites Successful operation of the Interface Manager card requires the following: 18 ■ HP StorageWorks ESL9000 Series Tape Library with a minimum firmware revision of 3.40 ■ Interface Manager card and documentation ■ ESL9000 Series library expansion cage and supplied installation hardware (ships with the Interface Manager card) ■ One to four HP StorageWorks e2400-160 Fibre Channel interface controllers with a minimum firmware revision of 5.1.
Hardware Installation 2 This chapter explains the installation procedure for the expansion cage and the Interface Manager card. Two installation types are possible: ■ First-Time Installation—The ESL9000 Series library expansion cage is installed into the library for the first time, and the Interface Manager card and Fibre Channel (FC) interface controllers are installed together into the expansion cage.
Hardware Installation Preparing the Installation ■ Required components and hardware: — ESL9000 Series library (with minimum firmware revision of 3.
Hardware Installation Installing the Expansion Cage in the ESL Series Library The expansion cage is an enclosure that houses up to six expansion boards for the ESL9000 Series libraries. The cage has six, 6U (26.7 cm / 10.5 in) expansion slots. To accommodate the Interface Manager card, which is a 4U card (17.8 cm / 7 in), a 2-slot, 6U to 4U adapter (referred to as a 2U filler panel in earlier documentation) must be installed in the last two slots.
Hardware Installation Figure 4: Accessing the electronics bay 5. If this is a first-time installation, using a Phillips screwdriver, remove the four screws at the corners of the top cover of the electronics bay, then remove the cover. Place the screws in a safe place for use later in the procedure.
Hardware Installation The following procedures, Installing the Cooling Fan, Installing the Expansion Cage, and Installing the Cable Clamp, only apply to first-time installations. If this is a first time installation, proceed with Installing the Cooling Fan. Otherwise, do one of the following: ■ If you are installing additional FC interface controllers with the Interface Manager card, skip to the section, Installing the Fibre Channel Interface Controllers into the Expansion Cage.
Hardware Installation Figure 6: Seating the cooling fan 5. Using a Phillips screwdriver and the two screws that you removed in step 1, mount the fan assembly to the upper right side of the electronics bay. Figure 7: Mounting the cooling fan to the electronics bay 6. Push the electronics bay back into the library and finger tighten the two captive screws at the top of the electronics bay frame.
Hardware Installation 7. Using a Phillips screwdriver, remove the six screws securing the cover to the electronics bay. Make sure that you support the bottom of the cover while removing the screws. Figure 8: Removing the electronics bay side cover 8. Route the fan cable to the right of any existing cards. Caution: The area for the fan power cable is limited. Route the cable as far back on the electronics bay as it will go. This prevents the cable from being damaged when the expansion cage is installed.
Hardware Installation 9. Plug the fan assembly power cable into connector J14 on the robotics backplane. Figure 10: Plugging the fan power cable into the backplane Installing the Expansion Cage Caution: If you have not installed the cooling fan for the expansion cage, refer to the previous section, Installing the Cooling Fan, to install the fan. To prevent thermal damage to the equipment, do not install the card cage without first installing the cooling fan. To install the expansion cage: 1.
Hardware Installation Figure 11: Expansion cage connector pins 3. Locate the guide pins for alignment. Lower the expansion cage into the electronics bay into the guide pin holes located on the PCI backplane. Figure 12: Aligning the guide pins 4. Press down evenly on both sides of the expansion cage until it is firmly seated. Caution: Be careful not to pinch the fan power cable. Caution: Make sure that the connectors on the expansion cage and the PCI backplane align properly.
Hardware Installation 5. Using a Phillips screwdriver, secure the expansion cage into the electronics bay by replacing the two rear cover screws. Note: Do not replace the two front cover screws yet.
Hardware Installation Installing the Cable Clamp 1. If they are not already installed, install the cable clips into each cable clamp starting with the first position from the left edge of the clamp, as shown in Figure 14. Note: The library rear door may not close if clips are placed in the fourth and fifth openings on the right edge of the cable clamp. If necessary, use the extra clips with adhesive backing and attach them to the left side of the electronics bay frame.
Hardware Installation Completing the Installation 1. Use a multimeter to measure the resistance shown on the PCI backplane. Place one lead on ground and the other lead on the +3.3V, +5V, and +12V test points to be checked. If the multimeter shows a short, check the expansion cage and fan to ensure proper connections. Figure 16: Checking the resistance on the PCI back plane 2. Reinstall the electronics bay cover using the top three screws only.
Hardware Installation Installing the Fibre Channel Interface Controllers into the Expansion Cage This section explains how to install one or more HP StorageWorks e2400-160 Fibre Channel Interface Controllers into the ESL9000 Series library expansion cage. The e2400-160 FC Interface Controller is a 6U (26.7 cm / 10.5 in) card and requires the full length of the expansion cage.
Hardware Installation Installing the Fibre Channel Interface Controllers 1. Push the ejector handles so that they extend towards the outer edges of the FC interface controller. Figure 18: e2400-160 Interface Controller ejector handles 2. With the SCSI ports located to your left as you face the back of the library, align the sides of the controller with the guides in the designated slot in the expansion cage. 3.
Hardware Installation Figure 19: Inserting the controller 4. Push the ejector handles inward to lock the controller in place.
Hardware Installation 5. Repeat step 1 through step 4 for each controller to be installed. 6. Install 6U filler panels (slot covers) into any unused slots. Caution: Failure to install filler panels in unused slots may result in thermal damage to the hardware. Figure 21: Installing filler panels in unused slots 7. Tighten the captive screws to secure the e2400-160 FC Interface Controllers into the expansion cage.
Hardware Installation Installing the Interface Manager Card into the Expansion Cage This section explains how to install the Interface Manager card into the ESL9000 Series library expansion cage. The Interface Manager card is a 4U (17.8 cm / 7 in) card and requires a 2-slot 6U to 4U adapter. This adapter is preinstalled in the expansion cage that ships with the Interface Manager card. If this is an upgrade installation, then you may need to replace the adapter.
Hardware Installation Installing the Interface Manager Card 1. Push the ejector handles so that they extend towards the outer edges of the Interface Manager card. Figure 23: Interface Manager card ejector handles 2. Align the sides of the Interface Manager card with the guides in either one of the 4U slots in the expansion cage as shown in Figure 24. 3.
Hardware Installation Figure 24: Inserting the Interface Manager card 4. Push the ejector handles inward to lock the card in place.
Hardware Installation 5. If necessary, install a 4U filler panel (slot cover) into the unused 4U slot. Caution: Failure to install filler panels in unused slots may result in thermal damage to the hardware. 6. Tighten the captive screws to secure the Interface Manager card into the expansion cage.
Hardware Installation Connecting the Cables After installing the Interface Manager card and FC interface controllers, the next step is to connect the cables. This procedure is divided into the following steps: 1. Connecting the Interface Manager Card to the Fibre Channel Interface Controllers using the supplied Ethernet cable bundle 2. Connecting the SCSI Bus Cables to the main SCSI bus of the library 3. Connecting the Fibre Channel Cables to the FC interface controllers 4.
Hardware Installation Note: The order in which the four Ethernet ports labeled “To Fibre Channel Controllers” on the Interface Manager card are connected to the FC interface controllers is inconsequential. If less than four FC interface controllers are installed, leave the unused connectors from the Ethernet cable bundle hanging.
Hardware Installation Connecting the SCSI Bus Cables 1. Connect the SCSI connectors on the FC interface controllers to the SCSI connectors on the library SCSI bulkhead. See ESL9322 SCSI Cable Configurations or ESL9595 SCSI Cable Configurations for detailed SCSI cabling instructions. 2. Secure the SCSI cables going from the controller to the library bulkhead by snapping them into the clips in the upper and lower cable clamps located on the electronics enclosure, as shown in Figure 29.
Hardware Installation ESL9322 SCSI Cable Configurations Figure 30 shows the SCSI ports as viewed from the rear of the ESL9322 tape library. L I 8 CONT. J 9 PTM DIAG. K A B 0 1 EXPANSION DRIVES C D 3 2 DRIVE POSITION E F G H 4 5 6 7 Figure 30: SCSI ports (ESL9322) Looking from the rear of the ESL9322 tape library, connect the SCSI cables and terminators as shown in Figure 31.
Hardware Installation Drive # 0 SCSI ID 1 2 Drive # 1 SCSI ID 2 2 Drive # 2 SCSI ID 3 Drive # 3 SCSI ID 4 Drive # 4 SCSI ID 1 Drive # 5 SCSI ID 2 1 1 2 4 1 2 1 2 5 SCSI L 1 SCSI K 2 SCSI I 1 Drive # 6 SCSI ID 3 2 Drive # 7 SCSI ID 4 2 SCSI SCSI J A SCSI B SCSI C SCSI SCSI D E SCSI SCSI F G SCSI H 1 1 3 1 Terminators 2 SCSI cables 3 Drive Column 1 4 Robotic Controller 5 Host SCSI Cable Figure 31: Internal SCSI cabling configuration (ESL9322) Table 3: SCSI Ports and Device Conne
Hardware Installation ESL9595 SCSI Cable Configurations Figure 32 shows the SCSI ports as viewed from the rear of the ESL9595 tape library. Q PTM DIAG. R CONT. P O N M L K J I A B C D E F G H 15 14 13 12 11 10 9 8 0 1 2 3 4 5 6 7 DRIVE POSITION COLUMN 1 DRIVES COLUMN 0 DRIVES Figure 32: SCSI ports (ESL9595) Looking from the rear of the library, connect the SCSI cables and terminators as shown in Figure 33.
Hardware Installation 1 2 1 2 1 2 1 2 1 2 1 2 1 2 1 2 4 5 Drive # 8 Drive # 0 Drive # 9 Drive # 1 Drive # 10 Drive # 2 Drive # 11 Drive# 3 Drive # 12 Drive # 4 Drive # 13 Drive # 5 3 Drive # 6 Drive # 14 Drive # 15 6 1 Q R P O N M L K J I Drive # 7 1 2 1 2 1 2 1 2 1 2 1 2 1 2 1 2 A B C D E F G H Figure 33: Internal SCSI cabling configuration (ESL9595) 1 SCSI cables (8) 3 Robotic controller 5 Drive column 2 2 Terminators (8) 4 Drive column 1 6 Host SCSI Cable Interface Manager
Hardware Installation Table 4: SCSI Ports and Device Connections (ESL9595) 46 SCSI Port Identifier Device Connection A Drive 0 B Drive 1 C Drive 2 D Drive 3 E Drive 4 F Drive 5 G Drive 6 H Drive 7 I Drive 8 J Drive 9 K Drive 10 L Drive 11 M Drive 12 N Drive 13 O Drive 14 P Drive 15 Q Host R Robot Interface Manager and Command View TL Installation Guide
Hardware Installation Connecting the Fibre Channel Cables Connect the FC cables from any external fibre devices to the FC connectors on the FC interface controllers. Route the FC cables through the access port on the back of the library. Caution: Do not pinch the Fibre Channel cables or bend them in such a way that the radius of the bend is less than two inches.
Hardware Installation Connecting the Interface Manager Card to the LAN To connect the Interface Manager card to the LAN, connect a standard RJ-45 Ethernet cable from the LAN to the Ethernet port labeled “Network” on the Interface Manager card.
Hardware Installation Telnet Method Connect a standard RJ-45 Ethernet cable from the network port of the PC or laptop to the cascade port of the Interface Manager card. Route the cable through the access port on the back of the library. CASCADE CASCADE TO FIBRE CHANNEL CONTROLLERS NETWORK SERIAL AUX STATUS ERROR Figure 36: Connecting to the cascade port Serial Method 1. Connect the small end of the included serial cable to the 3-pin serial connector on the Interface Manager card.
Hardware Installation Completing the Hardware Installation After installing the required hardware: 1. Verify that filler panels are installed in all unused slots in the expansion cage. 2. Push the electronics bay back into the library cabinet and finger-tighten the two thumbscrews to secure the electronics bay in place. 3. Power on the library using the following sequence: a. Turn on both circuit breakers on the AC power distribution assembly. b.
Configuration and Software Installation 3 This chapter describes how to configure the Interface Manager card for first-time use. This chapter also provides instructions for installing and configuring Command View TL software that is included with the expansion cage and Interface Manager kit. Before attempting to configure the Interface Manager card, make sure that: ■ You have successfully completed the hardware installation as described in Chapter 2, “Hardware Installation.
Configuration and Software Installation User Interface Overview This section explains the different types of user interfaces (UIs) that are used with the Interface Manager card, what each UI is used for, and when each UI should be used. The Interface Manager card supports three different UIs: ■ Serial—uses a command line interface (CLI) and connects directly to the Interface Manager card through an RS232 serial interface rather than through the LAN.
Configuration and Software Installation Order of Precedence of User Interfaces The order of precedence of the three UIs used with the Interface Manager card is as follows: 1. Serial 2. Telnet 3. Command View TL Only one session can be open at a time (serial, Telnet, or Command View TL). However, it is possible to have multiple Command View TL GUI clients open simultaneously because these clients all share in the same single session that is running on the management station.
Configuration and Software Installation Getting or Setting the Interface Manager IP Address Before the Interface Manager card can be used properly, you must configure the network IP address of the card. The Interface Manager card ships with dynamic host configuration protocol (DHCP) mode enabled and will attempt to assign itself an IP address automatically when powered on.
Configuration and Software Installation Using the Telnet Method 1. If you have not already done so, connect a standard RJ-45 Ethernet cable from the network port of a PC or laptop to the cascade port on the Interface Manager card. 2. Start a Telnet session on the PC or laptop that is connected to the Interface Manager card via the cascade port: a. From a command prompt, enter the following: telnet 192.168.2.1 Note: The above IP address is the IP address of the cascade port.
Configuration and Software Installation Note: HP does not recommend using the IP address assigned by DHCP to the Interface Manager card because it is not a static IP address. With DHCP enabled, the Interface Manager card will attempt to obtain an IP address every time the card is rebooted. The new IP address may or may not be the same as the previous address.
Configuration and Software Installation Using the Serial Method To use the serial UI, you must use a terminal emulation program on the management station (or other PC or laptop that is connected to the Interface Manager card via the serial cable). HyperTerminal is a commonly used, Windows-based terminal emulation program. To start the serial session: 1. If you have not already done so, connect the small end of the included serial cable to the 3-pin serial connector on the Interface Manager card.
Configuration and Software Installation Note: HP does not recommend using the IP address assigned by DHCP to the Interface Manager card because it is not a static IP address. With DHCP enabled, the Interface Manager card will attempt to obtain an IP address every time the card is rebooted. The new IP address may or may not be the same as the previous address.
Configuration and Software Installation Using Command View TL Command View TL is installed on the management station and communicates with the Interface Manager card through the LAN. The management station processes information from the Interface Manager card and “serves up” the Command View TL GUI. Users can access Command View TL, either from the management station directly or through any client on the LAN, by using a browser-based GUI interface.
Configuration and Software Installation Installing Command View TL Note: If you are upgrading from a previous version of Command View TL (Command View ESL prior to version 1.5), follow the procedure below to install the new version over the old version. All previous settings (device list, support tickets, proxy settings and so forth) are migrated during the upgrade. 1. Insert the Command View TL software CD into the CD-ROM drive of the designated management station. 2.
Configuration and Software Installation OK and follow the instructions on the screen. If you are using a non-Windows OS, you will be instructed how to download the JRE plugin. If the JRE plugin is not available, then Command View TL will not run. After the JRE is successfully installed, the Command View TL Launcher screen is displayed.
Configuration and Software Installation 62 Interface Manager and Command View TL Installation Guide
4 Troubleshooting LED Diagnostic Codes Table 5: Status LED diagnostic codes Red LED Green LED Description On Off BIOS code failed to run. Blinks 1x per 5 second interval Off Hardware POST failed. No firmware images are loaded. Blinks 2x per 5 second interval Off No CompactFlash disk or valid boot sector image found. Blinks 3x per 5 second interval Off Specified firmware image files were not found. Neither the current nor the previous image was found.
Troubleshooting Table 5: Status LED diagnostic codes Red LED Green LED Description Off Blinks 2x per 5 second interval Application software is initializing. Off Blinks 3x per 5 second interval Application is identifying all library components. Off On Normal state. Application has identified all library components.
Troubleshooting Common Issues Table 7: Symptoms and Solutions Symptom Command View TL server does not detect the Interface Manager card Possible Cause Solution Bad network connection Verify that the Interface Manager card and the management station are correctly connected to the LAN. Interface Manager card not powered up or in ready state Power up the library. Observe status and link LEDs.
Troubleshooting Symptom Command View TL does not run in the browser Possible Cause Solution Incompatible browser version or Java support not enabled ■ Make sure you are using a minimum of Microsoft Internet Explorer v6.0 SP1 or later, or Netscape Navigator v6.2 or later. ■ Make sure that Java support is enabled in the browser. Java Runtime Environment (JRE) not installed Download and install the Java 2 Platform, Standard Edition v1.4 or later from http://www.java.com.
Troubleshooting Symptom Possible Cause Command View TL opens in browser but returns “Not bound in registry” error message Management Station has more than one network interface controller (NIC) Solution Disconnect all but one NIC. Use the Services applet to restart the Command View TL service. Click Start > Settings > Control Panel > Administrative Tools > Services to access the Services applet.
Troubleshooting 68 Interface Manager and Command View TL Installation Guide
A Serial and Ethernet Pin Assignments Table 8: RJ-45 network port pinout Key Pin Description 1 Transmit out + 2 Transmit out - 3 Receive in + 4 No connection 5 No connection 6 Receive in - 7 No connection 8 No connection Table 9: RJ-45 FC interface controller and cascade port pinouts Key Pin Description 1 Receive in + 2 Receive in - 3 Transmit out + 4 No connection 5 No connection 6 Transmit out - 7 No connection 8 No connection Interface Manager and Command View TL In
Serial and Ethernet Pin Assignments Table 10: RJ-11 aux port pinout Key Pin Description 1 No connection 2 Receive data (driven by host) 3 Transmit data (driven by IM) 4 Signal common (ground) Table 11: 3-pin serial port pinout Key 70 Pin Description 1 Transmit data (driven by IM) 2 Signal common (ground) 3 Receive data (driven by host) Interface Manager and Command View TL Installation Guide
Regulatory Compliance Notice B Federal Communications Commissions Notice Part 15 of the Federal Communications Commission (FCC) Rules and Regulations has established Radio Frequency (RF) emission limits to provide an interference-free radio frequency spectrum. Many electronic devices, including computers, generate RF energy incidental to their intended function and are, therefore, covered by these rules.
Regulatory Compliance Notice Class B Equipment This equipment has been tested and found to comply with the limits for a Class B digital device, pursuant to Part 15 of the FCC Rules. These limits are designed to provide reasonable protection against harmful interference in a residential installation. This equipment generates, uses, and can radiate radio frequency energy and, if not installed and used in accordance with the instructions, may cause harmful interference to radio communications.
Regulatory Compliance Notice Modifications The FCC requires the user to be notified that any changes or modifications made to this device that are not expressly approved by Hewlett-Packard Company may void the user's authority to operate the equipment. Network and Serial Cables Connections to this device must be made with shielded cables with metallic RFI/EMI connector hoods in order to maintain compliance with FCC Rules and Regulations. IEC EMC Statement (Worldwide) This is a Class A product.
Regulatory Compliance Notice European Union Notice Products bearing the CE marking comply with the EMC Directive (89/336/EEC) and the Low Voltage Directive (73/23/EEC) issued by the Commission of the European Community and if this product has telecommunication functionality, the R&TTE Directive (1999/5/EC).
Regulatory Compliance Notice Japanese Notice BSMI Notice Harmonics Conformance (Japan) Interface Manager and Command View TL Installation Guide 75
Regulatory Compliance Notice German Noise Declaration Schalldruckpegel Lp = 70.
Electrostatic Discharge C To prevent damage to the system, be aware of the precautions you need to follow when setting up the system or handling parts. A discharge of static electricity from a finger or other conductor may damage system boards or other static-sensitive devices. This type of damage may reduce the life expectancy of the device. To prevent electrostatic damage, observe the following precautions: ■ Avoid hand contact by transporting and storing products in static-safe containers.
Electrostatic Discharge Grounding Methods There are several methods for grounding. Use one or more of the following methods when handling or installing electrostatic-sensitive parts: ■ Use a wrist strap connected by a ground cord to a grounded workstation or computer chassis. Wrist straps are flexible straps with a minimum of one megohm +/- 10 percent resistance in the ground cords. To provide proper ground, wear the strap snug against the skin.
D Specifications This section lists the environmental requirements of the Interface Manager card. ■ Operating Environmental Requirements — Temperature: 0 to 50 ºC — Relative Humidity: 5% to 80% (non-condensing) ■ Shipping and Storing Environmental Requirements — Temperature: -40 to +55 ºC — Relative Humidity: 0% to 92% (non-condensing) ■ Power Requirements — VDC: 3.3V and 5V — 2.0A max — 15W maximum power dissipation ■ Board Dimensions — Size: 15.72 cm × 16.18 cm (6.19 in × 6.37 in) — Height: 1.
Specifications 80 Interface Manager and Command View TL Installation Guide
Index 2-slot 6U to 4U adapter 31 3-pin serial port pinout 70 A access port 47 adapter 31 audience 8 authorized reseller, HP 12 aux port 70 B browser requirements 59 Index cable clamp, installing 29 cables connecting 39 ESL9322 configuration 42 ESL9595 configuration 44 Ethernet cable bundle 39 Fibre Channel 47 library access port 47 SCSI bus 41 cascade IP address 55 cascade port 55 cascade port pinout 69 cautions alignment of connectors 27 connector pins, bent 26 electrostatic discharge 20 fan cable, pi
Index conventions 9 related documentation 8 Dynamic Host Configuration Protocol (DHCP) 54 E electronics bay, accessing 21 electrostatic discharge 77 environmental requirements 79 equipment symbols 10 ESL9000 Series Tape Library access port 47 circuit breakers 21 functional overview 13 minimum firmware revision 18 powering down 21 expansion cage connector pins, inspecting 26 described 21 guide pins 27 installing 21, 26 securing 28 external features 17 F Federal Communications Commission (FCC) 71 Fibre Cha
Index link activity LED 64 link speed LED 64 M management station 14, 16, 18 installing Command View TL 60 multimeter, using 30 N network IP address configuring 54 network port pinout 69 Not bound in registry error 67 P password 57 power requirements 79 prerequisites 59 R related documentation 8, 20 RJ-11 aux port pinout 70 RJ-45 cascade port pinout 69 RJ-45 FC interface controller pinout 69 RJ-45 network port pinout 69 RS-232 port 14 S Secure Manager 13 serial interface 48, 52, 54 starting 57 Interf
Index 84 Interface Manager and Command View TL Installation Guide
Figures 1 High-level architecture. . . . . . . . . . . . . . . . . . . . . . . . . . . . . . . . . . . . . . . . . . . . . . . . . . . 2 Multiple libraries connected to a single management station . . . . . . . . . . . . . . . . . . . . . 3 Interface Manager faceplate. . . . . . . . . . . . . . . . . . . . . . . . . . . . . . . . . . . . . . . . . . . . . . . 4 Accessing the electronics bay . . . . . . . . . . . . . . . . . . . . . . . . . . . . . . . . . . . . . . . . . . . . .
Interface Manager and Command View TL Installation Guide
Tables 1 Document Conventions . . . . . . . . . . . . . . . . . . . . . . . . . . . . . . . . . . . . . . . . . . . . . . . . . . . 9 2 Interface Manager I/O components . . . . . . . . . . . . . . . . . . . . . . . . . . . . . . . . . . . . . . . . . 17 3 SCSI Ports and Device Connections (ESL9322) . . . . . . . . . . . . . . . . . . . . . . . . . . . . . . . 43 4 SCSI Ports and Device Connections (ESL9595) . . . . . . . . . . . . . . . . . . . . . . . . . . . . . . . 46 5 Status LED diagnostic codes . . .
Interface Manager and Command View TL Installation Guide