Troubleshooting Featured content Printer Claim Code Troubleshooting Printer is Offline (Windows) Find Your Wireless WEP, WPA, WPA2 Password Network Scanner Connection Error (Windows) Print Jobs Stuck in Queue Troubleshooting Printer Not Found During Network Driver Setup (Windows) Printer is Offline (Mac) USB Scanner Connection Error (Windows) Wireless Troubleshooting Is Windows on My Computer 32-bit or 64-bit? Printer Not Found During Network Driver Setup (Mac) Printer does not
HP Printers - Printer is Offline (Windows) This document is for all HP printers and computers with Windows. A status message of offline or printer offline displays on the computer, and the printer does not print. Figure : Examples of printer offline status messages Step 1: Use HP Print and Scan Doctor to check connectivity If you have Windows 10 or 8, download a special version of HP Print and Scan Doctor specifically created to help with printer offline conditions.
. Wait for the router’s network activity light to become active. 4. Press the wireless button or wireless control panel icon on the printer to turn the wireless connection off, and then on. 5. Wait for the printer to reconnect to your router. 5. Turn on the computer. 6. Reconnect the power cord to the rear of the printer. 7. Try to print. If you can print, you are done. If the printer cannot print and remains offline, continue.
If you can’t connect a wireless printer to your network, use the printer’s wireless direct connection to print. For more information on wireless direct printing, see Wi-Fi Direct or HP wireless direct. Update the printer firmware HP regularly releases printer updates. Updating the printer firmware might resolve the issue. For more information, see Updating Firmware on the Printer.
Find the password in Windows View your password from any Windows computer that is already connected to your network. 1. Right-click the wireless network tray icon , and then select Open Network and Sharing Center. 2. 3. 4. 5. Select Change Adapter Settings. Right-click the name of your wireless network, and then click Status. Click Wireless Properties. Click the Security tab, and then select the Show characters check box to see the wireless network security key (your password).
5. Double-click the wireless network name, then select the Show password check box. 6. If prompted, type your administrator password, and then click OK. HP Printers - Network Scanner Connection Error (Windows) This document is for HP multifunction printers connected to a Windows computer on a wired or wireless network. When you try to scan, the computer or the scanner is not found or the scan fails. One of the following communication or connection errors displays and the scan fails.
6. Search Windows for your printer model name, and then click the printer name in the list of results. If HP Printer Assistant opens, click Scan a Document or Photo or Manage Scan to Computer, and then make sure the check box is selected next to Automatically start Scan to Computer when I log onto Windows. If HP Solution Center opens, click Scan Settings to view scan connection status, settings, and preferences.
If the network shown is not yours (for instance, if you connected to a neighbor's or guest network), you must reconnect to your own network to scan. If the network signal strength is weak, move the computer and printer closer to the router, position the devices away from large metal objects such as bookcases, and move away from devices that emit radio signals such as microwaves and cordless phones.
Resolve scan connection issues by uninstalling the printer software before reinstalling the latest driver. Do not disconnect the printer from the network when uninstalling the software. 1. Search Windows for uninstall a program, and then click the Uninstall a program Control Panel setting in the list of results. 2. In the list of installed programs, click your HP printer name, and then click Uninstall or Yes to confirm the uninstall. 3. Follow the on-screen instructions to complete the software removal. 4.
2. Find Windows Image Acquisition (WIA) in the Name column and look at the Status and Startup type values. If the status is 'Started' and the Startup type is 'Automatic', WIA is running correctly. Skip to the next step. If the status is 'Disabled', right-click Windows Image Acquisition (WIA), click Properties, click the General tab, click Start under the Service status, and then select Automatic from the Startup type dropdown menu.
3. Try to scan. If you can scan, consult the firewall software support site to change settings such as security level, trusted zones, and open ports to allow communication with your printer. After changing the settings, re-enable the firewall in the Print and Scan Doctor. If you cannot scan, the firewall software is not causing the issue. Re-enable the firewall in the Print and Scan Doctor, and then continue to the next step.
Step 1: Confirm all Windows updates installed Part of the Windows 10 upgrade process includes installing important software updates to support full functionality of the computer and connected devices. If all updates failed to install, your printer might not work as expected. Make sure Windows installed all updates and is set to install them automatically. 1. Search Windows for change device installation, and then click the Change device installation settings Control panel setting in the list of results. 2.
2. Disconnect the USB cable from the printer, if necessary. The software installation prompts you to connect the cable if needed. 3. Go to HP Customer Support - Software and Driver Downloads. 4. If a Let's identify your product to get started page displays, click Printer, type your printer model number, and then click Submit. 5. If you need to change the operating system, click Change, select your version, and then click Change. 6.
Check the router band setting: Many routers operate in both 2.4 GHz and 5.0 GHz frequency bands, but not all HP printers support both bands. Make sure the 2.4 GHz router band is turned on and broadcasting. If the router broadcasts separate network names (SSIDs) for each band, connect the printer to the 2.4 GHz band SSID. Check your firewall software: Your firewall software might prevent the printer from accessing the computer.
HP Printers - Print Jobs Stuck in Queue Troubleshooting This document is for HP printers. The printer cannot print from a computer because a print job is stuck in the print queue. This stuck print job cannot be cancelled or deleted and prevents further print jobs from printing. Clicking Cancel or the Delete Job button does nothing. HP Printers - Printer Not Found During Network Driver Setup (Windows) This document is for HP printers with wireless or wired network connections and Windows computers.
1. Confirm that the printer is ready for the network setup. Wireless network connection: On the printer, open the Wireless network or Settings menu to make sure the wireless signal is turned on. Make sure the light next to the Wireless icon is either on and steady, or blinking. Wired network connection: Check that the cable is connected to the printer Ethernet port and to an available port on the router.
Figure : Example of Airplane mode enabled 5. Try installing the HP driver and software again. Step 3: Manually connect the printer to your network (wireless connections only) Try connecting the printer to your network manually so that the HP installer can find the printer. Use the Wireless Setup Wizard if you have a touch or text-based control panel, or try Wi-Fi Protected Setup (WPS). After connecting, try installing the HP driver and software again.
4. If a connection problem is detected, click the method being used to connect the printer, follow the instructions on the screen, and then click Retry. The tool provides helpful information to set up your networked printer, including network login information and current network information for the computer.
3. Click the name of any firewall software on your system that has an Enabled status, and then click Disable. Figure : Example of the Troubleshooting Firewalls window 4. Try installing the HP driver and software again. If the installation completed, consult the firewall software support to change settings such as security level, trusted zones, and open ports to allow communication with HP software and websites. After changing the settings, re-enable the firewall in the Print and Scan Doctor.
3. Click Programs and Features. 4. In the list of installed programs, click your HP printer name, and then click Uninstall or Yes. 5. Follow the on-screen instructions to complete the software removal. 6. Restart the computer. Step 7: Reinstall the HP software After uninstalling the software, go to HP Customer Support to download the most current version of the full feature software for your printer. This ensures your printer has complete functionality.
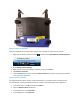
1. Press the Power button to turn off the printer, and then wait five seconds. 2. Disconnect the USB cable from the rear of the printer. Figure : Disconnect the USB cable from the rear of the printer 3. Press the Power button to turn on the printer. The printer makes some noise as it powers on and might start printing pages. Wait for the printer to become idle and silent before continuing. 4. Wait five seconds, and then reconnect the USB cable to the printer.
You have a network printer connection Step 2: Reset the printer Resetting power to the printer forces the printer to reset stored values in the firmware. A power reset can help when the printer is not accepting communication from the Mac. 1. Make sure the printer is idle, not making any sounds, before continuing. 2. With the printer turned on, disconnect the power cord from the rear of the printer. 3. Unplug the power cord from the wall outlet. 4. Wait at least 60 seconds. 5.
3. If you see multiple printer queues for the same printer, remove all extra printers by selecting them one at a time, and then clicking the minus button at the bottom of the list. Leave one 'idle' printer in the list that matches your printer if available and use this printer as the Default printer. 4. Try printing again. If the printer prints, you can stop troubleshooting. If the printer remains offline or displays an error, continue to the next step.
3. Click the Add button . 4. Find and select the name of your printer from the Printer list, and then click Add to add your printer. Do not select an HP Fax driver. NOTE: If your printer does not display in the list, make sure the printer is connected, turned on, has power, and is ready to print. Figure : Example of the printer selection list 5. Click Print Using or Use. 6. Select the name of your printer (if available) or AirPrint.
7. Try printing again. If the printer prints, you can stop troubleshooting. If the printer remains offline or displays an error, continue to the next step. Step 5: Reset the printing system If all previous troubleshooting did not resolve the issue, try resetting the printing system. CAUTION: Resetting the print system deletes all devices in the print queue. This includes both HP and non-HP devices. Video of resetting the printing system View this video on YouTube. 1.
2. 3. 4. 5. 6. Click Reset in the confirmation window. Enter the administrator user name and password, and then click OK. Wait until the printing system is reset and no devices show in the Printers list. Add your printer to the list again as was done previously. Try printing again. If the printer prints, you can stop troubleshooting. Continue troubleshooting if the errors persist. Step 6: Other things to try If all previous troubleshooting has not resolved the issue, try these possible solutions.
If the new connection works, you know that the printing problem is related to the computer. If the new connection does not work, then the printer might need to be serviced or printed to using a different type of connection. Make sure multicasting is supported If you are using a wireless network, make sure that multicasting is supported and enabled on your router. If the new connection works, you know that the printing problem is related to the computer.
Click Apply, and then wait until the changes are confirmed. Add a new printer using JetDirect protocol (HP LaserJet and network connection only) If the printer is offline and your printer is already connected to your network, connect to the printer using an IP address. 1. From the Printers and scanners list, click the plus button to add a printer. 2. Click the IP tab. 3. Enter the printer’s IP address into the Address field.
HP Printers - USB Scanner Connection Error (Windows) This document is for HP multifunction printers connected to a Windows computer with a USB cable. When you try to scan, the computer or the scanner is not found or the scan fails. One of the following error messages might display.
Scanner Unreachable The scan could not be initialized Step 1: Restart the computer and printer Restarting the computer and printer can restore a lost scan connection. 1. Turn off the printer. 2. Make sure the printer power cord connects directly to an electrical outlet and not through a surge protector or power strip. 3. Close all running programs on your computer, then shut down the computer. 4. Turn on the printer. 5. Turn on the computer. 6. Try to scan.
Step 3: Run the Print and Scan Doctor HP provides a free tool called HP Print and Scan Doctor to diagnose and resolve printing problems. Download and run HP Print and Scan Doctor to quickly and automatically perform several troubleshooting tasks known to resolve this issue. When this link is clicked, HP Print and Scan Doctor is downloaded using your Internet browser's download capabilities.
6. Evaluate the results. If you receive instructions to resolve an issue, follow the on-screen instructions, and then try to scan. If the issue persists, continue to the next step. If you receive an Everything checks out okay with your scanner message, continue to the next step. Step 4: Uninstall the printer software Resolve scan connection issues by uninstalling the printer software before reinstalling the latest driver. 1. Disconnect the USB cable from the printer, if necessary. 2.
4. If your printer is connected to the computer with a USB cable, disconnect the USB cable from the printer. 5. Restart the computer and wait until Windows opens. Continue to the next step. Step 6: Reinstall the HP software Go to HP Customer Support to download the most current version of the full feature software for your printer. NOTE: As an alternative, you can use the software disc if it supports the operating system installed on your computer. 1. Turn on the printer. 2.
NOTE: If you cannot start WIA, make sure the following services are also Started and set as the Automatic startup type. Remote Procedure Call (RPC) Shell Hardware Detection RPC Endpoint Mapper DCOM Server Process Launcher 3. Try to scan. If the error persists, continue to the next step. Step 8: Set Windows Image Acquisition (WIA) dependencies Use the Command Prompt to reset the WIA dependencies to detect whether the print hardware might resolve the scanning issue. 1.
Use these workarounds to scan if the previous steps did not resolve the issue. Some workarounds might be unavailable depending on the printer. Try one of the other workarounds if the first method you tried did not work. Scan with the Windows Scan app (Windows 10) Scan in Windows 10 with the Windows Scan app. The free app is available in the Windows Store. 1. Place the document or photo that you want to scan on the scanner glass, or load it into the automatic document feeder (ADF), if your printer has one.
3. Click File or the menu icon , and then click From scanner or camera. 4. Select a color option for the type of image or document you are scanning. To change brightness, contrast, and resolution settings, click Adjust the quality of the scanned picture. 5. Click Scan. 6. In the File menu, click Save as. Scan with Windows Fax and Scan Scan from the computer using Windows Fax and Scan.
Find 32-bit or 64-bit system type and Windows version in Windows 10 Determine which version of Windows 10 you are using, and if it is 32-bit or 64-bit. 1. Search Windows for About your PC, and open About your PC from the list of results. 2. The Version and System type are shown on the About screen. Find 32-bit or 64-bit system type in Windows 8 Video of finding your system type in Windows 8 Determine if your operating system is 32-bit or 64-bit.
1. Right-click the Start button or the lower left corner of the screen, and then click System. 2. Your system type is shown next to the label System type. NOTE: If your operating system does not include (64-bit) or (32-bit) in the name, the system type is 32bit. Find 32-bit or 64-bit system type in Windows 7 and Vista Video of finding your system type in Windows 7 and Vista To find the Windows type, do the following: 1. Click Start and right-click Computer. 2. Select Properties. 3.
Find 32-bit or 64-bit system type in Windows XP Determine if your operating system is 32-bit or 64-bit. Video of finding 32-bit or 64-bit system type in Windows XP Video of finding your system type in Windows XP 1. Click Start , right-click My Computer, click Properties, and then click the General tab. 2. Your system type is shown next to the label System. NOTE: If your operating system does not include (64-bit) or (32-bit) in the name, the system type is 32bit.
Find 32-bit or 64-bit system type if your computer does not start If your computer does not start, you can find the 32-bit or 64-bit system type from the product packaging. You can also find the system type online from a product specification document. Search the Internet for your computer model and the terms "specifications" or "review" to find webpages that list product information about your computer. 1. From any Web browser, search the Internet for your computer model number, a space, and specification.
The system type is listed with the name of the operating system, for example: Windows Vista Home Premium (64-bit). If 32-bit or 64-bit is not listed next to the name of the operating system, the system type is 32-bit. Download a 32-bit or 64-bit print driver Find and download a print driver. 1. Turn on the printer. 2. Disconnect the USB cable from the printer, if necessary. The software installation prompts you to connect the cable if needed. 3. Go to HP Customer Support - Software and Driver Downloads. 4.
If the printer is found during the installation, the issue is resolved. If the printer is not found during the installation, continue to the next step. Step 2: Check the network and printer connection status Make sure your network is working correctly and that the printer is ready for the network setup. 1. If you are using a wireless router, check your router’s documentation or support site to make sure it meets the following requirements: Check the router band: Many routers can operate in both 2.
If the network status is not connected, confirm that your network is working correctly, then check the status again. Make sure a check mark displays next to the network name. 5. Disconnect from any Virtual Private Networks (VPN) before installing the printer software. 6. Try installing the HP software again. If the printer is found during the installation, the issue is resolved. If the printer is not found during the installation, continue to the next step.
4. 5. 6. 7. Click Reset in the confirmation window. Enter the Administrator name and password, then click OK. Wait for the printing system to reset. When complete, no printers should display in the list. Try installing the HP software again. If the printer is found during the installation, the issue is resolved. If the printer is not found during the installation, continue to the next step.
1. Turn on the printer. 2. If your printer is connected to the computer with a USB cable, disconnect the cable from the printer. The software installation prompts you to connect the cable if needed. 3. Go to HP Customer Support - Software and Driver Downloads. 4. If a Let's identify your product to get started page displays, click Printer, type your printer model number, and then click Submit. The software results page for your printer displays with the default operating system selected. 5.
Introduction The following solutions can help solve problems if the printer is not picking up paper from the tray or is picking up multiple sheets of paper at one time. Either of these situations can result in paper jams. To resolve LaserJet paper jam issues online, go to Help With LaserJet Paper Jams. The printer does not pick up paper If the printer does not pick up paper from the tray, try following solutions. 1. Open the printer and remove any jammed sheets of paper.
5. Verify that the humidity in the room is within specifications for this printer and that paper is being stored in unopened packages. Most reams of paper are sold in moisture-proof wrapping to keep paper dry. In high-humidity environments, paper at the top of the stack in the tray can absorb moisture, and it might have a wavy or uneven appearance. If this happens, remove the top 5 to 10 sheets of paper from the stack.
7. The rollers above the tray might be contaminated. Clean the rollers with a lint-free cloth dampened with warm water. Use distilled water, if it is available. CAUTION: Do not spray water directly on to the printer. Instead, spray water on the cloth or dab the cloth in water and wring it out before cleaning the rollers. 8. The tray rollers may be worn. Inspect the rollers for any smooth surface either completely around the circumference or just on one side.
2. Use only paper that meets HP specifications for this printer. 3. Verify that the humidity in the room is within specifications for this printer, and that paper is being stored in unopened packages. Most reams of paper are sold in moisture-proof wrapping to keep paper dry. In high-humidity environments, paper at the top of the stack in the tray can absorb moisture, and it might have a wavy or uneven appearance. If this happens, remove the top 5 to 10 sheets of paper from the stack.
6. Make sure the paper guides in the tray are adjusted correctly for the size of paper. Adjust the guides to the appropriate indentation in the tray. The arrow on the tray guide should line up exactly with the marking on the tray. NOTE: Do not adjust the paper guides tightly against the paper stack. Adjust them to the indentations or markings in the tray. The following images show examples of the paper-size indentations in the trays for various printers. Most HP printers have markings similar to these.
7. Make sure the printing environment is within recommended specifications.