HP 3PAR StoreServ 7000 Storage SmartStart 1.1 Software User's Guide Abstract This document provides the information needed to use HP 3PAR SmartStart to install and configure HP 3PAR StoreServ 7000 Storage systems.
© Copyright 2012 Hewlett-Packard Development Company, L.P. Confidential computer software. Valid license from HP required for possession, use or copying. Consistent with FAR 12.211 and 12.212, Commercial Computer Software, Computer Software Documentation, and Technical Data for Commercial Items are licensed to the U.S. Government under vendor's standard commercial license. The information contained herein is subject to change without notice.
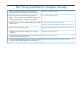
Part I Using SmartStart to Configure Storage 1. Gather the information you’ll need to use SmartStart to configure your HP 3PAR StoreServ 7000 Storage system. “Prepare to Configure” (page 5) 2. Learn more about how HP 3PAR storage systems work. Part II “Understanding Storage” NOTE: If you are not familiar with HP 3PAR storage systems, HP highly recommends you read this short introduction. 3.
Welcome Welcome to HP 3PAR SmartStart for HP 3PAR StoreServ 7000 Storage systems. SmartStart helps you configure your new: • HP 3PAR StoreServ 7200 Storage system • HP 3PAR StoreServ 7400 Storage system NOTE: If you are setting up multiple HP 3PAR StoreServ 7000 Storage systems, be sure to set up each storage system completely before starting to set up the next storage system. SmartStart can take up to one minute to open.
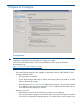
1 Prepare to Configure Prerequisites CAUTION: You must complete the setup tasks detailed in the HP 3PAR StoreServ 7000 Storage Installation Guide before using SmartStart to configure your system. To access the HP 3PAR StoreServ 7000 Storage Installation Guide, go to the HP 3PAR Documentation site: http://www.hp.
password to gain administrator access to both the system running SmartStart (the local host) and the remote host. ◦ Rights to configure storage To configure storage, your user account on the HP 3PAR storage system must be assigned either a Super or Edit role, or be granted these rights: host_create, vv_create, and vlun_create.
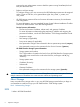
HP 3PAR SmartStart is an installation wizard for your HP 3PAR StoreServ 7000 Storage systems. SmartStart enables you to: • Initialize the HP 3PAR Service Processor • Initialize the HP 3PAR StoreServ 7000 Storage system • Configure FC and iSCSI host connections • Configure and begin data storage • Install the HP 3PAR Management Console, which you can use to manage storage and create new storage after installation is complete 2 Can I use HP 3PAR SmartStart with Windows? Yes.
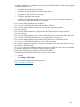
2 Setting Up the Service Processor Use SmartStart wizard Step 2, Set up systems, to set up the Service Processor and the HP 3PAR StoreServ Storage system. You only need to set up the Service Processor and the storage system once per each new HP 3PAR storage system. NOTE: After you have completed Service Processor setup, the Service Processor Setup wizard does not enable you to re-enter the wizard. To modify Service Processor settings, use Service Processor Onsite Customer Care (SPOCC).
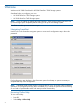
For more information on determining or assigning the Service Processor IP address, see the HP 3PAR StoreServ 7000 Storage Installation Guide. 2. In the User name text box, enter setupusr. You do not need to enter a password for setupusr to access this wizard for the first time. 3. Click OK. Troubleshooting Access If you are unable to access the Service Processor Setup wizard, collect the relevant log files and contact HP support. For more information, see “Troubleshooting System Setup” (page 14).
1. 2. Enter proxy server settings, if applicable. To mask identifying information in all Service Processor log files, select the Make contents of Service Processor log files anonymous checkbox in the Advanced pane. When you anonymize log files, the Remote Support process replaces object names in log files (such as “TopSecretVirtualVolume”) with meaningless sequential labels (such as “VVnnn”). 3. Click Next to continue the Service Processor configuration.
1. 2. 3. 4. Click Stop to stop the Apply Settings process and return to the Service Processor Setup wizard. Click the Prev button until you reach Step 2: SP Networking. Determine an available IPv4 address to use for the Service Processor and enter that IP address in the IP Address text box. Click the Next button until you return to Step 7: Apply Settings. (You do not need to re-enter any other Service Processor settings.) The wizard will automatically begin to apply the settings again.
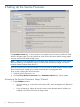
3 Setting Up the HP 3PAR StoreServ Storage System You must initialize the HP 3PAR StoreServ Storage system before you can configure the storage system. The Storage System Setup wizard verifies your HP 3PAR storage system configuration, initializes the storage system, and runs initialization tests on the storage system. To set up and configure the HP 3PAR storage system: 1. Verify the Service Processor is on the same subnet of the network as the HP 3PAR StoreServ 7000 Storage system you are setting up. 2.
Configuring Networking Enter the name and IP address information for your new HP 3PAR StoreServ Storage system. For more information, see your completed Storage System Software Installation Checklist from the HP 3PAR StoreServ 7000 Site Planning Manual.
For more information, see the HP 3PAR Service Processor Onsite Customer Care (SPOCC) User’s Guide. To access this document, go to the HP 3PAR support site: http://www.hp.com/3par/support_manuals Setting Up Local Notification You must set up Local Notification: Local Notification configures your HP 3PAR StoreServ Storage system to email you alerts as issues occur (for example, a CPG becomes low on space, a disk drive fails, and so on). 1. Enter your Service Processor network address. 2. Click Setup. 3.
1. 2. 3. Collect the SmartStart log files. Collect the Service Processor log files. Contact HP support and request support for your StoreServ 7000 Storage product. Collecting SmartStart Log Files To collect the SmartStart log files for HP support, zip all the files in this folder: C:\Users\\SmartStart\log NOTE: You can continue to access the SmartStart log files in the Users folder after you have removed SmartStart from your system.
4 Connect to the HP 3PAR StoreServ 7000 Storage System 1. 2. 3. Click the Connect to the storage system link. In the IP Address or Name text box: • If this is the first time you are connecting to the HP 3PAR storage system, enter the name or IP address of the HP 3PAR StoreServ 7000 Storage system. • If you have already connected to the HP 3PAR storage system one or more times, select the storage system from the list. Enter the username and password.
5 Configure the Hosts To export (or present) virtual volumes to hosts—which enables the host system to write data to and read data from the HP 3PAR StoreServ Storage system—you must configure either Fibre Channel host connections or iSCSI host connections. For more information on exporting volumes, see “Exporting Virtual Volumes” (page 43). Fibre Channel Connections You can set up Fibre Channel using direct connections or via switches in a SAN.
To ensure that your HP 3PAR StoreServ Storage system remains available if a path fails, connect the host system to the HP 3PAR storage system using multiple paths. Before using SmartStart to configure Fibre Channel connections: • If you are connecting the host and HP 3PAR StoreServ Storage systems directly, verify that appropriate cabling is in place between the host system and the HP 3PAR storage system.
Configure the Fibre Channel Host Introduction to Configuring the Fibre Channel Host To set up Fibre Channel connections, ensure that the host system and HP 3PAR StoreServ 7000 Storage system have two Fibre Channel connections. You can configure the Fibre Channel host if you have only one connection, but if that connection stops functioning, the host will not be able to access (read from or write data to) the HP 3PAR StoreServ Storage system.
Use your HP Passport account to log onto SPOCK. If you do not have an HP Passport account, you can register for a free account on SPOCK. 3. Click Next. Validate the Fibre Channel Connection 1. 2. Select the HP 3PAR StoreServ Storage system for which you want to validate the Fibre Channel connection. Click Validate. If SmartStart cannot find a Fibre Channel connection, or can only find one Fibre Channel connection, SmartStart enables you to configure ports on the HP 3PAR storage system.
Summary: Fibre Channel Host Configuration 1. 2. Review your Fibre Channel setup. Click Finish. • If you are connected to the local host and rebooted the host system, the local host reboots. After the local host has finished rebooting, launch SmartStart and continue setup. • If you are connected to the remote host and rebooted the host system, the remote host reboots. After the remote host reboots, continue setup.
1. 2. Click Configure. If the wizard displays the Reboot when finished checkbox, select it. In order to complete this MPIO configuration, the wizard will reboot the host system at the end of the iSCSI host configuration process. If the MPIO device ID is already configured on the host system, the wizard does not display the Reboot when finished checkbox. 3. Click Next.
Troubleshooting the iSCSI Connection If the iSCSI initiator on the host system is unable to connect to the HP 3PAR StoreServ Storage system, verify your configuration: 1. Verify your IP settings: 2. • IP address • Subnet mask • Gateway Check your iSCSI connection. To do so, ping the HP 3PAR StoreServ Storage system from the host. Troubleshooting Task Completion If SmartStart displays the message Failed to validate whether the current Windows task is complete, click Configure again.
6 Configure Storage The steps in SmartStart wizard Step 5, Configure storage, guide you through creating basic storage on your HP 3PAR StoreServ 7000 Storage system. NOTE: You can use the HP 3PAR Management Console to delete any hosts, virtual volumes, or exports you create using SmartStart. To do so, install and use the HP 3PAR Management Console (see SmartStart wizard Step 6, Install the Management Console). To create basic storage, you: 1. Create hosts.
Default CPGs The setup process automatically creates default CPGs on your HP 3PAR StoreServ 7000 Storage system. The CPGs created depend on your HP 3PAR storage system’s drive types, number of drive cages, and RAID types: Drive Type RAID Type Default CPG Created Fast Class 1 FC_r1 Fast Class 6 FC_r6 Nearline 1 NL_r1 Nearline 6 NL_r6 Solid State 1 SSD_r1 Solid State 5 SSD_r5 Solid State 6 SSD_r6 Using Default CPGs 3. 4.
Host Settings 1. 2. 3. In the General group box: a. System - Select the system to create the new host. b. Domain - Select the domain in which to create the new host. Select if not applicable. c. Name - Enter the host name. Names are case-sensitive. d. Set Name - Select the host set in which to create the new host. Select if not applicable. e. Host OS - Select the operating system running on the host. f. Persona - The host persona will be visible and disabled.
iSCSI 1. In the iSCSI Host Paths group box: a. Select one or more iSCSI names from the Available iSCSI Names list. This list displays iSCSI names for all physically connected host paths not already assigned to hosts. b. Click the left arrow to add the selected iSCSI name(s) to the Assigned iSCSI Names list. c. To assign new iSCSI names, enter the iSCSI name(s) in the New iSCSI Name text box and click Assign.
Configure Virtual Volume 1. In the General group box: a. System - Select the system where the volume will be created. b. Domain - Select the domain in which the volume will reside. Select if not applicable. c. Name - Enter a name for the new volume. Names are case-sensitive. d. ID - Enter an ID for the new volume if you uncheck the auto box (option shown only if Show advanced options is selected). e. Use Template - Select the volume template to apply to the new volume.
Policies and Geometry This page is displayed only if Show advanced options was checked on the Configure Virtual Volume page. 1. In the Policies group box enable any of the following: a. Allow stale snapshots. b. Restrict export to one host. c. Enable zero detect (default). d. Retention Time. If enabled, enter a value in the corresponding text box and then select either day(s) or hour(s). e. Expiration Time. If enabled, enter a value in the corresponding text box and the select either day(s) or hour(s). 2.
Summary Review the summary information, then click Finish. Add Virtual Volumes to Windows Introduction to Adding Virtual Volumes to Windows To use virtual volumes on a Windows 2008 R2 host system, you must first configure the volumes as Windows disks. To configure virtual volumes on your Windows 2008 R2 server: • You do not have to be connected to the HP 3PAR StoreServ Storage system to add volumes to Windows. • To use SmartStart to format volumes as Windows disks, you must use Microsoft NTFS.
NOTE: Verify the folder you mount is empty. If the folder does not exist, is not empty, or is read-only, the folder might not mount successfully. 4. Click Next. Adding virtual volumes to Windows might take up to 10 minutes. Troubleshooting Task Completion If SmartStart displays the message Failed to validate whether the current Windows task is complete, use one of the following suggestions to try the task again: • Click the Prev button, then click Next. • Cancel and then restart the wizard.
7 Install the HP 3PAR Management Console To manage your HP 3PAR StoreServ Storage systems and access advanced features and functionality, use the HP 3PAR Management Console. To install the Management Console, click the Install the HP 3PAR Management Console link. Accessing the Management Console To access the HP 3PAR Management Console: • If you are an administrator, launch the Management Console from the Management Console icon.
Part II Understanding Storage For more information about storage concepts, see the HP 3PAR StoreServ Storage Concepts Guide. To obtain this document, go to the HP 3PAR Documentation site: http://www.hp.com/3par/support_manuals For information about supported hardware and software platforms, go to the Single Point of Connectivity Knowledge (SPOCK) website: http://www.hp.
8 Storage Software Components HP 3PAR StoreServ Storage systems include both the hardware components that physically store your data, and the software applications that manage your data.
Each layer is created from elements of the layer above: • Chunklets are drawn from physical disks. • Logical disks are created from groups of chunklets. • Common Provisioning Groups (CPGs) are groups of logical disks. • Virtual volumes use storage space provided by CPGs. Physical Disks A physical disk is a disk drive mounted on a drive magazine located in drive cages (or drive enclosures) in an HP 3PAR storage system. Chunklets Physical disks are divided into chunklets.
You can create the following types of virtual volumes: 36 • Fully provisioned virtual volumes: Volume size is fixed. Creating fully provisioned virtual volumes does not require a separate license. • Thinly Provisioned Virtual Volumes: Also known as Thin volumes, these volumes allocate space on demand in small increments. Creating Thin volumes requires the HP 3PAR Thin Provisioning Software license. • Physical copies: A full copy of a volume.
9 Hosts The HP 3PAR StoreServ Storage system sees a host as a set of Fibre Channel WWNs (World Wide Names) or iSCSI names: in other words, a set of host I/O paths. The host system uses these I/O paths to perform read/write operations on exported virtual volumes on the storage system. • The HP 3PAR storage system automatically detects hosts that are physically connected to ports on the storage system.
to the storage system. The information gathered from the Host Explorer agent is visible to uncreated hosts, and assists with creating hosts and diagnosing host-connectivity issues. How Host Explorer Helps You Create Hosts When you create a host, the system displays the unassigned WWNs or iSCSI names: • When the Host Explorer agent is running on the attached hosts, the system automatically groups the WWNs or iSCSI names for the host together, which helps you create the host.
10 CPGs A Common Provisioning Group (CPG) creates a virtual pool of storage space that allows up to 4,095 virtual volumes to share the CPG's resources. When you create virtual volumes (fully provisioned virtual volumes or Thin volumes), the volumes draw storage space from the CPG's storage space pool. • CPGs dynamically allocate storage space to Thin volumes.
11 Virtual Volumes Virtual volumes are the only data layer visible to host systems. • Virtual volumes draw storage space from Common Provisioning Groups (CPGs). • Virtual volumes become visible to host systems when you export (present) them to hosts. • Virtual volumes are exported as Logical Unit Numbers (LUNs) to hosts. • You can create physical copies or virtual copies (snapshots) of virtual volumes. These copies are backup in case the original base volume becomes unavailable.
Fully provisioned virtual volumes and Thin volumes have three separate data components: • User space contains the user data. The user space is the area of the volume that corresponds to the regions in the CPG that are available to the host. Thus, the user space is the part of the virtual volume you export to the host as a LUN. • Copy space, also known as snapshot space, contains the copy data.
Virtual copies are created using copy-on-write techniques, which are available only with the HP 3PAR Virtual Copy Software license. Thousands of snapshots of each virtual volume can be created—up to the amount of storage space available. Depending on your system configuration, you can make up to 500 virtual copies of a base volume. To reduce the number of management tasks around physical copies: • You can create a consistent group of virtual copies from a list of virtual volumes.
12 Exporting Virtual Volumes Virtual volumes are the only data layer you can make visible to hosts. In order to make virtual volumes visible to hosts, you must export (present) the virtual volume to the host. The export process creates an association between the volume and a logical unit number (LUN). You configure the characteristics of this association when you create the Virtual Volume-LUN pairing (VLUN). To export virtual volumes, use the HP 3PAR Management Console.
13 RAID RAID (redundant array of independent disks) is a storage functionality that distributes data in units called chunklets across physical disks in order to create redundancy and therefore increase the stability of your stored data. On the HP 3PAR StoreServ 7000 Storage system, a chunklet is 1 GiB. RAID is one of the parameters of a CPG (common provisioning group), the storage pool from which volumes allocate storage space.
14 User Roles and Rights In order to access an HP 3PAR StoreServ Storage system, you must have a user account. Each HP 3PAR OS user is assigned a role, and each role is assigned a set of rights. The roles and rights assigned to the user determine the tasks the user is allowed to perform on a system. To maintain greater control over your system, assign users roles with the minimum set of rights they need to perform their tasks. Eight roles are defined in the HP 3PAR OS.
15 Managing Storage To manage your HP 3PAR StoreServ Storage system, use the HP 3PAR Management Console. • To install the Management Console, go to SmartStart wizard Step 6, Install the Management Console. • For more information on using the Management Console: ◦ Start the Management Console and open the HP 3PAR Management Console Online Help. ◦ Download the HP 3PAR Management Console User’s Guide from the HP 3PAR Documentation site: http://www.hp.
Part III Additional Resources For information on: See: Accessing related HP 3PAR documentation “Additional Resources” (page 48) Troubleshooting SmartStart “Troubleshooting SmartStart” The HP 3PAR StoreServ Storage Systems Guided Troubleshooting site: http://www.hp.
16 Additional Resources Related Documentation To access documentation that will help you manage your HP 3PAR StoreServ Storage system, go to the HP 3PAR Documentation site: http://www.hp.
Troubleshooting SmartStart • To troubleshoot SmartStart: ◦ See the HP 3PAR StoreServ 7000 Storage Troubleshooting Guide. To access this guide, go to the HP 3PAR Documentation site: http://www.hp.com/3par/support_manuals ◦ Go to the HP 3PAR StoreServ Storage Systems Guided Troubleshooting site: http://www.hp.
17 Support and Other Resources Contacting HP For worldwide technical support information, see the HP support website: http://www.hp.
For information about: See: Configuring the Secure Service Custodian server in order to monitor and control HP 3PAR storage systems HP 3PAR Secure Service Custodian Configuration Utility Reference Using the CLI to configure and manage HP 3PAR Remote Copy HP 3PAR Remote Copy Software User’s Guide Updating HP 3PAR operating systems HP 3PAR Upgrade Pre-Planning Guide Identifying storage system components, troubleshooting information, and detailed alert information HP 3PAR F-Class, T-Class, and StoreSe
For information about: See: Planning for HP 3PAR storage system setup Hardware specifications, installation considerations, power requirements, networking options, and cabling information for HP 3PAR storage systems HP 3PAR 7200 and 7400 storage systems HP 3PAR StoreServ 7000 Storage Site Planning Manual HP 3PAR 10000 storage systems HP 3PAR StoreServ 10000 Storage Physical Planning Manual HP 3PAR StoreServ 10000 Storage Third-Party Rack Physical Planning Manual Installing and maintaining HP 3PAR 7200
Typographic conventions Table 3 Document conventions Convention Element Bold text • Keys that you press • Text you typed into a GUI element, such as a text box • GUI elements that you click or select, such as menu items, buttons, and so on Monospace text • File and directory names • System output • Code • Commands, their arguments, and argument values • Code variables • Command variables Bold monospace text • Commands you enter into a command line interface • System
18 Documentation feedback HP is committed to providing documentation that meets your needs. To help us improve the documentation, send any errors, suggestions, or comments to Documentation Feedback (docsfeedback@hp.com). Include the document title and part number, version number, or the URL when submitting your feedback.
Glossary active VLUN The pairing of a virtual volume and a LUN so the host can access its virtual volume and I/O writes can be saved to the virtual volume. The VLUN parameters determine whether a virtual volume is expressed as an active VLUN. VLUNs that are not active will not communicate with the HP 3PAR StoreServ Storage system. allocation limit User-defined threshold that can be set for Thinly-Provisioned Virtual Volumes and fully-provisioned virtual volumes to cap their potential size.
LD Logical disk. A collection of chunklets that reside on different physical disks and that are arranged as rows of RAID sets. When you create a CPG, the system creates and groups logical disks and assigns those logical disks to the CPG. LUN Logical Unit Number. A number used to access a virtual volume that has been assigned to a particular host on a particular port. matched-set VLUN template A rule that allows a particular host connected to a particular port to see a virtual volume as a specified LUN.