
HP StorageWorks P9000 Cluster Extension Software Administrator Guide (TB534-96009, February 2011)

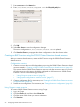


2. Create the configuration file CLXP9000.config in the /etc/opt/hpclx/conf directory,
by copying and editing the sample file CLXP9000.config provided in the /opt/hpclx/
sample directory.
$cp /opt/hpclx/sample/CLXP9000.config
/etc/opt/hpclx/conf/CLXP9000.config
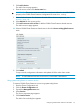
3. In the configuration file (CLXP9000.config), enter the appropriate values for:
• XPSerialNumbers
• RaidManagerInstances
• DeviceGroup
• DC_A_Hosts
• DC_B_Hosts
• ResyncMonitor
• FenceLevel
• DataLoseMirror
• DataLoseDataCenter
NOTE: For more information about these values, see “User configuration file and P9000
Cluster Extension objects” (page 79).
For example:
APPLICATION CLXWEB
XPSerialNumbers 30060 30080
RaidManagerInstances 101
DeviceGroup vgnetscape
DC_A_Hosts sys1A sys2A
DC_B_Hosts sys1B sys2B
ResyncMonitor yes
FenceLevel never
DataLoseMirror yes
DataLoseDataCenter yes
IMPORTANT: If you are using Device Mapper Multipath, configure the
multipath_rescan.sh script as a PostExecScript. For more information, see “Rescanning
multipath devices” (page 66).
4. Copy the updated CLXP9000.config file to the other cluster nodes.
Testing the service configuration
The procedure and commands in this section are based the sample configuration in “P9000 Cluster
Extension for Linux: Sample configuration” (page 53). Use this procedure as a guide for configuring
your environment.
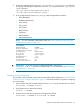
1. Use the Cluster User Service Administration Utility (clusvcadm) to start the service on Host1.
#clusvcadm -e CLXWEB –m Host1
2. Verify that the service started successfully.
#clustat –s CLXWEB
3. Stop the service and verify that the service stopped successfully.
#clusvcadm –s CLXWEB Or #clusvcadm –d CLXWEB
Configuring P9000 Cluster Extension with RHCS 59