
HP 3PAR SUSE Linux Enterprise Implementation Guide
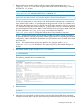

Building the Brocade Driver
NOTE: Use this section only if you are installing and building the Brocade driver. If you are using
the Brocade driver that was installed by the SUSE installation, skip to “Setting up the NVRAM and
BIOS with the Brocade HBA” (page 29).
If you are installing the Brocade driver instead of using the in-box Brocade driver that was already
installed by the SUSE installation, follow these steps:
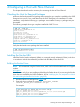
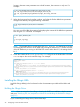
1. Download the driver package from www.brocade.com and extract the driver contents by
issuing tar xvzf brocade_driver_linux-<version>.tar.gz. Make sure to do this
in a temporary location. For example:
# mkdir tmp
# cd tmp
# tar zxvf ../brocade_driver_linux_v3-2-1-0.tar.gz
bfa_driver_linux-3.2.1.0-0.noarch.rpm
bfa_util_linux-3.2.1.0-0.noarch.rpm
bfa_util_linux_noioctl-3.2.1.0-0.noarch.rpm
bna_driver_linux-3.2.1.0-0.noarch.rpm
brocade_install.sh
driver-bld-info.xml
2. Run the brocade_install.sh script that installs the bfa driver and associated utilities.
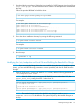
Setting up the NVRAM and BIOS with the Brocade HBA
This section describes setting up the NVRAM and BIOS with the Brocade HBA.
Configure the following NVRAM settings using the Brocade BIOS utility
Access the BIOS utility by hard booting the server and, when prompted, perform the procedures
in this section.
NOTE: The NVRAM settings on Brocade HBAs can be changed by any server in which they are
installed. These settings will persist for an HBA even after it is removed from a server.
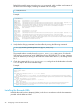
Enabling an Adapter to Boot from SAN
To start the BIOS utility, turn on the computer, hold down the Alt or Ctrl key, and press B within
five seconds to display the bootup message.
The adapter listing is displayed.
NOTE: Each HBA port is reported as a host bus adapter. The following settings need to be
applied for each HBA port.
1. Proceed into the Adapter Settings and ensure BIOS is set to Enabled.
2. Press Alt-S to save and exit this section.
3. If you need to configure boot devices or another adapter choose Return to Brocade Config
Menu, otherwise choose Exit Brocade Config Menu.
Configuring Boot Devices
NOTE: If it is necessary to change the topology, do so before you configure the boot devices.
1. Proceed into the Boot Device Settings.
2. Select the Boot Device you wish to change and press ENTER.
3. Select the new Boot Target and press ENTER.
4. Select the Boot LUN and press ENTER.
5. Repeat steps 2, 3 and 4 for any additional Boot Devices.
Installing the Brocade HBA 29