
HP 3PAR StoreServ 7000 Storage Service Guide


Table Of Contents
- HP 3PAR StoreServ 7000 Storage Service Guide
- Contents
- 1 Servicing the Storage System
- 2 Understanding LED Indicator Status
- 3 Support and Other Resources
- 4 Documentation feedback
- A Installing Storage Software Manually
- B Node Rescue
- C Illustrated Parts Catalog
- D Deinstallation
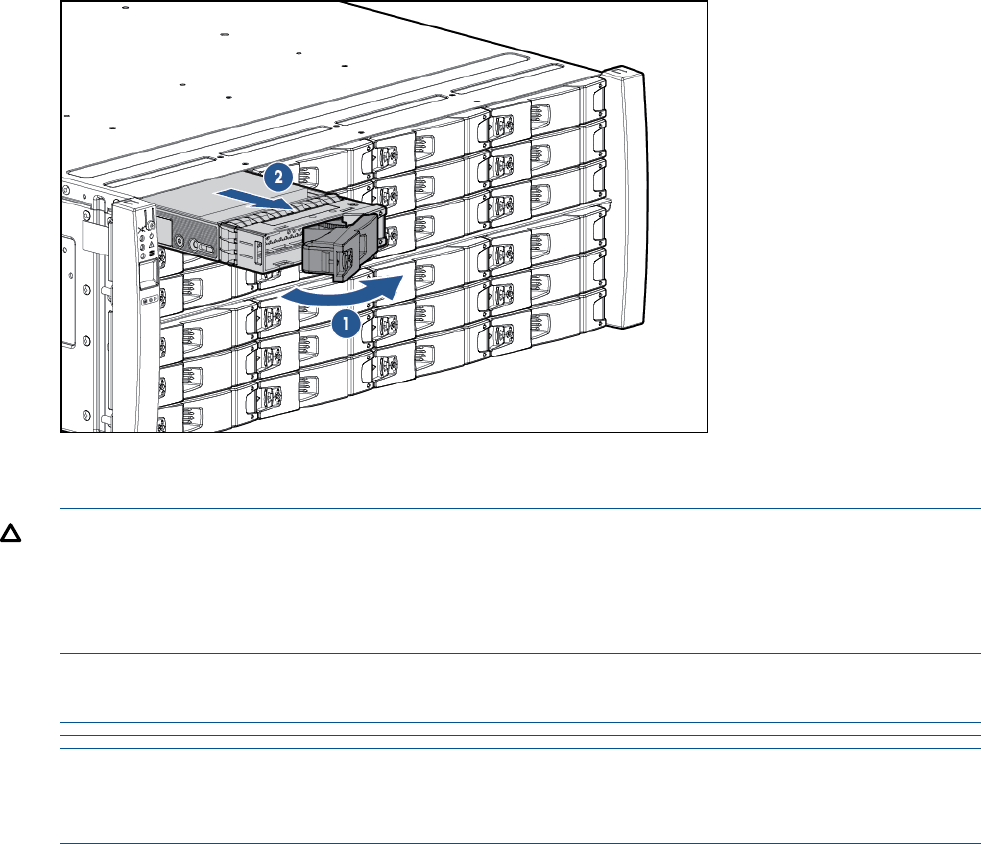
Figure 11 Removing a 3.5 inch disk drive
Installing a Disk Drive
CAUTION: Blank disk drive carriers are provided and must be used if all slots in the enclosure
are not filled with disk drives.
CAUTION: To avoid potential damage to equipment and loss of data, handle disk drives carefully.
Each disk drive includes a green and amber LED on the front to indicate disk drive status.
NOTE: All drives in a vertical column of an LFF drive enclosure must be the same speed and
type.
NOTE: Before beginning this procedure, review how to load the drives based on drive type,
speed, and capacity. For more information, see “Guidelines for Installing Disk Drives and Disk
Enclosures” in the HP 3PAR StoreServ 7000 Storage Installation Guide.
Installing a 2.5 inch disk drive (SFF)
1. Press the handle latch to open the handle.
2. Insert the disk drive into the enclosure with the handle opened from the top in the vertical
position.
3. Slide the disk drive into the enclosure until it engages; push firmly until it clicks.
12 Servicing the Storage System