
MSM7xx Controllers Configuration Guide v6.4.0
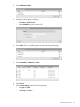
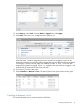


12. Under Map to, select Trunk 1 and set Mode to Tagged, then select Apply.
13. Select Save. The trunk is now configured and is ready for use.
(Note that Trunk 1 remains mapped to the Access network as untagged. A trunk can be
mapped to more than one network profile as tagged, but only one network profile as untagged.
For example, if another network profile was created on VLAN 12, Trunk 1 could also be
mapped to that profile as tagged. If Trunk 1 is mapped to the new profile as untagged, it will
automatically be removed from the Access network.)
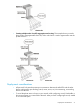
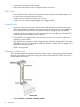
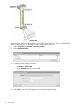
14. Connect port 3 and 4 to the switch.
15. Select Controller >> Network > Ports. The status lights for both ports should now be green.
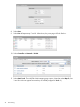
Creating a dynamic trunk
This section describes how to create a dynamic LACP trunk.
Creating a dynamic trunk 75