
F3215-HP Load Balancing Module Security Configuration Guide-6PW101


202
Configuring attack detection and protection at the
CLI
Attack detection and protection configuration task list
• Configure attack protection functions for a security zone. To do so, you need to create an attack
protection policy, configure the required attack protection functions (such as Smurf attack protection,
scanning attack protection, and flood attack protection) in the policy, and then apply the policy to
the security zone. There is no specific configuration order for the attack functions, and you can
configure them as needed.
• Configure a TCP proxy when the SYN flood attack protection policy specifies the processing
method for SYN flood attack packets as TCP proxy.
• Configure the blacklist function. This function can be used independently or used in conjunction
with the scanning attack protection function on a security zone.
• Enable the traffic statistics function. This function can be used independently.
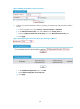
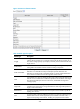
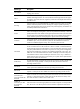
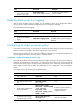
Complete the following tasks to configure attack detection and protection:
Task Remarks
Configuring attack
protection functions for
a security zone
Creating an attack protection policy Required.
Enabling attack protection logging
Configuring a single-packet attack protection policy
Configuring a scanning attack protection policy
Configuring a flood attack protection policy
Required.
Configure one or more
policies as needed.
Applying an attack protection policy to a security
zone
Required.
Configuring TCP proxy Optional.
Configuring the blacklist function Optional.
Configuring connection limits Optional.
Creating an attack protection policy
Before configuring attack protection functions for a security zone, you need to create an attack protection
policy and enter its view. In attack protection policy view, you can define one or more signatures used for
attack detection and specify the corresponding protection measures.
When creating an attack protection policy, you can also specify a security zone so that the security zone
uses the policy exclusively.
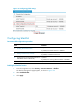
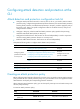
To create an attack protection policy:
Ste
p
Command
Remarks
1. Enter system view. system-view N/A
2. Enter virtual device (VD)
system view.
switchto vd vd-name Required for a non-default VD.