
F3215-HP Load Balancing Module System Management Configuration Guide-6PW101


152
After you change the file directory or file name prefix, or reboot the device, the old configuration archives
are regarded as common configuration files, the configuration archive counter resets, and the display
archive configuration command does not display them. The serial number for new configuration archives
starts from 1.
After the maximum number of configuration archives is reached, the system deletes the oldest archive for
the new archive.
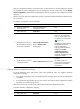
To configure configuration archive parameters:
Ste
p
Command
Remarks
1. Create the configuration
archive directory.
See System Maintenance
Configuration Guide.
N/A
2. Enter system view.
system-view N/A
3. Configure the directory and
file name prefix for archiving
the running configuration.
archive configuration location
directory filename-prefix
filename-prefix
By default, no path or file name
prefix is set for configuration
archives, and the system does
not regularly save configuration.
IMPORTANT:
The undo form of this command
disables both manual and
automatic configuration
archiving, restores the default
settings for the archive
configuration interval and
archive configuration max
commands, and deletes all saved
configuration archives.
4. Set the maximum number of
configuration archives.
archive configuration max file-number
Optional.
The default number is 5.
Change the setting depending
on the amount of available
storage space.
Enabling automatic configuration archiving
To avoid decreasing system performance, follow these guidelines when you configure automatic
configuration archiving:
• If the device configuration does not change frequently, manually archive the running configuration
as needed.
• If a high-speed storage medium (such as a CF card) is used and the device configuration changes
frequently, set a shorter saving interval.
Make sure you have set an archive path and file name prefix before performing this task.
To enable automatic configuration archiving:
Ste
p
Command
Remarks
1. Enter system view. system-view N/A