
HP Security Modules Software Upgrade Guide-6PW103


32
• Configure IP addresses for the Security module and the PC and ensure that they are on the same
network segment. In this example, the IP address of Ethernet interface GigabitEthernet 0/1 on the
Security module is 192.168.80.10 and that of the PC is 192.168.80.200.
• Use the ping command to check the connectivity between them.
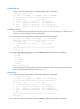
Step2 Enable the FTP service.
# Enable the FTP server.
[HP] ftp server enable
# Configure an FTP username and password.
[HP] local-user guest
[HP-luser- guest] service-type ftp
[HP-luser- guest] password simple 123456
[HP-luser-guest] level 3
NOTE:
• You can use the FTP service after you have configured authorization and authentication on the FTP
server. Multiple clients can simultaneously access the FTP server. A remote FTP client sends a request to
the FTP server. The FTP server executes an action accordingly and returns the execution result to the FTP
client.
• After you have confi
g
ured authentication and authorization on the FTP server, you need to set the user
level to 3. Otherwise, when you use the backup files to restore those on the Security module, “You have
no rights to store files” will be prompted.
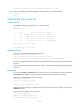
Step3 Enable the FTP client program on the PC.
In the following example, Windows XP’s built-in FTP client program is illustrated.
Enter ftp in the DOS window.
C:\Documents and Settings\Administrator>ftp
ftp>
ftp> open 192.168.80.10
Connected to 192.168.80.10.
220 FTP service ready.
User (192.168.80.10:(none)): guest
331 Password required for guest
Password:
230 User logged in.
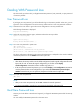
Step4 Upgrade applications.
Using FTP, you can upload application files from the client to overwrite the existing application files on
the server (Security module) to implement application upgrade. The upgraded application files take
effect at the next boot.
# Upload the main_bac.bin file from the PC to the Security module and save it as main.bin.
ftp> binary
200 Type set to I.
ftp> lcd d:\update
Local directory now D:\update.
ftp> put main_bac.bin main.bin
200 Port command okay.