
R3204P16-HP Load Balancing Module System Management Configuration Guide-6PW101


10
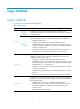
The port properties of the hyper terminal must be the same as the default settings of the console port
shown in the following table.
Settin
g
Default
Bits per second 9,600 bps
Flow control None
Parity None
Stop bits 1
Data bits 8
Login procedure
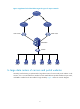
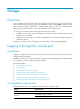
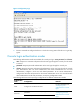
1. As shown in Figure 5, use the console cable shipped with the device to connect the PC and the
device. Plug the DB-9 connector of the console cable into the serial port of the PC, and plug the
RJ-45 connector into the console port of your device.
Figure 5 Connect the device and PC through a console cable
W
ARNING!
Identify interfaces correctly to avoid connection errors.
NOTE:
The serial port of a PC does not support hot-swap. Do not plug or unplug the console cable to or from the
PC when your device is powered on. To connect the PC to the device, first plug the DB-9 connector of the
console cable into the PC, and then plug the RJ-45 connector of the console cable into your device. To
disconnect the PC from the device, first unplug the RJ-45 connector and then the DB-9 connector.
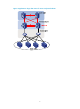
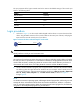
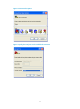
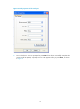
2. Launch a terminal emulation program (such as HyperTerminal in Windows XP/Windows 2000).
The following takes the HyperTerminal of Windows XP as an example. Select a serial port to be
connected to the device, and set terminal parameters as follows: set Bits per second to 9600, Data
bits to 8, Parity to None, Stop bits to 1, and Flow control to None, as shown in Figure 6
through Figure 8.
NOTE:
On Windows 2003 Server operatin
g
system, add the HyperTerminal pro
g
ram first, and then lo
g
in to and
manage the device as described in this document. On Windows 2008 Server, Windows 7, Windows
V
ista, or some other operatin
g
system, obtain a third party terminal control pro
g
ram first, and follow the
user guide or online help of that program to log in to the device.
LB
Host
RS-232
Console