
R3721-F3210-F3171-HP High-End Firewalls Getting Started Guide-6PW101


34
Logging in to the Web interface
The device provides the web-based network management function to facilitate device operation and
maintenance. With this function, you can visually manage and maintain network devices through the
web interface.
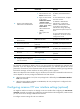
Feature and hardware compatibility
Feature F1000-A-EI/S-EI
F1000-E
F5000 Firewall module
FIPS No No No Yes
The firewall does not support HTTP in FIPS mode.
Configuration guidelines
• The web-based configuration interface supports the operating systems of Windows XP, Windows
2000, Windows Server 2003 Enterprise Edition, Windows Server 2003 Standard Edition,
Windows Vista, and MAC OS.
• The web-based configuration interface supports the browsers of Microsoft Internet Explorer 6.0 SP2
and higher, Mozilla Firefox 3.0 and higher, Google Chrome 2.0.174.0 and higher, and the
browser must support and be enabled with JavaScript.
• The web-based configuration interface does not support the Back, Next, Refresh buttons provided
by the browser. Using these buttons may result in abnormal display of web pages.
• The Windows firewall limits the number of TCP connections. When you use IE to log in to the web
interface, sometimes you may be unable to open the web interface. To avoid this problem, disable
the Windows firewall before login.
• If you log in to the device through the web interface after the software version of the device changes,
HP recommends that you delete the temporary Internet files on IE; otherwise, the web page content
may not be displayed correctly.
• You can display at most 20000 entries that support content display by pages.
Logging in by using the default Web login information
The Firewalls are provided with the following default Web login information:
• Username admin
• Password admin
• Management interface (GigabitEthernet 0/0) IP address 192.168.0.1.
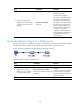
You can use the default information to log in to the Web interface by following these steps:
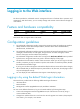
1. Connect the management interface GigabitEthernet 0/0 of the device to the PC by using a
crossover Ethernet cable.
2. Change the IP address of the PC to one that in the network segment 192.168.0.0/24 (except for
192.168.0.1), for example, 192.168.0.2.