
A3509A 16-bit Fast-Wide SCSI Adapter Quick Installation Guide


Table Of Contents
Customer Order No.
A3509-90002
Copyright 1997
Printed in USA 6/97
A3509-96001
$
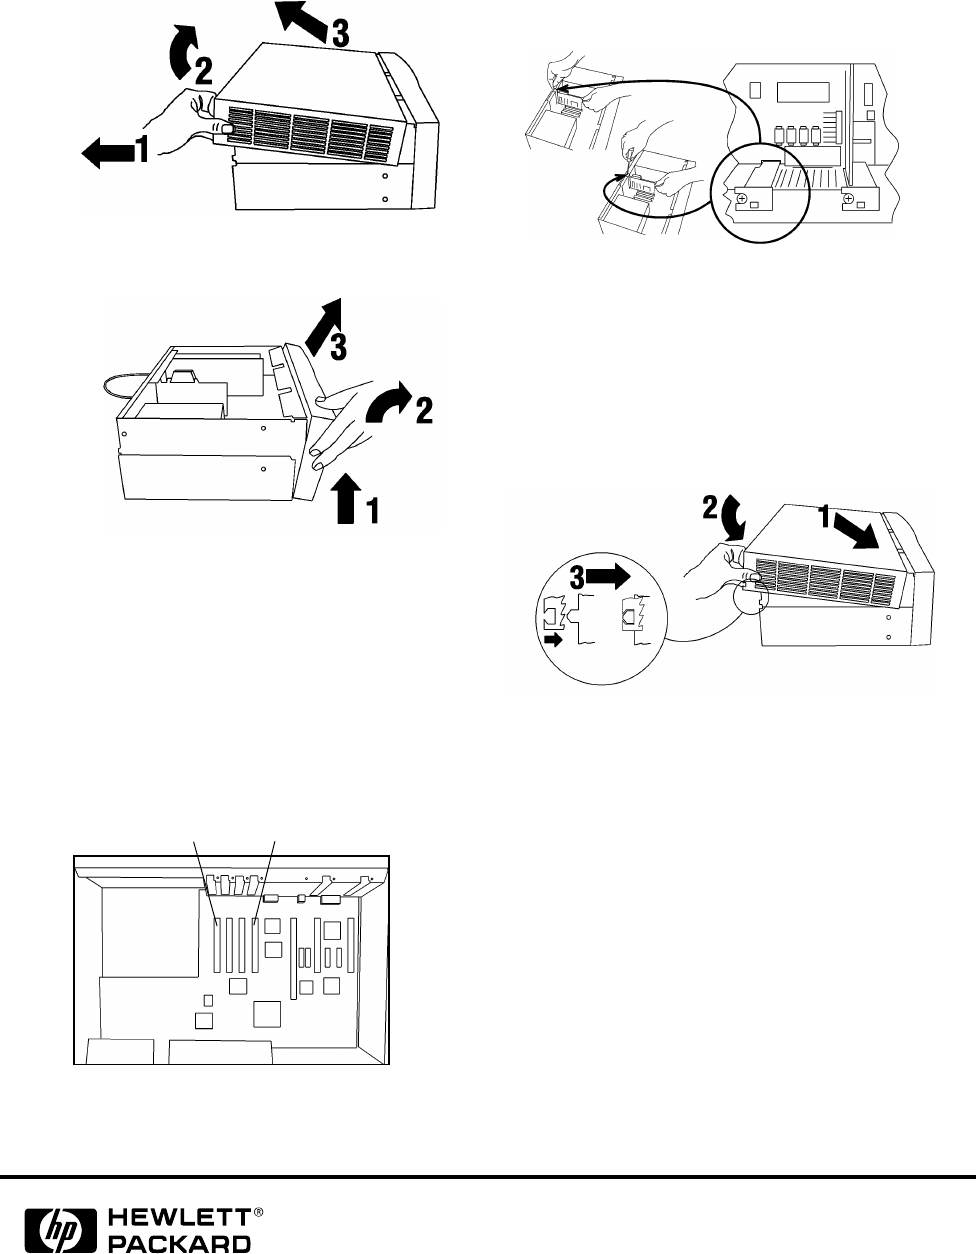
Step 3: Remove the cover and bezel.
Slide the cover off and remove the bezel with an
upward motion as shown in Figures 4 and 5.
Figure 4
Figure 5
Step 4: Prepare the FC adapter slot.
Before you touch any internal parts, be sure to
attach your ESD Strap to the chassis of the
MUX.
Remove the blank card and slot cover from the
unused SCSI slot. See Figure 6.
Figure 6
Step 5: Insert and seat the new adapter.
Grasp the top of the adapter card and align the
tabs with any available SCSI slot. Gently push
the card in the slot, using a forward and
backward motion. See Figure 7.
Figure 7
Tighten the two top screws to secure the card.
Step 6: Replace the cover.
Replace the cover as shown in Figure 8. Attach
the cables and power cord.
Figure 8
Step 7: Power ON the MUX.
Power ON the MUX. It will automatically self-
test. Verify that the MUX recognizes the new
adapter by displaying the MUX Source ID on the
SCSI Status Menu. If the adapter identification
does not display, rerun diagnostic tests.
See “Using the SCSI Status Menu” in the MUX
service manual (A3308-90005) for additional
information.
6&6,FDUGVORWVDQG