
Installation Guide (J3191A, J3192A, and J3193A) 1996-09


6
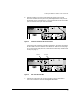
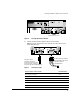
Adding, Replacing, or Removing a Transceiver
For more information on the Download OS feature, refer to appendix A,
“Downloading an Operating System” in the Console User’s Guide you received
with your Switch 2000.
Adding, Replacing, or Removing a Transceiver
Caution When adding, removing, or replacing a transceiver from a HP 100Base-T
Switch Module, always remove the module from the Switch 2000 first. While
the modules are hot swappable, the transceivers are not. Otherwise, you might
interrupt switch operation and/or damage the module or transceiver circuitry.
For proper cooling and for reduction of electromagnetic emissions, ensure
that a slot cover (provided with your Switch 2000) is installed on any unused
switch module slot or transceiver slot.
1. Disconnect any network cables attached to the module for which you will
add, replace, or remove a transceiver.
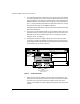
2. Remove the module from the Switch 2000:
a. Loosen the screws in the extractor handles of the module.
b. Simultaneously rotate both extractor handles downward and pull the
module toward you until it releases from the slot and the Fault and
status LEDs for that slot are off.
c. Slide the module out of the slot.
3. Always check the color coding of the transceiver and the module. The
color and text must match each other.
4. Using the transceiver manual, do one of the following:
• To install a new transceiver:
i. Remove the cover plate.
ii. Install the new transceiver.
• To replace an existing transceiver:
i. Remove the old transceiver.
ii. Install the new transceiver.
• To remove a transceiver without replacing it:
i. Remove the old transceiver.
ii. Install the cover plate.
5. Re-install the 100Base-T module into the Switch 2000.