
DCFM Migration Guide v6.4.0 (53-1001776-01, June 2010)


DCFM Migration Guide 17 of 38
53-1001776-01
Professional edition migration
1. Click Next on the Welcome screen.
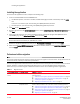
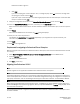
2. Choose one of the following options to migrate data from a previous version.
To migrate data from a previous management application, you must do so now.
• To migrate data from the previous version installed (automatically detected), select Yes, from DCFM in the
following location.
• To browse to the previous version, select Yes, from DCFM installed in this machine or on network and click
Browse to browse to the installation directory.
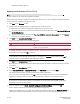
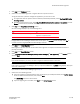
3. Click Next on the Copy Data and Settings screen.
An error message displays if any of the following occur:
NOTE
If legacy EFCM or Fabric Manager software exists in the system, an Uninstall screen displays. Click Yes to
Uninstall services of legacy EFCM and Fabric Manager software.
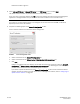
4. Click Start on the Data Migration screen.
Data migration may take up to 30 minutes. When data migration is complete, the Professional version is
partially uninstalled.
5. Click Next on the Data Migration screen.
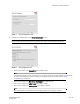
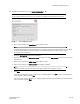
6. Select Professional Plus with SMI Agent, Enterprise with SMI Agent, or SMI Agent only on the Editions screen
and click Next.
NOTE
If you choose Enterprise, you will not be able to migrate to Professional Plus in the future.
NOTE
If you choose to install only the SMI Agent, when you open the DCFM client, a License dialog displays, where you
must enter a license key.
If you choose to install only the SMI Agent, go to step 9.
7. Choose one of the following options:
• If you are migrating to a licensed edition, enter the license key (on the Key Certificate) on the Server License
screen or browse to the license file (.xml) and click Next.
The License Key field is not case-sensitive.
• If you are migrating to a trial edition, click Next on the Server License screen.
Error Fix
Selected location is not valid or not supported. Browse to the correct location of the application.
Upgrade to a supported version.