
Brocade Network Advisor Migration Guide - Supporting Network Advisor 11.1.X (53-1002321-01, May 2011)

Brocade Network Advisor Migration Guide 25 of 82
53-1002321-01
Cross operating system migration
Cross operating system migration
Network Advisor 11.1.0 is not supported on the Solaris or Windows Vista operating systems. To migrate from DCFM
on Solaris, you must first migrate to a Windows or Linux operating system. To migrate from DCFM on Windows Vista,
you must first migrate to a supported Windows operating system.
•Solaris to Windows migration . . . . . . . . . . . . . . . . . . . . . . . . . . . . . . . . . . . . . . . . . . . . . . . . . . . . . 25
•Solaris to Linux migration . . . . . . . . . . . . . . . . . . . . . . . . . . . . . . . . . . . . . . . . . . . . . . . . . . . . . . . . 26
•Windows Vista to supported Windows migration . . . . . . . . . . . . . . . . . . . . . . . . . . . . . . . . . . . . . . 26
•Unsupported server migration. . . . . . . . . . . . . . . . . . . . . . . . . . . . . . . . . . . . . . . . . . . . . . . . . . . . . 74
Solaris to Windows migration
NOTE
The Windows operating system version must match the Solaris version.
Migrating DCFM 10.4.X data from Solaris to Windows
To migrate data from DCFM 10.4.X on Solaris to Windows, complete the following steps.
1. Configure the Samba server, if necessary. Refer to “Configuring the Samba server on Solaris” on page 25.
2. Perform a partial uninstall of DCFM 10.4.X. Refer to “Uninstalling from UNIX systems” on page 82
3. Share and copy the partially uninstalled source from Solaris to Windows.
4. Install DCFM 10.4.X on Windows and migrate the DCFM 10.4.X Solaris data to DCFM 10.4.X Windows. Refer to
the DCFM 10.4.X Migration Guide.
5. Install Network Advisor 11.1.X on Windows and migrate from DCFM 10.4.X. Refer to “DCFM migration” on
page 27.
Configuring the Samba server on Solaris
The Samba server running on Solaris allows sharing the file system with Windows. Use the Samba server to migrate
data across operating systems.
If the Samba server is not already configured, complete the following steps.
1. Create a backup copy.
For example, cp -p /etc/sfw/smb.conf /etc/sfw/smb.conf.old.
2. Open the smb.conf file ( /etc/sfw/smb.conf) in a text editor.
3. Go to the line workgroup = WORKGROUP.
4. Change the line workgroup = WORKGROUP to match your Windows workgroup or domain (for example
workgroup = SOMECOMPANY).
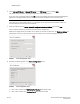
5. Go to the following paragraph in the smb.conf file and update the folder to share to Windows.
A publicly accessible directory, read/write to all users. Note that all files created in the directory by users will be
owned by the default user, so any user with access can delete any other user's files. Obviously this directory
must be writable by the default user. Another user could of course be specified, in which case all files would be
owned by that user instead.
[OPT]
Path = /opt (Folder to share to Windows operating system)