
Installation Guide, Third Edition - Server Expansion Unit


Chapter 4
Cabling and Power Up
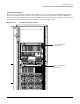
HP 9000 rp8400 server Upgrade and SBA Cable Installation
61
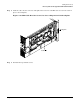
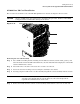
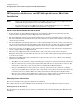
Step 5. Position the core I/O assembly in the chassis and slide in until it presses against the backplane.
Push firmly to seat the assembly into the chassis.
Step 6. Tighten the two retaining screws to fully seat the assembly to the chassis.
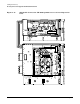
Step 7. Connect the cables that were labeled and detached during removal of the core I/O assembly.
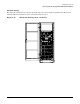
Step 8. Press the HP 9000 rp8400 server power switch to apply 48V AC power to the server.
Step 9. Perform the firmware updates for the HP 9000 rp8400 server. Complete details are contained in
the rp8400/rp7410/rp7405 and Server Expansion Unit (SEU) Firmware Update Release Notice
V6.0 (or later version) notes.
Step 10. See “Voltage Check” on page 75 to continue with the installation of the Server Expansion Unit.