
Installation Guide, Third Edition - Server Expansion Unit

Chapter 4
Cabling and Power Up
Applying 48V Power to the Server Expansion Unit and to the HP 9000 rp8400 server
90
Applying 48V Power to the Server Expansion Unit and to the HP 9000
rp8400 server
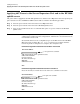
48V power will we suppplied to the HP 9000 rp8400 server and the Server Expansion Unit after pressing the
power switch. Core I/O card FPGA and MP revisions will be verified in the following procedure.
Step 1. Press the power switch on the front of the Server Expansion Unit.
Step 2. Press the power switch on the front of the HP 9000 rp8400 server.
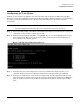
Step 3. Login to the new MP and use the PE command with option T to power on 48V in the HP 9000
rp8400 server.
NOTE After turning on the 48V sub system, wait 1–2 minutes for the partition
configuration (complex A, B & C configurations) information to be transferred to the
new A7109A core I/O cards.
To determine this has been accomplished, log in to the MP and view the MP Main
Menu selections available. The CO: Consoles option is not available until the
transfer of partition configuration is complete. See examples below.
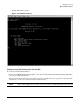
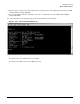
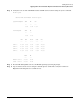
Partition Configuration Information Has Not Been Transferred
MP MAIN MENU:
VFP: Virtual Front Panel (partition status)
CM: Command Menu
CL: Console Logs
SL: Show chassis Logs
HE: Help
X: Exit Connection
MP>
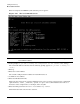
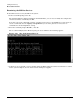
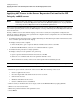
Partition Configuration Information Has Been Transferred
Press the enter key to refresh the screen and receive a similar screen below.
MP MAIN MENU:
CO: Consoles
VFP: Virtual Front Panel (partition status)
CM: Command Menu
CL: Console Logs
SL: Show chassis Logs
HE: Help
X: Exit Connection
MP>
CO option not available
CO option is available