
HP SureStore CD-Writer Plus User's Guide - C4381-90100


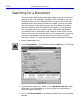
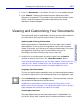
Table Of Contents
- Hewlett-Packard Limited Warranty Statement
- HP Software License Agreement
- Chapter 1: Installing CD-Writer Plus and Software
- Chapter 2: Using Your CD-Writer Plus
- Chapter 3: Problem Solving
- Chapter 4: Sharing Your CDs
- Chapter 5: Making Data CDs
- Chapter 6: Making Music CDs
- Chapter 7: Making Inserts and Labels
- Chapter 8: Copying CDs
- Chapter 9: HP Simple Trax
- Chapter 10: Adobe PhotoDeluxe
- Chapter 11: Corel Print House Magic
- Chapter 12: Photo Organizer
- Chapter 13: PaperMaster Live Quick-Start Tutorial
- Searching for a Document
- Viewing and Customizing Your Documents
- Faxing and Printing Your Documents
- Creating a New Cabinet and Copying Information
- Creating Customized Drawers and Folders
- Filing a Document into PaperMaster Live
- Publishing, Sharing and Archiving Cabinets to CD
- Viewing a Cabinet Given to you on CD
- Congratulations!
- Upgrade Notification
- Chapter 14: Norton AntiVirus
- Appendix A: Technical Information
- Appendix B: Customer Support
- Index

12-4 Getting Started
Creating Albums
Albums are collections of pictures. You can group pictures into albums by
subject, event, or any other criteria that you choose. Pictures can be
added to an album by scanning or importing, or by copying or moving
pictures from the Light Table or from other albums.
To create an album:
1. Select the pictures on the Light Table.
2. Click Album on the Create tab.
3. Enter a name for the new album.
4. Specify whether the pictures should be moved or copied to the new
album.
5. Click OK.
Creating E-Mail
Pictures from the Light Table, an album, the Trash, or Search Results can
be used to create e-mail messages.
1. Select the pictures on the Viewer pane.
2. On the Create tab, click the E-mail icon.
3. A series of questions will guide you through the process of sending an e-
mail.
4. Address your mail message using the postcard template that is provided.
You can manually type the e-mail addresses of each recipient or use the
address book. Type a subject and the text of your message in the spaces
provided.
5. When you are ready to send the mail message, click the Send button.