HP Cluster Platform Site Preparation Guide HP Part Number: A-CPSPG-1D Published: August 2007 Edition: 1.
© Copyright 2007 Hewlett-Packard Development Company, L.P. The information contained herein is subject to change without notice. The only warranties for HP products and services are set forth in the express warranty statements accompanying such products and services. Nothing herein should be construed as constituting an additional warranty. HP shall not be liable for technical or editorial errors or omissions contained herein.
Table of Contents About This Manual.............................................................................................................7 Audience.................................................................................................................................................7 How To Use This Guide..........................................................................................................................7 Organization......................................................
2.4 Inspecting the Racks........................................................................................................................42 2.5 Leveling the Racks...........................................................................................................................43 2.6 Connecting the Racks......................................................................................................................43 2.7 Installing Side Panels..............................................
List of Figures 1-1 1-2 1-3 1-4 1-5 1-6 2-1 2-2 2-3 2-4 2-5 2-6 2-7 B-1 Maximum Rack Configuration Using a 1:1 Ratio of HP SFS20 Enclosures to ProLiant DL360 Object Storage Servers...................................................................................................................19 HP 10000 Series Rack.....................................................................................................................22 Thee-Rack Cluster Footprint..............................................
List of Tables 1-1 1-2 1-3 1-4 1-5 1-6 1-7 1-8 1-9 1-10 1-11 2-1 A-1 A-2 A-3 Dense Cluster Using 1U Server.....................................................................................................16 Dense Cluster Using 2U Server.....................................................................................................16 Number of Object Storage Servers in a Cabinet Using ProLiant DL360 Servers..........................
About This Manual This manual provides an overview of the HP Cluster Platform hardware and describes how to plan for the receipt and installation of cluster hardware in a dedicated computer facility. Audience This guide is intended for experienced hardware administrators of large-scale computer systems, and for HP Global Deployment representatives.
• • Performing a site inspection Performing a delivery survey See the outline and checklists provided in Appendix A. Organization This manual is organized as follows: Chapter 1 Describes how to plan for the installation of a cluster. Chapter 2 Describes how to unpack and assemble the cluster racks. Appendix A Provides planning checklists. Appendix B Describes the cluster topology. Appendix C Provides general guidelines on a dedicated computer room environment.
HP BladeSystems For HP Cluster Platform BladeSystem configurations, see the HP BladeSystem Site Planning Guide at: http://h71028.www7.hp.com/enterprise/cache/499697-0-0-0-121.html Component Documentation An HP Cluster Platform is integrated from existing components such as servers, network switches, and high-speed interconnects. If you need to know about the features of particular cluster components, you can obtain component documentation from the following URL: http://docs.hp.
The home page for the InfiniBand Trade Association (location of the specifications) is: http://www.infinibandta.org/home The home page for the Voltaire Infiniband Interconnect is: http://www.voltaire.com/index.html Warranty, Service, and Support Options HP Cluster Platform solutions warranties and service options are based on the offerings of the underlying components. Refer to the appropriate product specifications for HP Cluster Platform. For information on HP Services offerings go to: http://www.hp.
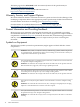
These symbols, on power supplies or systems, indicate that the equipment is supplied by multiple sources of power. Sample wording follows: ! WARNING: To reduce the risk of injury from electric shock, remove all power cords to completely disconnect power from the system. ZK-2075 ZK-2076 This symbol indicates that the component exceeds the recommended weight for one individual to handle safely.
Safety Considerations To avoid bodily harm and damage to electronic components, read the following safety and comfort guidelines before unpacking and configuring the cluster components.
If you need to remove more than one component from a rack for any reason, always start from the top of the rack and remove the lightest items first. When reloading the rack, start from the bottom of the rack and replace the heaviest items first. Refer to the specifications section of the component documentation to find the weight of a component.
Information on Ergonomics Ergonomics and safety information is provided with all components. HP recommends that you read and ensure that you understand all such information before using a component. Safety and comfort information is provided at the following URL: http://www.hp.com/ergo/checklist.html Recycling Shipping an integrated cluster generates far less packaging than the individual components that it contains.
1 Installation Planning This chapter describes the following preparation work and information gathering that is typically required to write an installation plan: • The delivery status of the cluster, (see Section 1.1). • An overview of the installation process, (see Section 1.2). • Site preparation and planning requirements, (see Section 1.3). • Time and labor requirements, (see Section 1.4). • Physical layout requirements, (see Section 1.5). • Planning for connections, (see Section 1.6).
After configuration, the individual racks are disconnected and are mounted on shock pallets for shipment. Some cables that run between racks are connected to their origin ports, and then looped and secured within the rack cabinet. This ensures that the cluster is complete and allows for quick installation of the equipment at the installation site. This site preparation guide enables you to determine the site requirements and making the necessary preparations for delivery, power, and network considerations.
of modules in relation to the number of nodes. To find documentation resources, see the section titled Section in the Preface of this guide. 1.2.
Table 1-4 Number of Object Storage Servers in a Cabinet Using ProLiant DL380 Servers Ratio Cabinet 1:11 2:12 3:13 4:13 Base 6 4 2 2 Expansion 10 6 4 4 1 2 3 The maximum configuration requires 4 racks. The maximum configuration requires 6 racks. The maximum configuration requires 9 racks. 1.2.3 Example HP SFS System Rack Configurations An HP SFS for HP SFS20 Enclosure system has a minimum of one base rack. It may also have expansion racks.
Figure 1-1 Maximum Rack Configuration Using a 1:1 Ratio of HP SFS20 Enclosures to ProLiant DL360 Object Storage Servers Expansion Rack 4 Expansion Rack 2 Expansion Rack 1 Base Rack Expansion Rack 3 MDS & Admin Servers SFS20 Enclosures SFS20-M0A, SFS20-M0B, SFS20-M1A, SFS20-M1B HP ProCurve Switch 1, 2, 3 Object Storage Servers 50 - 63 Object Storage Servers 22 - 35 Object Storage Servers 0 - 7 Object Storage Servers 8 - 21 Object Storage Servers 36 - 49 SFS20 Enclosures SFS20-50A, SFS20-51A, SFS20-
• Optimizing Data Centers for High-Density Computing is available at the following location: http://h18000.www1.hp.com/products/servers/proliantstorage/racks/10000series/documentation.html • • Power and Cooling Trends in the Datacenter available at the following location: http://techcomm.cca.cpqcorp.net/whitepapers/tc030203tb.pdf Power Calculator (ProLiant) http://h18001.www1.hp.com/partners/microsoft/utilities/power.
• • Shipping room personnel for relocating the pallets, if needed. Shipping room personnel might also be required if there are problems locating items in a shipment or if there are damaged items. Key personnel who are involved in the installation hand-off. When the installation and hardware verification process is complete, trained administrators might need to be present to boot the cluster and then begin verifying its operation. Use the checklists in Appendix A to identify key personnel.
Figure 1-2 HP 10000 Series Rack 1 3 6 2 4 5 Table 1-6 HP Rack 10000 Series Rack Callouts and Dimensions Callout Numbers — Descriptions 22U 42U 42U Wide Cabinet 1 — Rack width (with side panels) 612.77 mm 612.77 mm 815.47 mm 2 — Rack height 1113.48 mm 2002.50 mm 2002.50 mm 3 — Foot width 535.3 mm 535.3 mm 735.3 mm 4 — Foot depth 885.3 mm 885.3 mm 885.
Table 1-7 42U Rack Dimensions and Weight (continued) Metric Unpacked Characteristics Shipping Characteristics Packed on Shock Pallet Model B22 Width (footprint) 603 mm 24 in 813 mm 32 in 114.84 kg 253 lb 129 kg 284 lb 907.18 kg 2000 lb Weight (empty) 1 Maximum weight 1 For both dynamic and static loading considerations. The footprint dimensions include the distance spanning the leveling feet and the additional width dimensions of optional side panels.
1.5.3 Access Space Requirements The access space requirement includes the following minimum clearances for servicing. Table 1-8 shows the recommended minimum clearances. You might need to take into account the location and access requirements of existing adjacent equipment. You might also need to leave additional clearance to enable service representatives to step around doors and over floor-routed cables. Consider the airflow requirements described in Section 1.5.
1.5.4 Estimating Power and Cooling Power consumed by a cluster is converted to heat, which is expressed in British thermal units per hour (BTU/hr). You can calculate the heat load for a system by using the following equation: Heat Load = Power (Watts) x 3.413 BTU/hr per Watt In the preceding equation, 1 Watt equals 3.413 BTU/hr. A size 42U rack fully loaded with dual-processor servers might use 13.65 kW of power, thereby generating almost 47,000 BTU/hr.
The following considerations also apply when planning for an HP Cluster Platform: • The cluster's layout configuration. The layout of a cluster is determined by cable length limits and the cluster layout is generally established and fixed during the process of ordering a cluster. After delivery, you cannot reorganize a cluster's layout to facilitate cooling. • Some cluster models that use parallel copper cables have large bundles of cables that emerge from the bottom of the rack.
4. 5. Open the HTML document (or download and open the PDF) to the specifications section to obtain its weight Consider additional options that might not be included in the server's base specifications. For example, an additional disk drive per server in a dense cluster rack containing 32 servers can add over 60 lb to the cabinet.
utilized in the cluster. Other inter-rack cabling considerations also apply, as specified in the cluster's installation and operation guide. If you have specific layout requirements for your installation, you must specify the layout at the time of ordering the system so that the appropriate cable lengths are calculated as part of the order. Use the information in Section 1.5.1 (page 21) to draw up a system layout and to generate a cabling requirements guide.
1.6.3 Cable Routing Depending on your computer room layout and cable routing provisions (such as overhead raceways), You might need to estimate cable routes and plan the routing of cables. Note that the order configuration rules for a cluster do not provide you with much flexibility. The cable lengths are determined by the configuration rules, which select the cables from a limited set of predetermined lengths.
An HP Cluster Platform is provided with industry-standard power connections that typically do not require direct connection (hard wiring) to a power supply. However, hard wiring might be required for the following reasons: • Local electrical standards explicitly require such wiring. • HP recommends that you install an inline uninterruptible power supply (UPS) as part of your site preparation.
Figure 1-6 PDU Connectors L6-30P 309-32A Warning! For installations in computer rooms with overhead power supplies, the maximum available power cable length when routed to the top of the rack is approximately 36". Never extend the power cable emerging from the rack in any way. If you need to supply power from overhead outlets, relocate the power supply outlets so that they are closer to the racks. 1.6.
See Section 1.5.4 (page 25) for information about calculating the power requirements for a cluster module (rack). Warning! To reduce the risk of personal injury, fire, or damage to the equipment, do not overload the AC supply branch circuit that provides power to the rack. Consult the electrical authority that has jurisdiction over your facility's wiring and installation procedures.
in a single, straight-row configuration. The temperature in the room where an HP Cluster Platform is located should never exceed 32°C (95°F), and should comply with the American Society of Heating, Refrigerating and Air-Conditioning Engineers (ASHRAE) requirements specified in Table 1-11.
1.9.3 Other Environmental Considerations The following environmental factors might also be important when planning an installation. Electrostatic Discharge (ESD) Static charges (voltage levels) occur when objects are separated or rubbed together. Low humidity also contributes to undesirably high levels of electrostatic charges by increasing the electrostatic discharge (ESD) voltage potential.
might be required for installation and service work. This is particularly important at the rear of racks and for racks placed adjacent to walls, where ambient lighting might not be effective. For example, it is difficult to see cable connection points on the hardware if there is not enough light. Adequate lighting reduces the chances of connector damage when cables are installed or removed. 1.
As part of your site planning and preparation, walk the delivery route and note any potential problems. Any changes that require physical modification to walls and doors must be scheduled into your delivery and installation plan. Consider the following items: • The dock door at the receiving site must accommodate the height and width of the racks when they are packed and installed on the shock pallet. • The floor must be strong enough to take the combined dynamic load of the trucking device and the rack.
2 Unpacking and Assembling the Racks This chapter describes the following procedures related to unpacking and assembling the racks when they arrive at your site: • Thermal stabilization (see Section 2.1). • Removing packaging from the racks (see Section 2.2). • Removing a rack from a pallet (see Section 2.3). • How to inspect the racks (see Section 2.4). • Leveling the racks (see Section 2.5). • Bolting the racks together (see Section 2.6). • Installing side panels (see Section 2.7). 2.
however, you should follow the instructions in this manual to ensure your safety and to prevent damage to the cluster components. Before unpacking the racks, perform the following steps: 1. Ensure that the racks are as close as possible to their final destination, and that enough room is available to roll the racks off of their pallets. Note: HP Rack 10000 Series 42U racks are 2 meters (78.7 inches) tall off the pallet, and 2.2 meters (85.4 inches) on the pallet.
Figure 2-1 Unpacking the Rack 1 4 3 4 5 2 4 4 3 ZK-2083 Item Description 1 Top cover 2 Ramps 3 Corrugated front and rear covers 4 Corner posts 5 Antistatic plastic bag 2.3 Removing a Rack from a Pallet When you finish verifying the contents of the shipment, you can remove the rack from its pallet. Warning! Serious personal injury or equipment damage might result if correct safety precautions are not taken during the unpacking procedure.
3. that are attached with straps of fabric; be careful that the pieces do not swing out and hurt you or anybody else. Extend the ramps to their full length, if necessary, as shown in Figure 2-2. Figure 2-2 Ramp Extension and Installation Left unloading ramp Shipping pallet Right unloading ramp Right ramp attaches here Extend ramp to full length ZK-2084 4. 5. 40 Attach the ramps by fitting the metal prongs into the holes on the pallet.
Figure 2-3 Shipping Bolt and Bracket Leveler Shipping Bolt Shipping Bracket HPTC-0007 6. 7. Loosen the leveler locking nuts, and screw the four rack levelers all the way up into the rack (see Step 3 in Figure 2-4). Carefully roll the rack off the pallet and down the ramps to the floor (see Step 4 in Figure 2-4). Warning! The levelers must be raised fully for the rack to roll easily down the unloading ramps (see Step 3 in Figure 2-4).
Figure 2-4 Dismounting a Rack from a Pallet 2.4 Inspecting the Racks Before moving the racks into their final positions, inspect each rack using the following guidelines: 1. Verify that all components within the rack are securely fastened, and that there are no loose pieces present in the rack interior. 2. Verify that all four leveler feet are lowered to support the full weight of the rack, and that the rack is level. 3. Verify that there are no obstructions to the airflow from the component fans.
8. 9. Verify that the circuit breaker on each power distribution unit is in the OFF position. Remove all shipping brackets and screws; save them for later use should the system need to be moved. 2.5 Leveling the Racks Level each rack in its final position as follows: 1. Loosen the locknuts on all four leveler feet. 2. Turn each leveler hex nut clockwise until the leveler foot contacts the floor (Figure 2-5). Figure 2-5 Leveler Foot LOCKNUT LEVELER HEX NUT LEVELER FOOT 3. 4.
Figure 2-6 Installing the Standard Baying Kit Brackets Threaded Holes in the Cabinet Frame Baying Bracket T-30 Torx Flat-Head Screw HPTC-0008 2.7 Installing Side Panels The cluster ships with two side panels for each row of racks. Multiple rack clusters are coupled and only need a side panel on either end of the grouping. You do not need to remove the doors before attaching the side panels. To attach side panels, hook the top of each side panel to the hangers bolted on the rack frame.
Note: Newer 42U rack models have three side panel sections for each end of a row of racks. This means that there are six side panels to install in all. The new side panels are easier to handle and install. 2.
A Planning Checklist This appendix provides some suggested checklists and information sheets that should be filled out by the system recipient and an HP representative. When the site planning and preparations function is performed by HP in consultation with the customer, other deployment documents (including locale-specific documents) might apply. A.
Table A-1 Customer and HP Information Worksheet (continued) Secondary customer contact: Telephone: E-mail: Traffic coordinator: Telephone: E-mail: Sales representative: Telephone: E-mail: Site Surveyor: Telephone: E-mail: HP Information Order No: Survey Date: Delivery Date: A.3.2 Site Inspection Checklists Use the worksheet in Table A-2 to perform a site inspection.
Table A-2 Site Inspection Worksheet (continued) Item Check Comment or Date Is the dedicated branch circuit less than 250 ft (72.
Table A-3 Delivery Survey Worksheet (continued) Width of access door checked. Y N Unloading permits checked. Y N Y N Permit agency address. Elevator Elevator capacity checked. Depth Height Width Stairs Number of flights. Width Height A.
B Cluster Interconnect Topology Methods of connecting individual servers into clusters are referred to as cluster topologies. The HP Cluster Platform uses a fat tree topology. This topology is represented by a network tree where the network capacity increases closest to the root of the tree than at its leaves, thereby making the network nonblocking. Figure B-1 shows an example of one implementation of a fat tree topology for a 128-node cluster.
C General Guidelines for the Computer Room This appendix addresses some general site-planning topics that you might want to call out explicitly in your site plan. Caution: Wire colors referenced in this section apply to installations in the USA. Substitute the appropriate wire coding for your locale. All electrical preparation work must be performed by qualified technicians. The polarity, voltages, and grounding must be verified before any equipment is connected and powered up. C.
• Screening to cancel out the effects of undesirable transmissions • Lightning arresters on power cables to protect equipment against electrical storms The following guidelines provide the best possible performance of power distribution systems: • Dedicated power source that isolates the cluster's power distribution system from other circuits in the facility. • Missing-phase and low-voltage detectors that shut down automatically when a severe power disruption occurs.
C.1.3.4 Wiring Connections Expansion and contraction rates vary among different metals. Therefore, the integrity of an electrical connection depends on the restraining force applied. Connections that are too tight can compress or deform the hardware and causes it to weaken. This usually leads to high impedance, which can cause circuit breakers to trip. Caution: Connections that are too loose have a high resistance that causes serious problems, such as erratic equipment operation.
C.2.2 Air Conditioning Equipment The cooling capacity of the installed air conditioning equipment for the computer room should be sufficient to offset the computer equipment dissipation loads, as well as any space envelope heat gain.
Low humidity contributes to undesirably high levels of electrostatic charges. This increases the electrostatic discharge (ESD) voltage potential. ESD can cause component damage during servicing operations. Low humidity levels are often the result of the facility heating system and occur during the cold season. Most heating systems cause air to have a low humidity level, unless the system has a built-in humidifier. C.2.2.
D Calculating Noise Levels Use the following formulas to calculate noise levels: • Formula 1: The declared A-weighted sound power level according to ISO 9296 and ISO 7779 LWAd: LWAdT = log[N1*10^(LWAd1) + N2*10^(LWAd2) + …..] in bels. Where: — LWAdT is the declared A-weighted sound power level for entire rack. — LWAd1 is the declared A-weighted sound power level for the first type of server or switch. — N1 is the number of the first type of server or switch.
E Preventing Electrostatic Damage To avoid damaging the system, you must follow the configuration procedures and be aware of the standard precautions for handling electronic parts. A discharge of static electricity from a finger or other conductor might damage system boards or other static-sensitive devices. This type of damage can reduce the life expectancy of the device. E.
Index A access space, 24 acoustics, 33 administrator, 20 air conditioning, 54 air filtration, 54 air quality, 55 airflow minimum clearances for, 25 airflow space, 24 ambient noise, 33 annotations, 11 ASHRAE, 33 audience for this book, 7 B battery, 13 baying kit, 43 bill of materials, 7 BOM, 7 branch circuit balancing, 32 load limit, 32 BTU, 25 burn injuries, 13 C cable considerations, 28 dimensions, 28 estimating, 29 length, 28 protection, 28 routing, 29 types, 28 cabling algorithm, 29 caution information
online, 9 planning references, 19 related, 8 reporting errors in, 10 web resources, 9 dust, 55 dynamic loading, 36 E electrical general guidelines, 51 standard, 32 electrical connections grounding requirements, 32 PDU specifications, 29 electrical hazards, 12 electrician, 20, 29 electromagnetic interference , 34 electromechanical devices, 34 electrostatic discharge, 34 grounding, 34 humidity, 34 overview, 57 preventing, 57 prevention measures, 57 wrist strap, 34 elevator, 36 EMI, 34 cell phones, 34 enclosu
illumination, 35 important information, 11 InfiniBand cables, 28 InfiniBand Trade Association URL, 10 information, customer, 46 inspection, site, 8 installation estimating total weight of, 26 human resources, 20 overview, 16 planning, 15 preventing electrostatic damage, 57 safety considerations, 12 site preparation, 19 installation guide, 7 installation overview, 16 installation requirements data and comms, 31 environmental considerations, 32 grounding, 32 hardware delivery verification, 35 labor, 20 minimu
power supply, 31 preinstallation survey, 46 rack layout, 27 site inspection, 46 site inspection checklist, 47 site preparation, 19 TCP/IP address, 31 tools and resources, 35 trucking, 26 unpacking, 23 UPS, 30 weight, 26 weight worksheet, 26 pollution general guidelines, 55 power building guidelines, 52 calculating, 25 distribution guidelines, 52 general guidelines, 51 grounding guidelines, 52 hardware guidelines, 52 load limit, 32 protection, 51 quality guidelines, 51 worksheet, 25 power connections, 29 gro
safety considerations, 12 safety symbols, 10 schedule delivery, 7 installation, 7 security, 20 service minimum clearances for, 24 service options, 10 shipping, 21 shipping bolt, 40 shipping dock, 36 shock pallet, 16 side panel installing, 44 site inspection, 8 survey, 7 site access, 20 site inspection, 46, 47 site plan preparing, 7 resources, 7 site preparation, 19 cable estimating, 29 cable length, 28 cable protection, 28 cable routing, 29 cable types, 28 configuration rules, 16 connections, 28 data and co
URL, 10 W WAN, 31 warning hazard, 10, 11 warning labels, 10 warranty terms of, 10 web resources, 9 weight, 21 estimating, 26 wire, 52 wireless devices, 13, 34 wiring connections, 53 worksheet customer information, 46 delivery survey, 48 power and cooling, 25 site inspection, 46, 47 weight, 26 wrist strap, 34, 57 Z zinc particulate contamination, 55 63
*A-CPSPG-1D* Printed in the US