COLOR LASERJET ENTERPRISE CM4540 MFP SERIES Software Installation Guide
HP Color LaserJet Enterprise CM4540 MFP Series Software Installation Guide
Copyright and License Trademark Credits © 2010 Copyright Hewlett-Packard Development Company, L.P. Microsoft®, Windows®, Windows® XP, and Windows Vista® are U.S. registered trademarks of Microsoft Corporation. Reproduction, adaptation, or translation without prior written permission is prohibited, except as allowed under the copyright laws. The information contained herein is subject to change without notice.
Table of contents 1 Software installation ....................................................................................................................................... 1 Network installation .............................................................................................................................. 1 Configure the IP address ..................................................................................................... 1 Install the software ...............................
iv ENWW
1 Software installation Network installation Use a network connection to connect multiple computers to the product. Configure the IP address 1. Make sure the product is turned on and that the Ready message appears on the control-panel display. 2. Connect the network cable to the product and to the network. 3. Wait for 60 seconds before continuing. During this time, the network recognizes the product and assigns an IP address or host name for the product. 4.
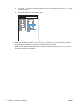
c. Touch the View button to view the information on the control panel, or touch the Print button to print the pages. d. Find the IP address on the Jetdirect page. Jetdirect Page HP Color LaserJet CM4540 MFP Page 1 5. IPv4: If the IP address is 0.0.0.0, or 192.0.0.192, or 169.254.x.x, you must manually configure the IP address. Otherwise, the network configuration was successful. IPv6: If the IP address begins with "fe80:", the product should be able to print.
Install the software Windows 1. Quit all programs on the computer. 2. Install the software from the CD. 3. Follow the onscreen instructions. 4. When prompted, select the Connect through a wired network option. 5. From the list of available printers, select the printer that has the correct IP address. 6. At the end of the installation, click the Finish button, or click the More Options button to install more software or configure basic digital sending features for the product.
Mac OS X 10.4 1. From the Apple menu , click the System Preferences menu and then click the Print & Fax icon. Mac OS X 10.5 and 10.6 2. Click the Printer Setup button. 3. Click the Installable Options menu. 4. Configure the installed options. 1. From the Apple menu , click the System Preferences menu and then click the Print & Fax icon. 2. Select the product in the left side of the window. 3. Click the Options & Supplies button. 4. Click the Driver tab. 5.
USB software installation Use a USB cable to connect a single computer directly to the product. This product supports a USB 2.0 connection. Use an A-to-B type USB cable. HP recommends using a cable that is no longer than 2 m (6.5 ft). CAUTION: Do not connect the USB cable until the installation software prompts you to connect it. Windows 1. Quit all open programs on the computer. 2. Install the software from the CD, and follow the onscreen instructions. 3.
4. When the software prompts you, connect the USB cable to the product and the computer. 5. Print a page from any program to make sure that the software is correctly installed. NOTE: If the installation failed, first attempt to uninstall and then reinstall the software.
Printer-driver options for Windows Printer drivers provide access to the product features and allow the computer to communicate with the product (using a printer language). The following printer drivers are available at www.hp.com/go/ cljcm4540mfp_software. HP PCL 6 driver HP UPD PS driver HP UPD PCL 5 ENWW ● Provided as the default driver. This driver is automatically installed unless you select a different one.
8 Chapter 1 Software installation ENWW
2 Configure digital send features for network products Use digital-sending features to do the following: ● Send scanned files directly to e-mail recipeints. ● Fax documents using the internal fax accessory card, LAN Fax, or using an Internet fax account. ● Archive scanned documents to a shared network folder. For more information, see www.hp.com/go/dss.
Install the HP PC Send Fax Driver (for Windows and fax models only) If you did not install the send fax driver during the software installation, you can install it now. Use the send fax driver to send faxes from your computer through your HP fax-enabled product. NOTE: This driver works with the HP Analog Fax Accessory 500. It does not work with LAN or Internet Fax services. 1. Insert the Software CD. 2.
Use the HP Scan to Email Setup Wizard to configure basic e-mail settings Use this procedure to configure basic settings for the Send to E-mail feature. Use the HP Embedded Web Server to configure more advanced settings. 1. Insert the Software CD. 2. On the main screen, click the Documentation & Support button, click the Configure Product button, and then click the HP Scan to Email Setup Wizard option.
Use the HP Save to Folder Setup Wizard to set up a shared network folder Use this procedure to set up a shared folder on the network. After this folder is set up, you can scan documents and save them as files in this folder. 1. Insert the Software CD. 2. On the main screen, click the Documentation & Support button, click the Configure Product button, and then click the HP Save to Folder Setup Wizard option.
Use the HP Embedded Web Server to set up Quick Sets Quick Sets are shortcut jobs that you can configure for the Scan to E-mail, Save to Network Folder, and Save to USB features. These jobs appear on the product control panel in the Quick Sets list or on the Home screen. Use the following procedure to set up Quick Sets for the Save to Network Folder feature. ENWW 1. Open a Web page, and type the IP address in the address line. 2.
Use the HP Embedded Web Server to configure E-mail settings NOTE: You can also use the HP Scan to Email Setup Wizard option on the CD to configure basic E-mail settings. Use the HP Embedded Web Server to configure more advanced options. 1. Open a Web page, and type the IP address in the address line. 2. When the HP Embedded Web Server opens, click the Scan/Digital Send tab, and then click the E-mail Setup link. 3. Select the E-mail check box to enable the feature. 4.
© 2010 Hewlett-Packard Development Company, L.P. www.hp.